You can use the Modeler Connect page to log into a cloud application, a database, or upload a file of tables to access and import the desired data for reporting. After establishing your connection(s), you select the tables that you want to import, and optionally, filter the rows in the tables to return only the rows you require. After identifying the columns and rows that you want, import the desired data and continue onto the Modeler Prepare page to refine your data.
Note: Live Access does not import data; it runs a query directly against a data source behind your firewall. This means the data never leaves your premise and access to the data is removed when you turn off your Birst Cloud Agent.
Important: Birst supports only one extraction job at a time per space. Creating parallel extraction jobs using Cloud connectors, or Birst Connect / Birst Cloud Agents is not supported and could lead to data upload inconsistencies. We recommend using Extract Groups as well as Orchestration tasks to schedule data extractions in a space. Note: Birst Connect 1 is not supported in Orchestration.
There are some data types that return unusable data (Binary data), so columns with the following data types are excluded from data preview response and for import. The list of data types includes:
- BINARY
- VARBINARY
- LONGVARBINARY
- BLOB
- CLOB
- NCLOB
Note: Birst uses the JDBC Type class from java 8 to identify the data type mapping. If Birst does not find a matching data type, it will return the VARCHAR data type. This is applicable to any database specific data type.
There are a variety ways that you can connect to data from Birst which include:
- Connect to a Cloud Application
- Birst Cloud Agent
- Birst Connector 2 File Connector
- Quick File Upload
- Connect to a Database
- Birst Connect 2.0 Live Access Connections
- Connect to an R Server
- Modeler REST Connector
Upload a File
You can upload data source files such as an Excel worksheet. Modeler supports common file types such as text, Excel, and CSV. Worksheets in an Excel Workbook will be treated as separate data sources.
Notes:
- When uploading files, make sure they are less than 20mb in size.
-
Uploading a file does not require a running Birst Cloud Agent.
- Use the middle panel when uploading a file to create a connection.
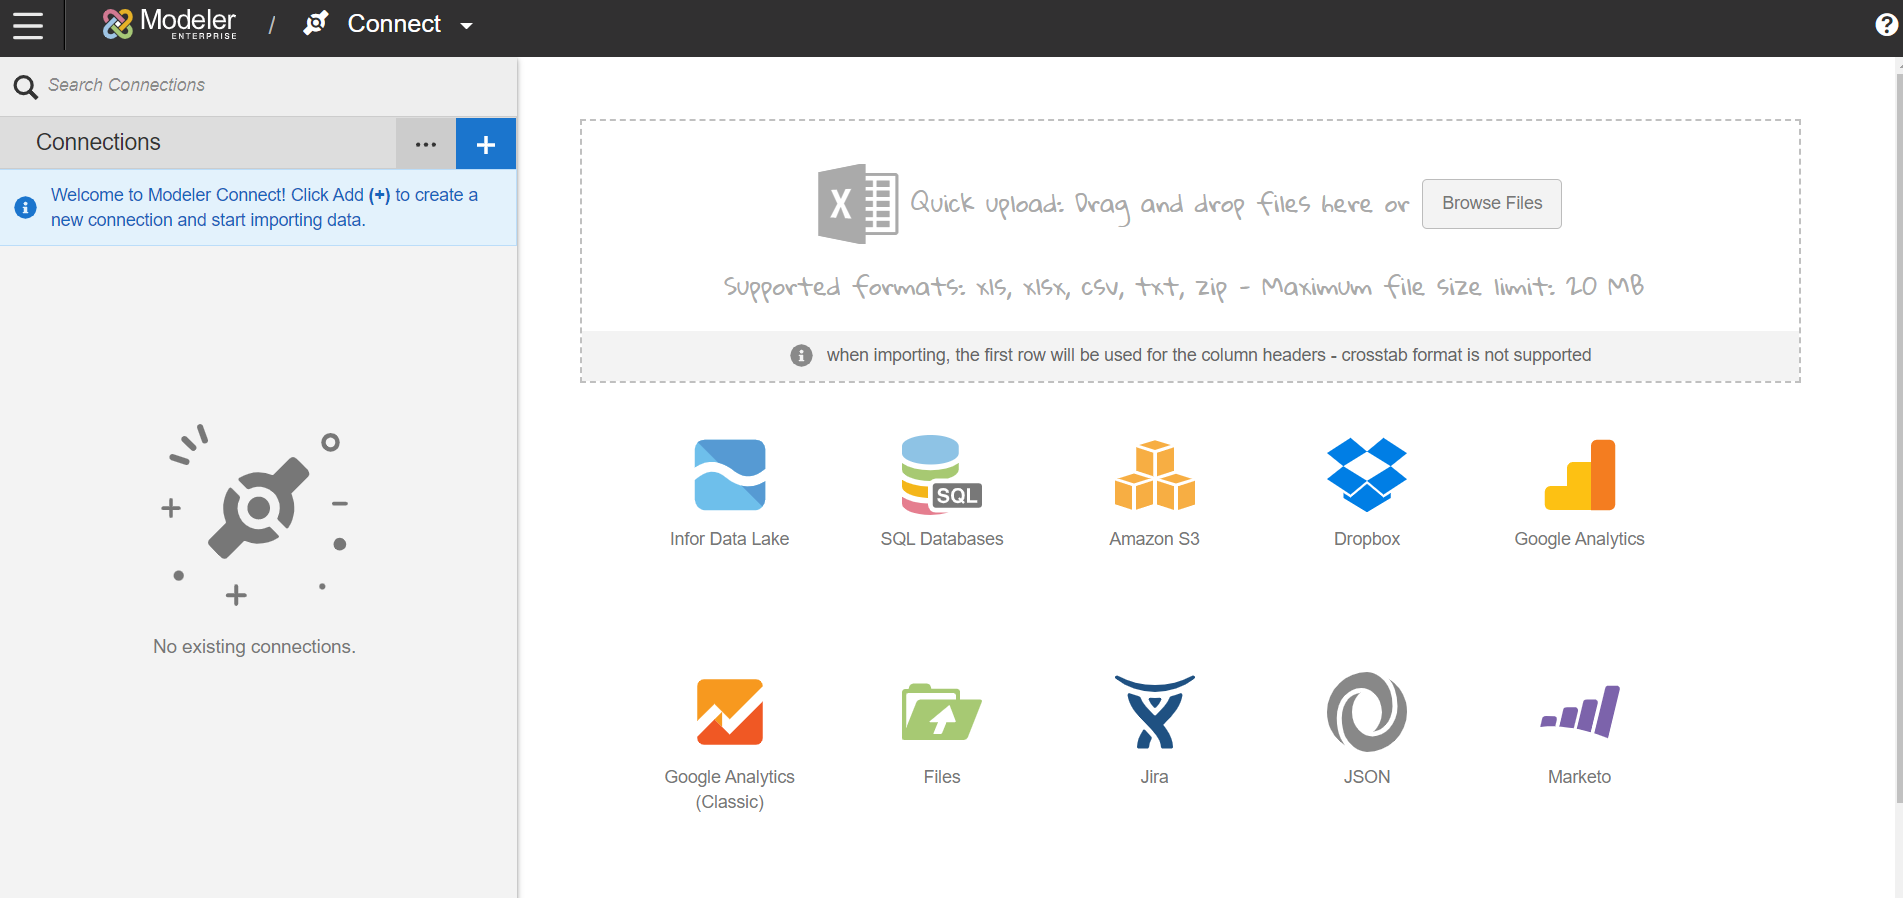
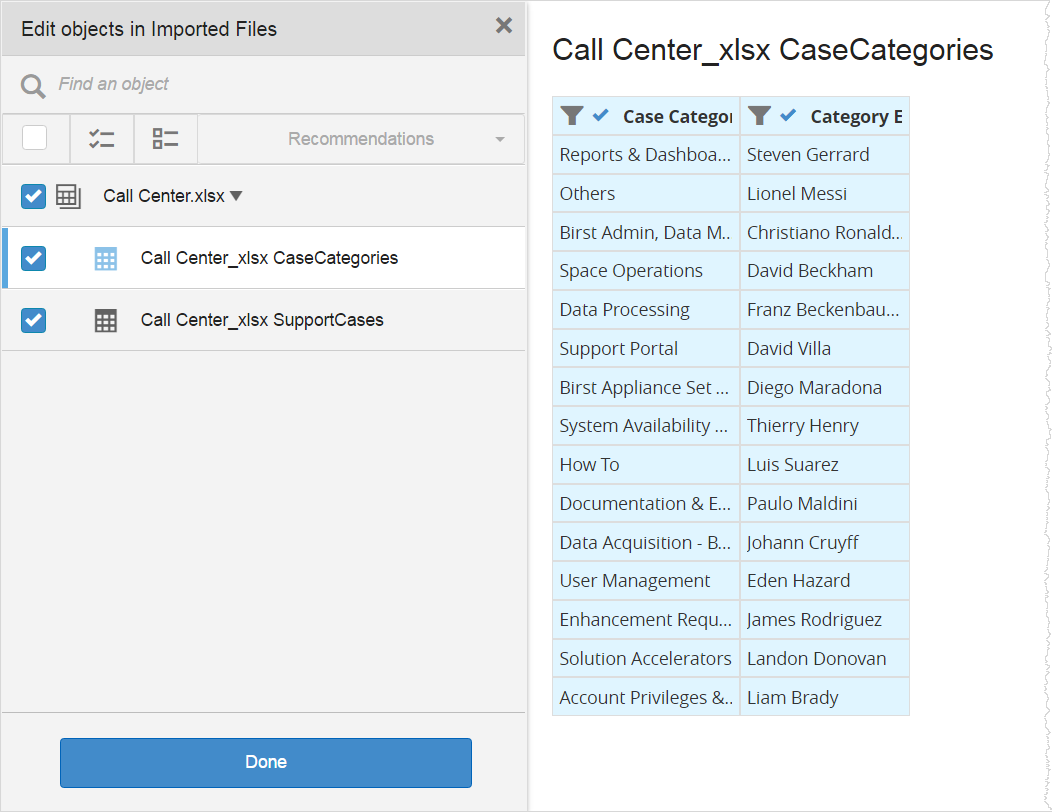
- Modeler provides a list of tables from a file upload, and lets you further refine your selections. The list of tables display on the left panel, while a preview of the first table with its first 100 rows displays in the main panel.
- When uploading Excel files, a list of tables displays based on every tab in the worksheet.
- When uploading Excel files, a list of tables displays based on every tab in the worksheet.
-
After uploading your file, you can configure the file's upload settings before importing your data. For more information, see Set Data Characteristics.
- Initially, all of the tables are selected and grouped under the file listing. You can select or deselect tables from the listing and select or deselect columns as needed. You can filter the rows based on the filter(s) criteria applied. For more details on how to edit connection objects, see Edit Connection Objects.
- Note: Filter options are only available for a column if the database/column metadata marks that columns as searchable/filterable.
- When you are satisfied with your data refinements, click Import.
Note: Birst will load a single-column source file because requires at least two columns in a source file.
Note: If a flat source file has been modified, it cannot be re-uploaded without changing the name of the file.
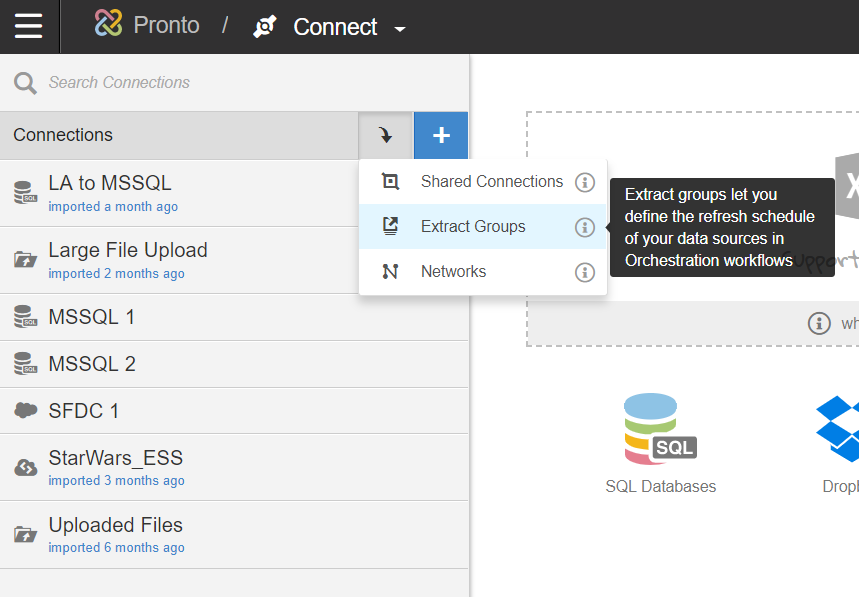
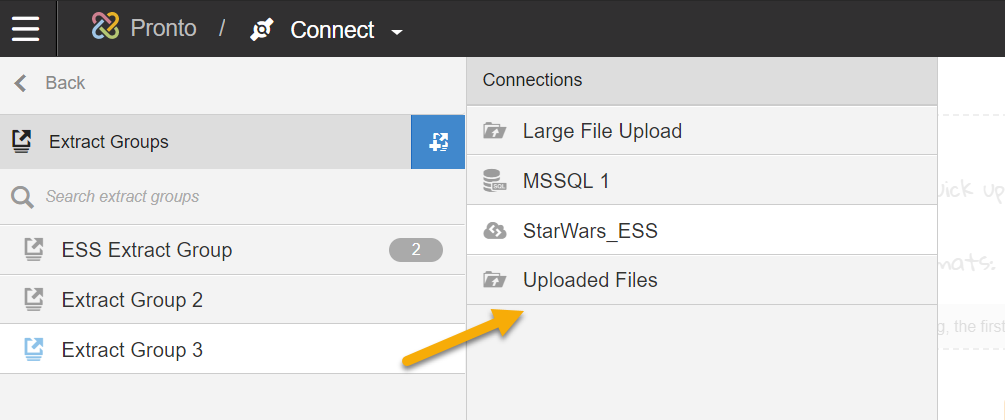
Extract Groups
Users can now create Extract Groups for connections created in Modeler > Connect or Birst Connect 2.0 connections.
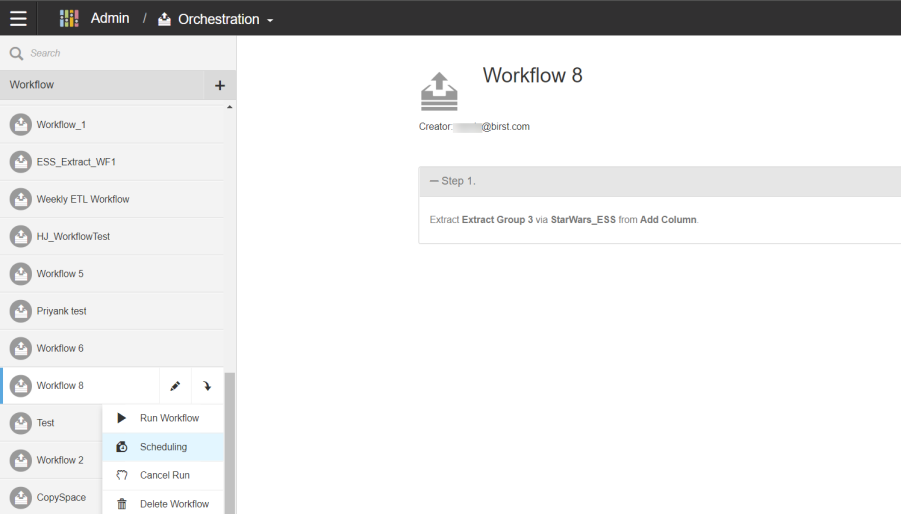
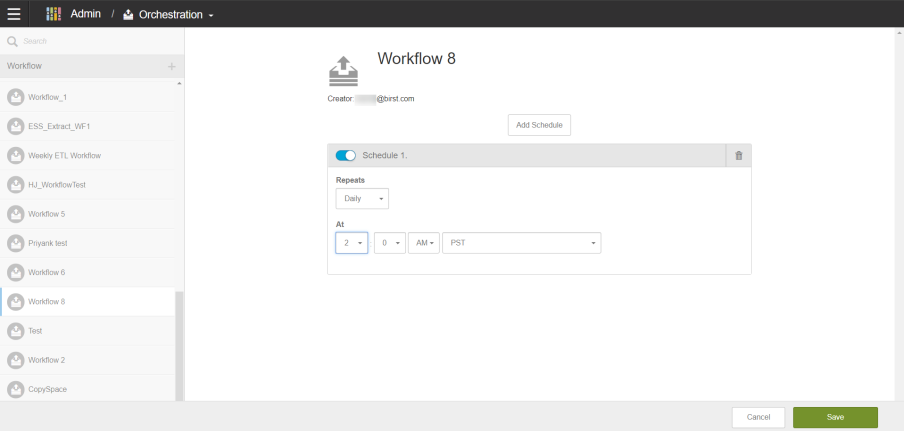
These extract groups can then be incorporated in scheduled workflow, organized via the Orchestration Admin module. For more information about workflows see the Orchestration help topic.
Note: Mapped data sources such as Live Access connections that are not actually extracted cannot be assigned to an extract group.
You access Extract Groups from the Modeler Connect page as follows:
Click Extract Group to add data sources to your extract group. You'll be prompted to provide a name for your extract group.
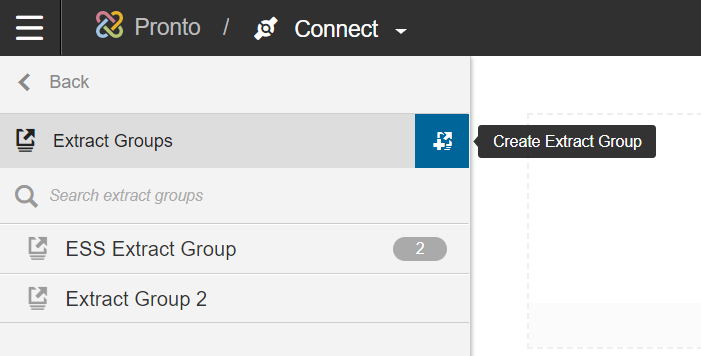
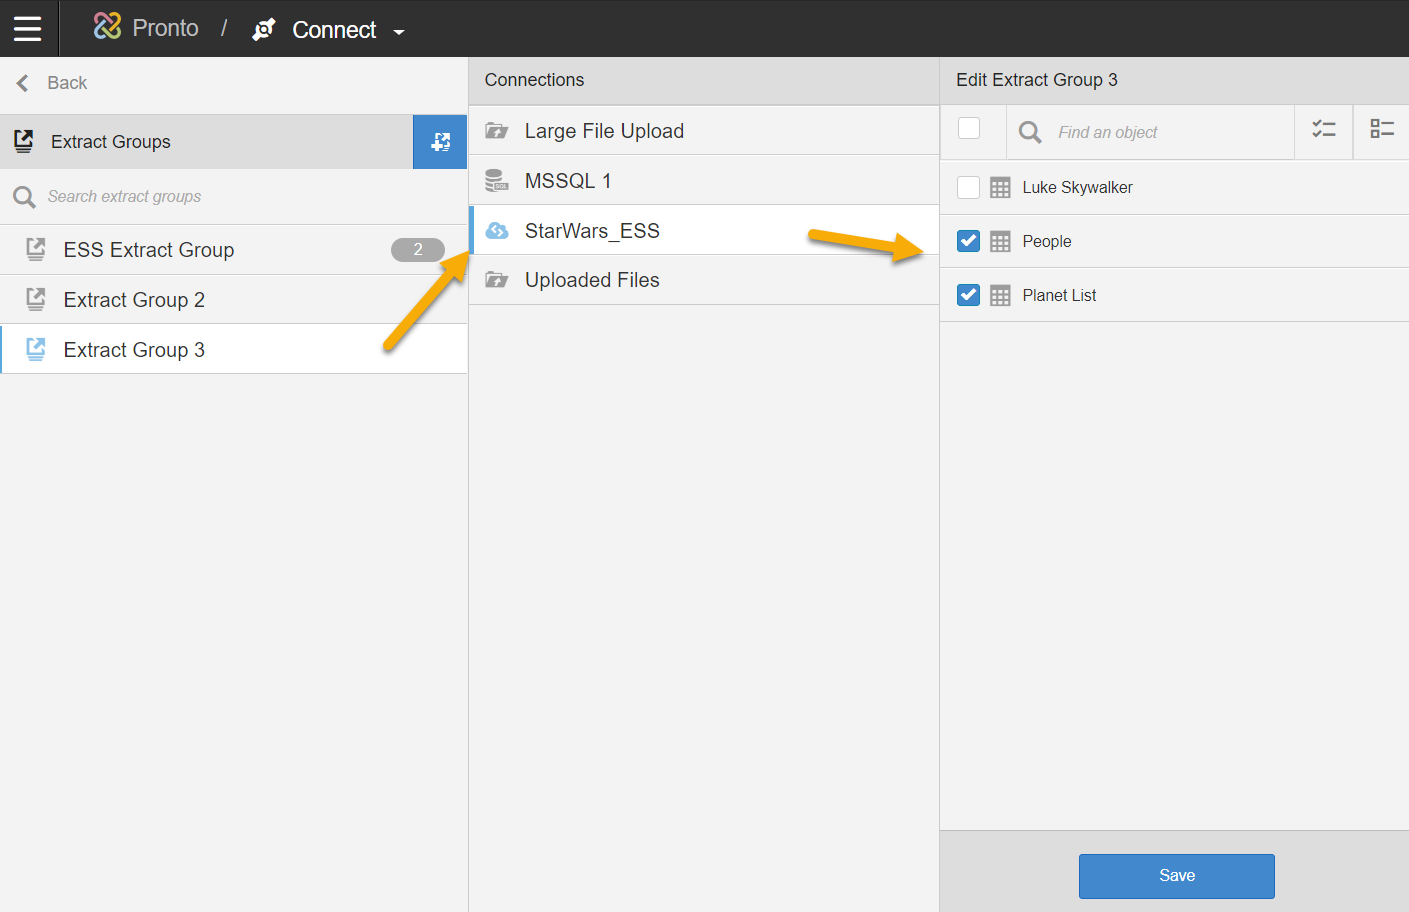
Then you select one or more data sources that you want to include in an extract group.
Then select the objects you want to assign to the extract group. You may have a specific order for which you want to refresh tables/objects, so this provides a great way to enforce the timing of those object refreshes in conjunction withOrchestration workflows.
Click Save and proceed to the Orchestration feature to assign the extract group to a workflow task.
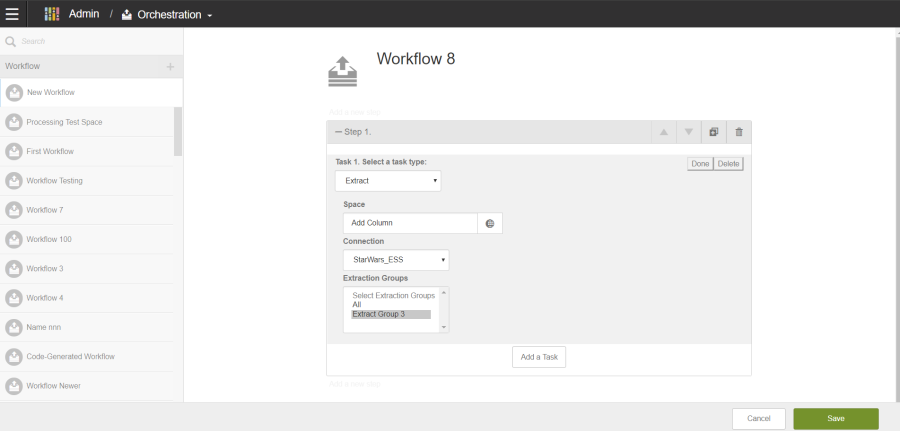
See Orchestration for more details.