Modeler REST Connector
The REST connector can be used with a variety of web application data sources. Users can customize REST connector parameters to extract data from the REST API of their choice. The REST connector supports many of the common use cases of RESTful APIs.
URL Conventions
Web Services use different values for the URLs that return data from the applications. These values are entered when creating a REST connector and when creating an extract object. The Birst REST Connector requires the following syntax for URLs:
HTTP | HTTPS://<Endpoint>/<Resource>?<Query>
- The protocol is either HTTP or HTTPS.
- Endpoint: Root URL of the Web Service used to retrieve data.
- Resource: Path that identifies particular data to be returned.
- Query: URL parameters consisting of name/value pairs separated by ampersands (&).
Example URLs:
- https://community.jivesoftware.com/api/core/v3/people?count=100&startIndex=1
- http://services.odata.org/V4/Northwind/Northwind.svc/Customers
- http://jenkins.birst.cc/api/json?depth=1
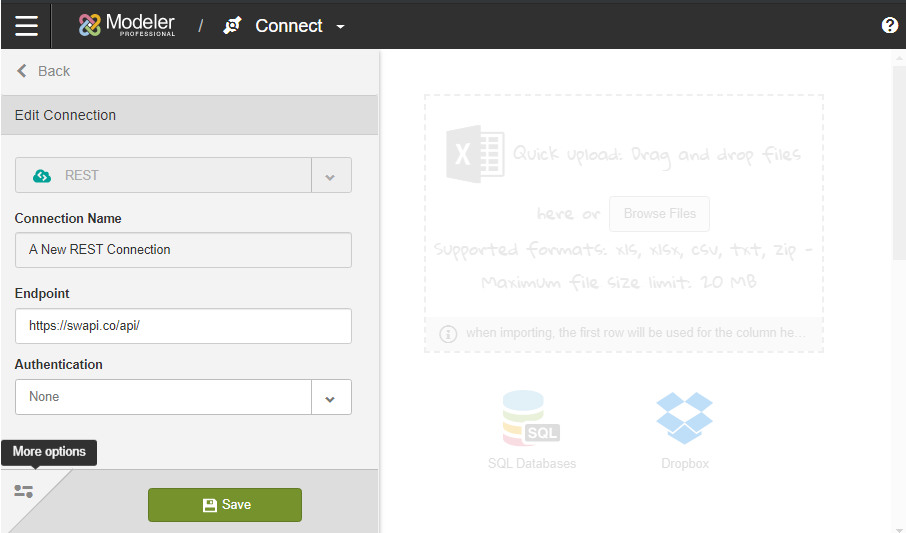
Create Connection
- From Modeler Connect, click +Create New Connection.
- Select the REST connector.
- Enter the connection name. The name must be unique.
- Enter the Endpoint URL. This is the Root URL of the
Web Service used to retrieve data. The REST Connector requires the following
syntax for URLs:
HTTP | HTTPS://<Endpoint>/<Resource>?<Query> - Select the Authentication method.
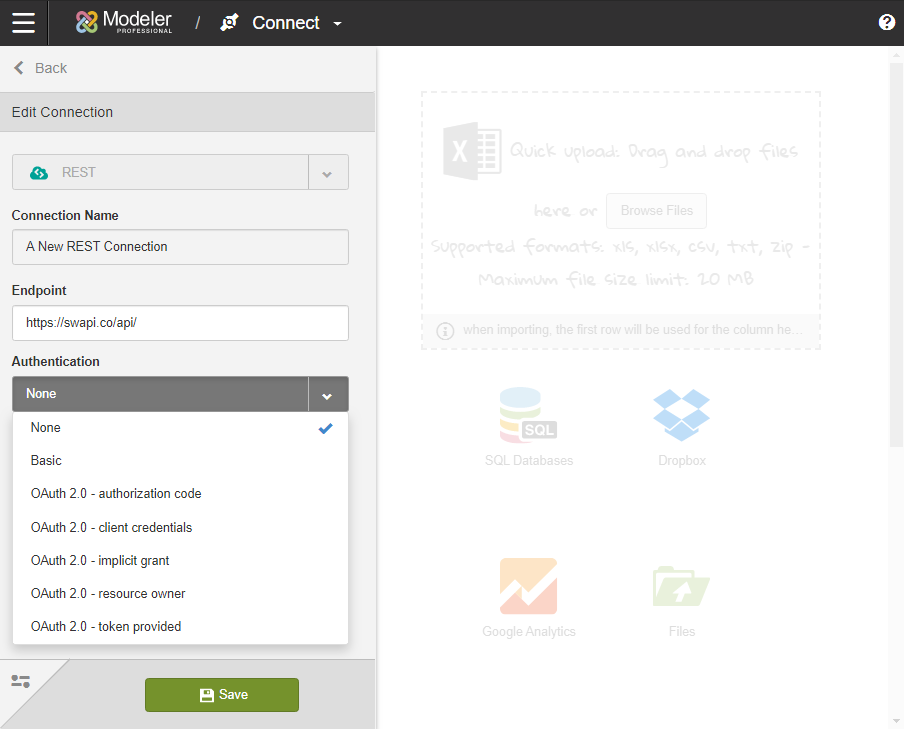
- Birst supports the following seven methods. Depending on the method selected, additional information must be provided.
- None. No additional information is needed.
- Basic requires Username and Password.
- OAuth 2.0. Birst supports five different authentication methods for OAuth 2.0. You can verify the information you'll need to supply with your chosen application's API documentation.
- OAuth 2.0 - Authorization Code requires Access Token URL, Authorization URL, Client ID, Client Secret, and Callback URL.
- OAuth 2.0 - Client Credentials requires Access Token URL, Client ID, and Client Secret.
- OAuth 2.0 - Implicit Grant requires Authentication URL, Client ID, and Callback URL.
- OAuth 2.0 - Resource Owner requires Access Token URL, Owner Username, Owner Password, Client ID, and Client Secret.
- OAuth 2.0 - Token Provided requires Access Token. When this method is selected, optional fields for Refresh Token, Refresh URL, Client ID, and Client Secret are available under the More Options menu.
- For additional advanced settings, select the More Options icon.
- The available optional fields depend on the selected authentication method.
- Add access token to URL is available for OAuth 2.0 methods. Enabling this setting will pass the token in the URL.
- Headers creates REST call headers at the connection level. For example, headers can be used to accommodate for an API’s custom authentication needs. If more than one header is necessary, use the following syntax: <header name1>=<header value1>&<header name2>=<header value2>
- Scope. Available for OAuth 2.0 methods. Enabling this setting defines the application's access to a user's account.
- Source Prefix. Enabling this setting will add the designated prefix to all sources created through the connection.
- Upload SSL Certificate. Enabling this setting will allow you to upload an SSL certificate to secure the connection.
- Save.
Create Object
- From the connection, click +Create New Object.
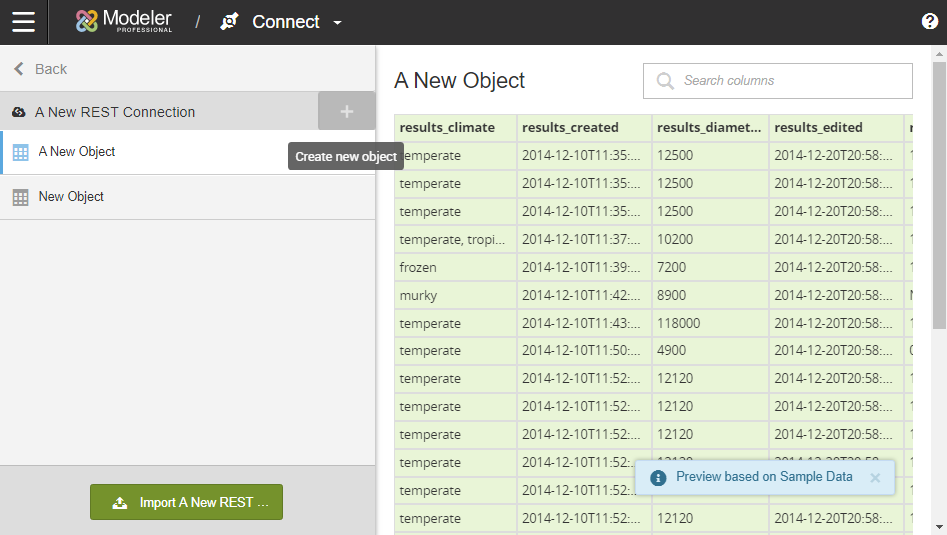
- Enter the Resource. This indicates the Resource portion of the URL syntax. HTTP | HTTPS://<Endpoint>/<Resource>?<Query>
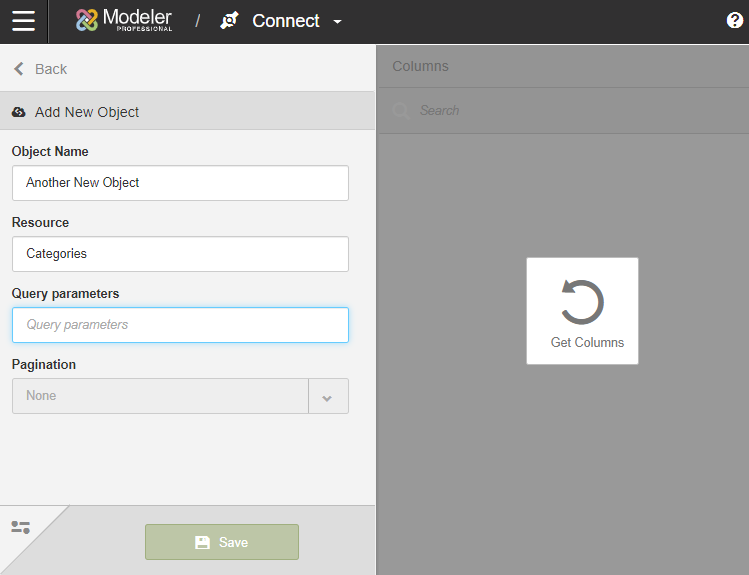
- Enter the Query Parameters. This indicates the Query portion of the URL syntax. HTTP | HTTPS://<Endpoint>/<Resource>?<Query>
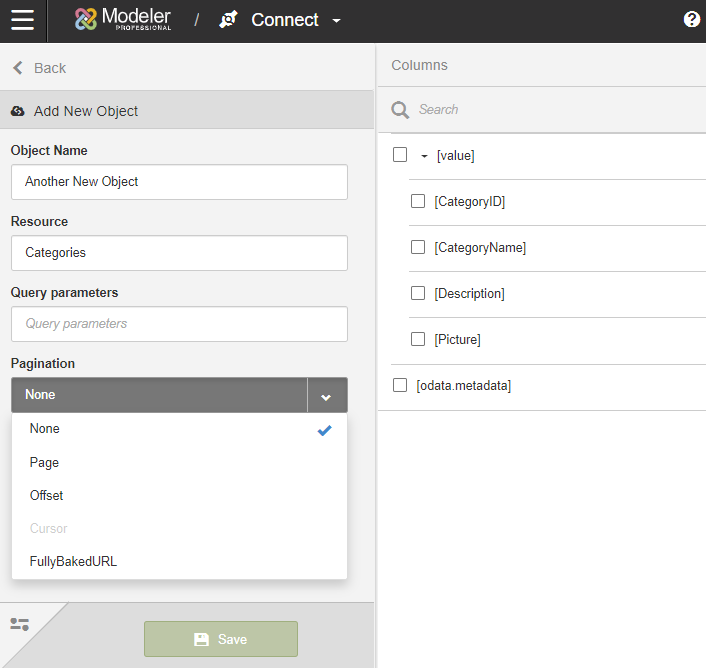
- Select your Pagination type and enter any additional information. For more information, see the Pagination section.
-
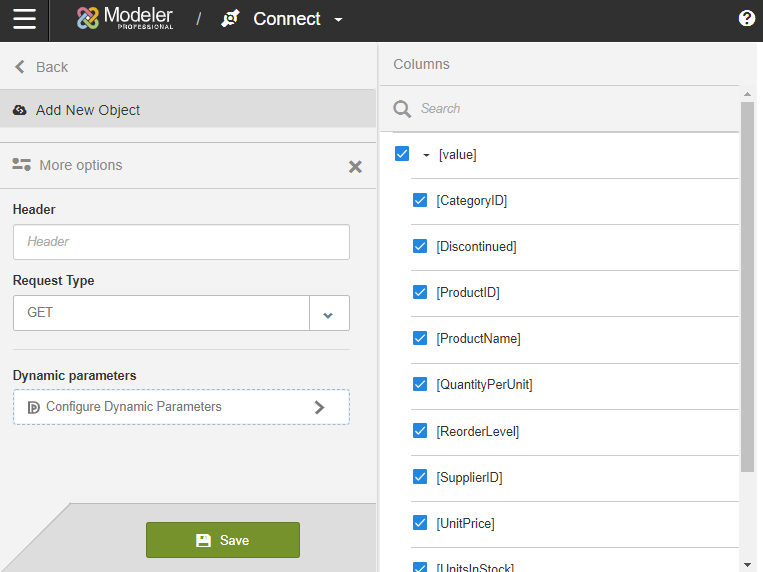
For additional advanced settings, select the More Options icon.
- Header. You can create REST call headers at the object level. If more than one header is necessary, use the following syntax: <header name1>=<header value1>&<header name2>=<header value2>
- Request Type. Birst supports three Request Types for APIs. Select your Request Type and fill out any additional information.
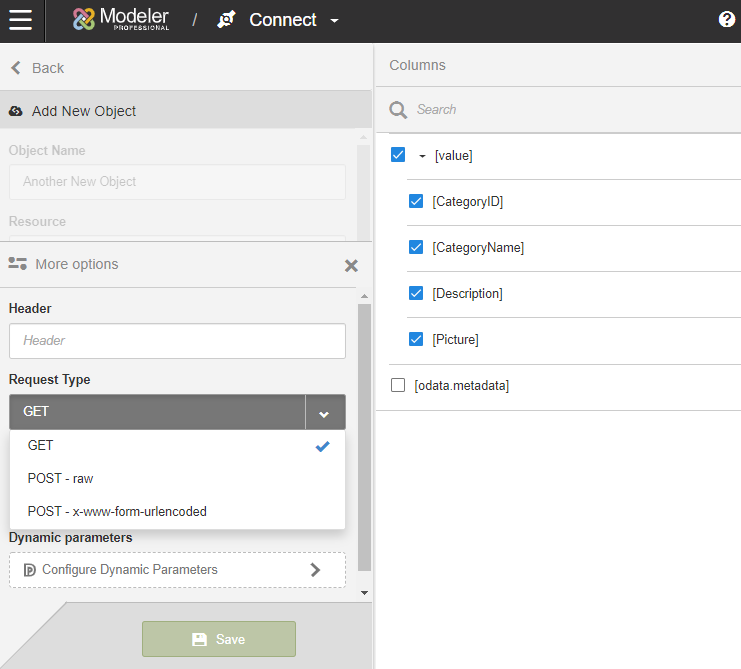
- GET requires no additional information.
- POST - raw requires the POST body.
- POST - x-www-form-urlencoded requires the Key/Value pairs.
- Dynamic Parameters are useful in cases when you need to call an endpoint multiple times in order to gather all possible values for a given API resource. For example, the API may only provide a resource that lists all products belonging to a specific category. In order to create a source in Birst that contains the list of products across all categories sold, you will need to call that resource for each per product category.
Birst allows you to use a column from another source of the same REST connector to iterate through all possible values of that column and populate the current source with the result of each separate resource call. If the syntax for the API is categories(category number)/products, in order for us to iterate through all categories, we would need to supply the API call with the correct category number. Tip: Repository variables can be used similarly to dynamic parameters. For more information on variables, see Manage Variables.- From More Options, click Configure Dynamic Parameters.
- Enter the Parameter Name. This name will be used in the URL. In this example, we will use it in the Resource field.

- Enter the Object Name. Pick from the list of sources in the REST connector.

- Enter the Column Name. Pick a column from the list of available in columns in your selected source.
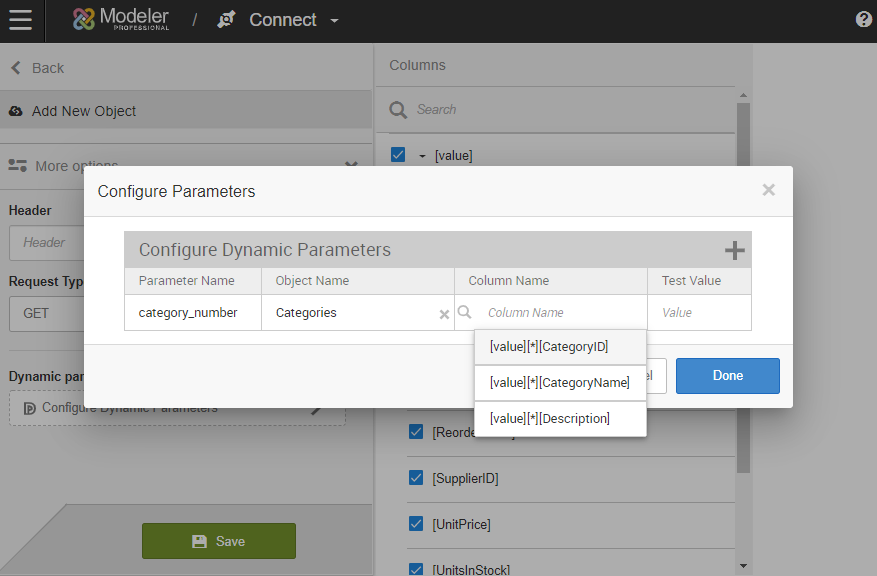
- Enter the Test Value. This is only used for preview. The test value will have no impact when importing sources.
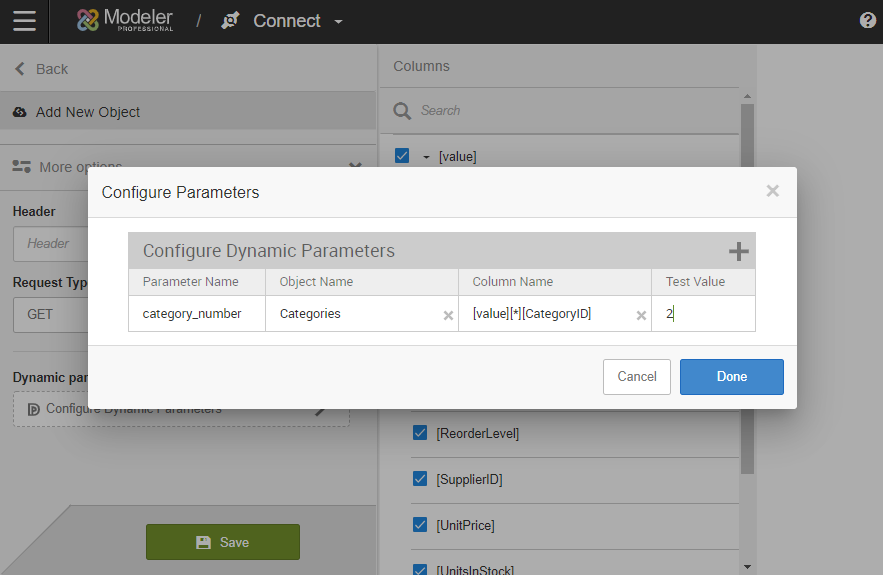
- Click + Add Dynamic Parameters icon to create any additional parameters.
- When finished, click Done.
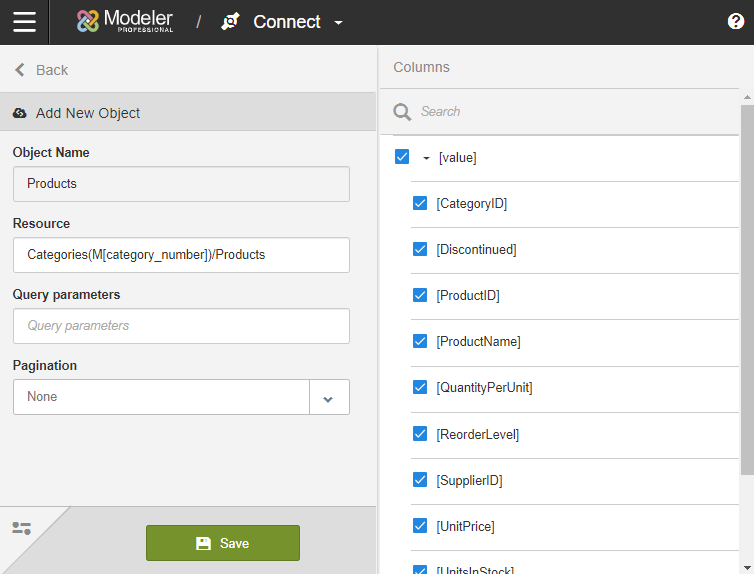
- Update your settings with the parameter or parameters. In this example, we updated the Resource field to use the Category ID. When using parameters in Birst, use the following syntax M[NameofParameter].Our example API syntax is categories(#)/products; the resource should be Categories(M[parameter_name])/products.
- From More Options, click Configure Dynamic Parameters.
- Save.
Pagination
Pagination style differs based on the API you are using. The Modeler REST Connector supports five types of pagination:
None
When there is no pagination, select None. This is the default selection.
Page
When the API has a set number of pages, use the Page format.
Enter the Paging Parameter and set the range.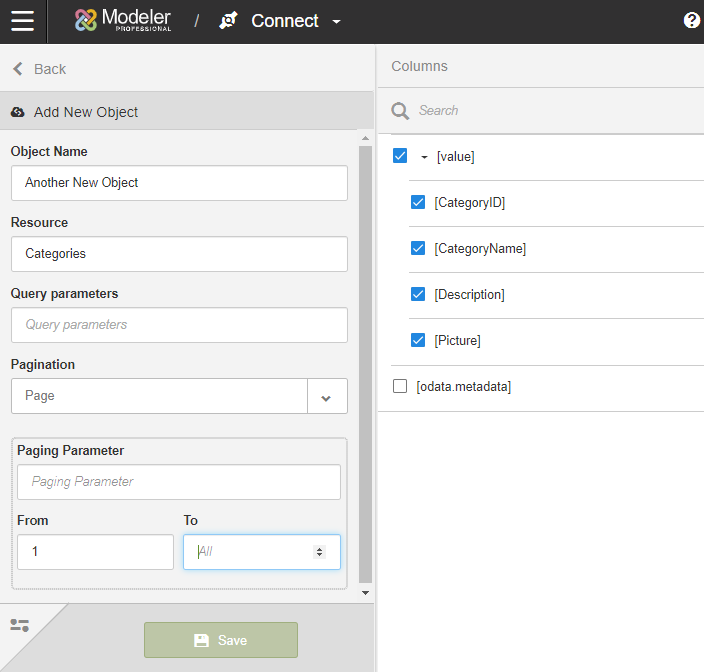
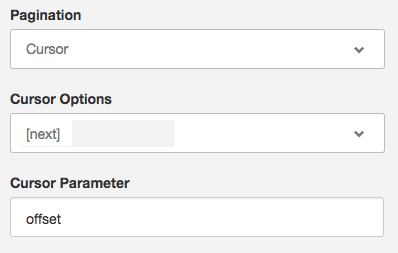
Cursor
Cursor-based pagination uses a cursor indicator to page through the result set. Cursor pagination uses forward (next page cursor) and reverse (previous page cursor) controls. The cursor parameter indicates the starting position of the query relation to the complete set of items. This mechanism is similar to the offset parameter, however the cursor value is encoded (or hashed) and included in JSON response while offset is numeric and can be manually entered.
The user will need to provide two pieces of information:
- The name of the string that identifies the “cursor” of the API. For example, “offset” […]
- The hashed value representing the starting point to retrieve the next page of results. In this example, that hashed value is “qe3Ws15jAb67leEh”, designated by the “next” field in the response.
In our example, the response would contain:
“next : qe3Ws15jAb67leEh”
Example: https://api.example.com/accounts?offset=qe3Ws15jAb67leEh
To set that up in Modeler, user would do:
Here is another example based on Twitter REST API cursor based pagination:
Twitter is using cursor based pagination. https://developer.twitter.com/en/docs/basics/cursoring
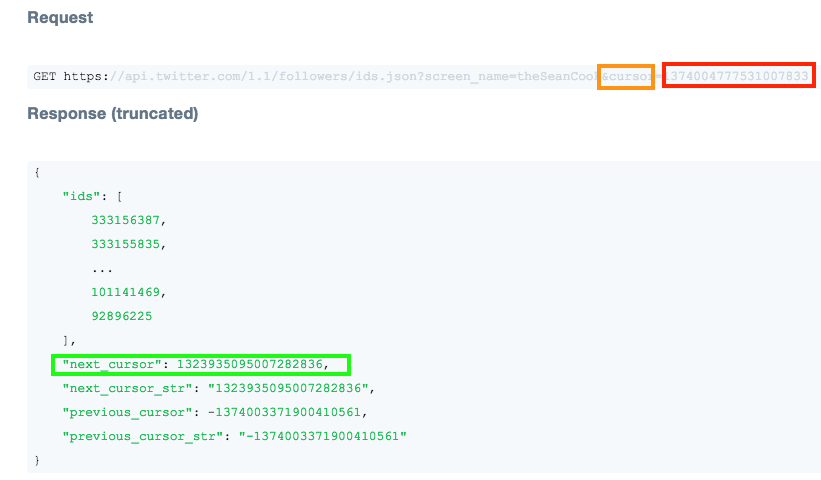
To set that up in Modeler:
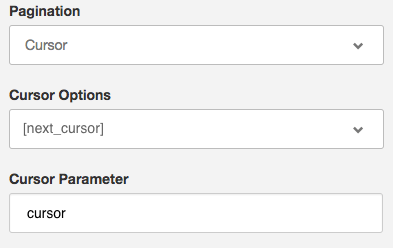
The hashed value will keep updating, for each page we are loading (to point us to the next page), hence we need to point to the field that will be pointing to the next value.
Offset
Offset pagination requires the user to build the pagination parameters based on the specific web based application API documentation.
The Offset Parameter pagination style is similar to the syntax for looking up multiple database records. There is both a limit and an offset query parameter. The limit is the maximum number of items to return. The offset is the starting position of the query in relation to the complete set of items.
Examples:
https://api.example.com/accounts?offset=0&limit=100
https://api.example.com/accounts?offset=1500&limit=100
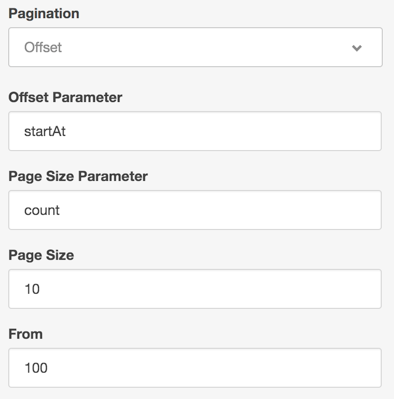
https://anotherapi.example.com/accounts?startAt=100&count=10
Enter the following settings:
Offset Parameter: The parameter name for the offset number.
From: The start value for the offset number. By default it is 0.
Page Size Parameter: The page size parameter name.
Page Size: The number of items returned per page.
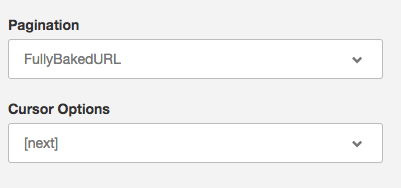
FullyBakedURL
For use case where the pagination is defined by a link, use the FullyBakedURL setting. Birst will automatically detect the fields containing URLs that can be used for pagination. Fully Baked URL Pagination is similar to the other styles, however instead of building a URL query for all pages, it includes a full URL representing the next result set of data (next page) in each page data (not exist or null if it represents last page of data).
Simply select the field containing the next page to explore to set pagination.