Using Amazon Redshift for Your Data Warehouse
Birst can be set up to use an Amazon Redshift data warehouse. Amazon Redshift works like any other data warehouse database, except that it is outside of the Birst data center. You can create and manage your own Redshift clusters. Birst connects to the clusters you create on Redshift in order to create spaces.
Amazon Redshift can be the data warehouse only for the Birst Appliance running in Amazon EC2, it cannot be used for Birst Cloud implementations that do not run in AWS.
Important: You require Account Administrator privileges to this feature.
High-level Steps to Set Up Amazon Redshift
Set up your Amazon Redshift cluster to work with Birst.
Configure a connection to the Amazon Redshift cluster in Birst.
Give permission to Birst users to create spaces on the Amazon Redshift cluster.
Create a space on the Amazon Redshift cluster.
Setting Up a Redshift Cluster to Work with Birst
Refer to the Amazon Redshift documentation for information on how to set up a Redshift cluster: http://aws.amazon.com/documentation/redshift/.
Requirements for Using Redshift with Birst
Amazon Redshift enforces a maximum of 256 schemas per database.
The master user password you use to create the Redshift cluster cannot contain the following special characters: {} (curly braces), % (percent sign), or ; (semi-colon). Although Amazon allows these characters, passwords containing these characters are not supported in Birst.
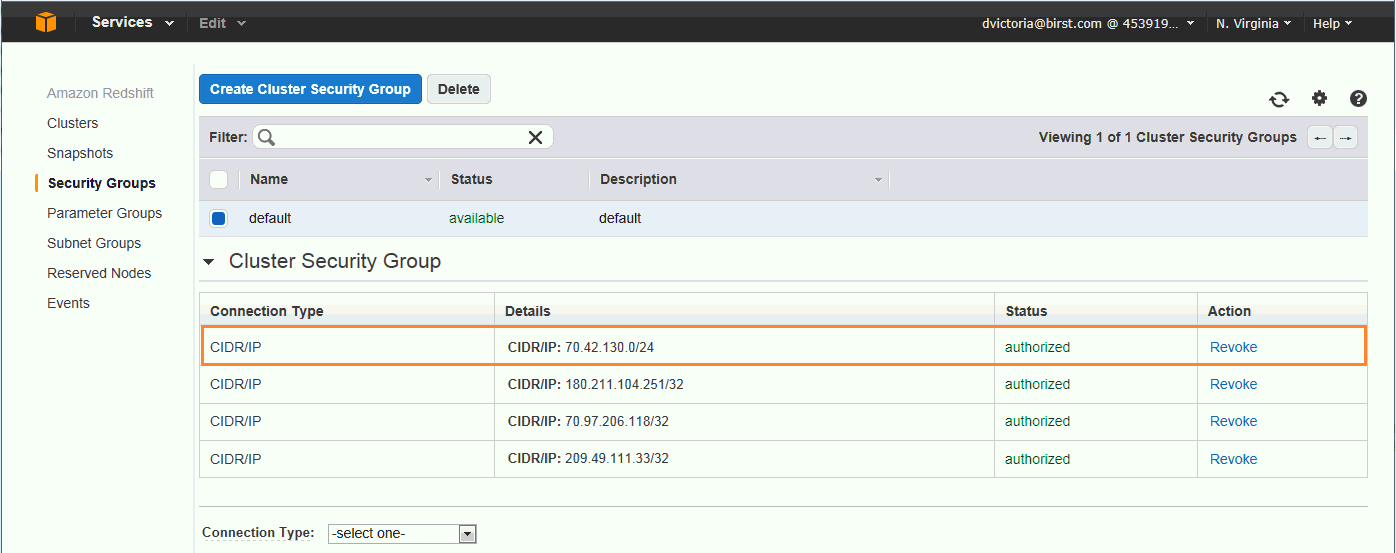
Add 70.42.130.0/24 to the security group for the cluster as shown below:
Configuring a Connection to an Amazon Redshift Cluster in Birst
After creating an Amazon Redshift cluster, configure a coBirstnnection to the Redshift cluster in . This allows Birst to access the data warehouse in Redshift. You need some information about your Redshift cluster in order to configure a connection in Birst.
To configure a connection to a Redshift cluster in Birst
| 1. | Log in to Amazon Web Services and select Redshift, then select the cluster you want to connect Birst to. |
| 2. | Take note
of the Cluster Name, Master Username, and JDBC URL on the cluster configuration
page. You need this information to set up your Birst
configuration.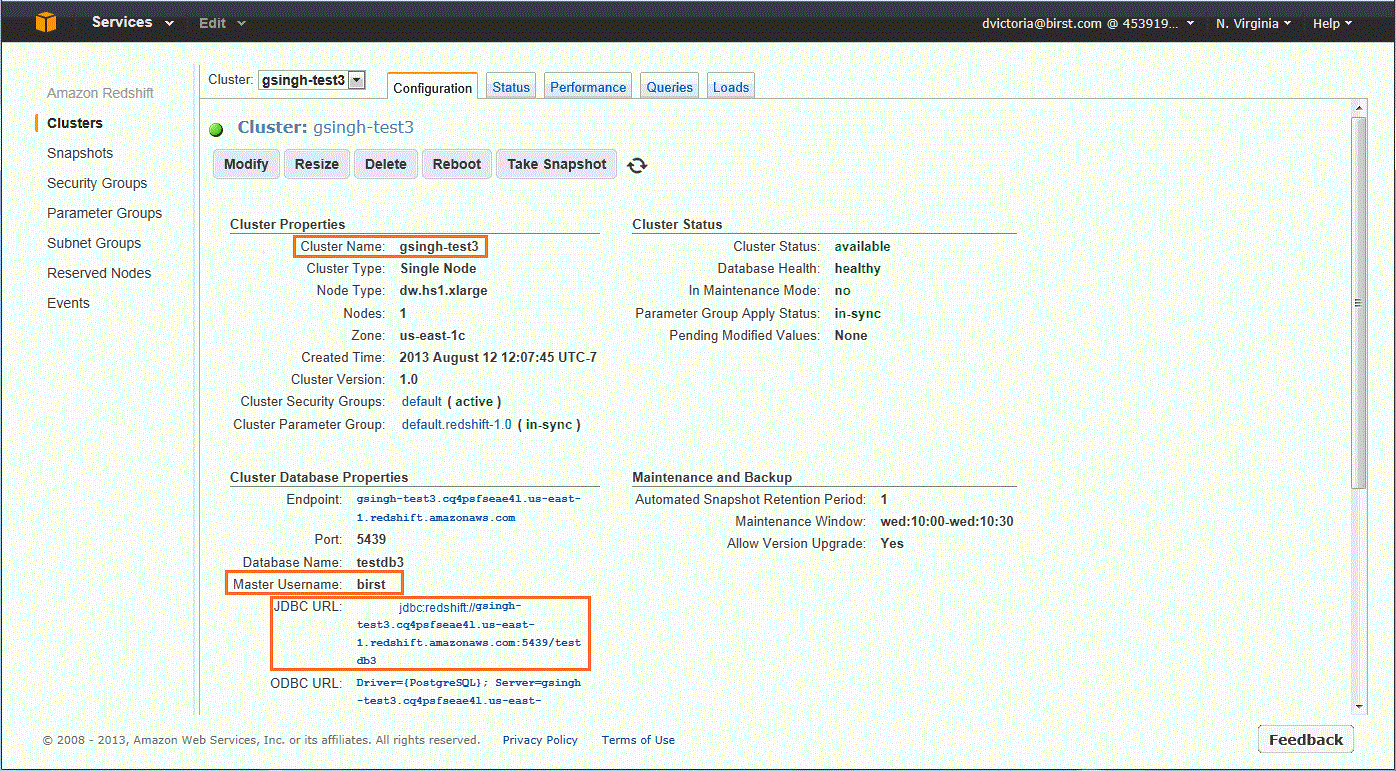 |
| 3. | Log in to Birst. |
| 4. | On the Home
page, click User Management. If you do not see this button, you are not an Account Administrator and do not have access to this feature. |
| 5. | Click External
Databases. Any existing external database connections display on this
tab.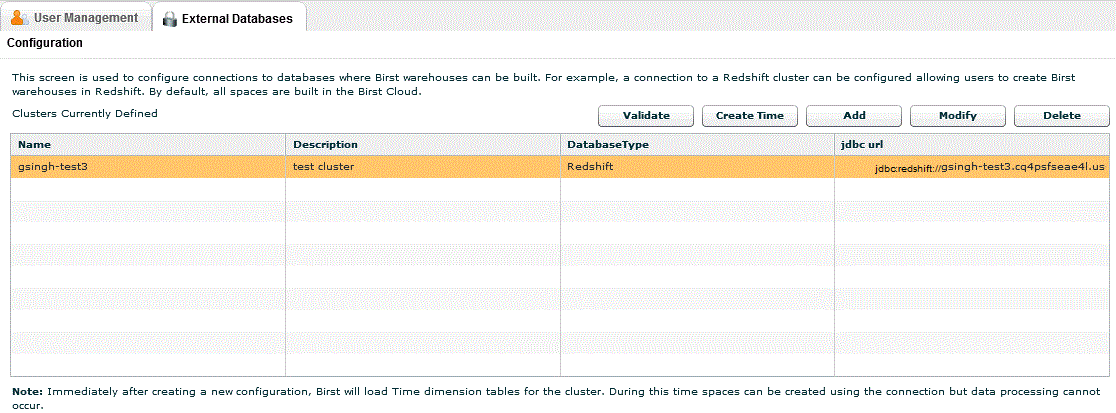 |
| 6. | Click Add
to add a cluster. The Add Configuration dialog opens.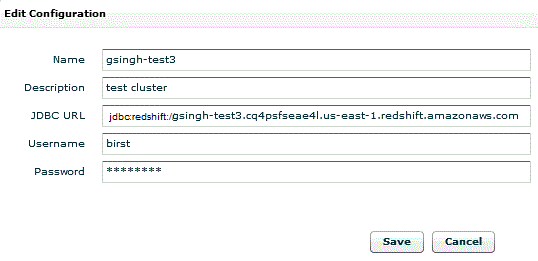 |
For Name, type in the cluster name from the Redshift cluster configuration page.
Type a description in the Description field.
Copy the JDBC URL from the Redshift cluster configuration page into this field.
For Username, type in the Master Username from the Redshift cluster configuration page.
For
Password, type in the Master User Password you used to create the Redshift
cluster.
Important: The password cannot contain curly brackets
{}.
| 7. | Click Save. The database connection will now be listed on the Configuration page. |
When you create a new external database connection, Birst loads and creates various time dimensions. This will take a few minutes. During this time, spaces can be created using the connection and data can be uploaded but data cannot be processed.
To verify if the time dimensions have been created, select the connection, then click the Validate button. You will receive a message letting you know whether the time dimensions are still being created or have finished being created. If the time dimensions are not successfully created or you need to re-create them, select the connection, then click the Create Time button.
When a connection is deleted, any spaces that are associated with that connection are automatically deleted. When you click the Delete button, if there are any spaces using that connection, the names of the spaces will be displayed in the confirmation message. Also note that when a connection is modified, the changes will automatically be reflected in any spaces associated with that connection.
Giving Permission to Birst Users to Create Spaces on the Amazon Redshift Cluster
Next, to enable a Birst user to create a space on a Redshift cluster, you need to give the user permission to connect to databases on an external cloud. By default, all spaces are built in the Birst Cloud.
To give a user permission to create a space on an external cloud
| 8. | On the Home
page, click User Management. The User Management page opens. If you do not see this button, you are not an Account Administrator and do not have access to this feature. |
| 9. | Search for
a specific user account, or click Search without entering anything into
the Username field to bring up a list of all Birst
users. Tip: Click a column header (such as Username) to sort on that column. |
| 10. | Select one
or more usernames (Ctrl-click to make multiple selections), then click
the Set Warehouse button.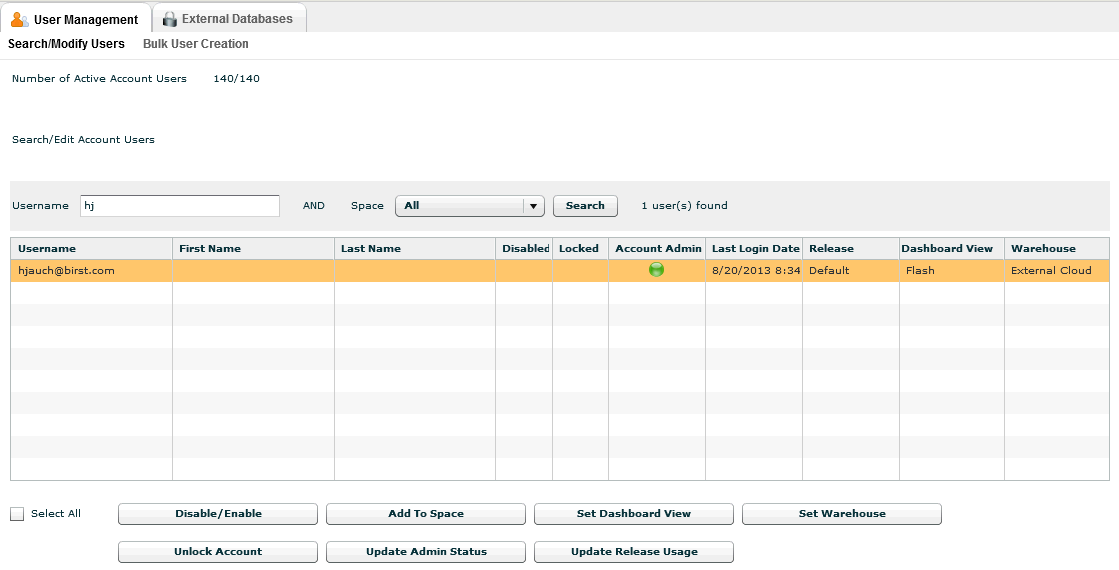 |
| 11. | Select External
Cloud then click Continue. The selected users will be set to External
Cloud under the Warehouse column. Important: After a user has been set to External Cloud, they will need to log out and log back in before being able to create a space on an external cloud. |
Creating a Space Using an Amazon Data Warehouse
Users with the appropriate permissions can now create a space on a Redshift cluster that has been configured in Birst.
To create a space using an Amazon Redshift data warehouse
| 12. | Log in to Birst with a user account that has permission to use an external cloud for the data warehouse. |
| 13. | From the Home
page, click Add Space. If you do not see the Add Space button, you do not have permission to create a new space. |
| 14. | You will see
a dropdown list in the upper right part of the Create New Space dialog
box. Select External Cloud. The list will be greyed out if the user account does not have permission to create a space on an external cloud. Tip: If a user has permission to create a space on an external cloud but the dropdown is greyed out, the user should log out and log back in. The dropdown should be active after they log back in. 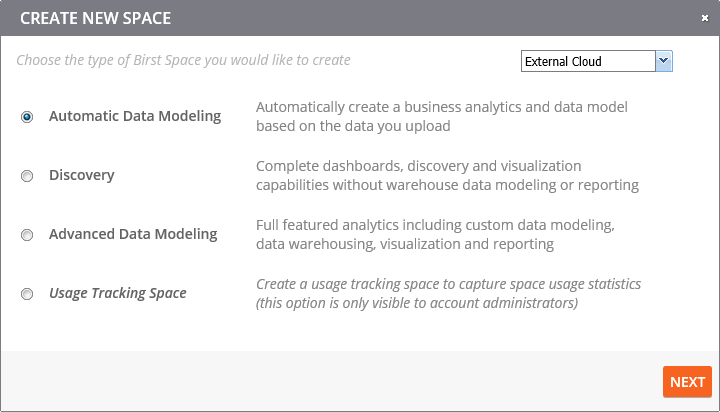 |
| 15. | Select the type of space to create then click Next. See Birst Space Types and Creating a New Space. |
| 16. | On the next
page, select the cluster on which to create this space from the list of
connections that have been configured as in the example below, then click
Next.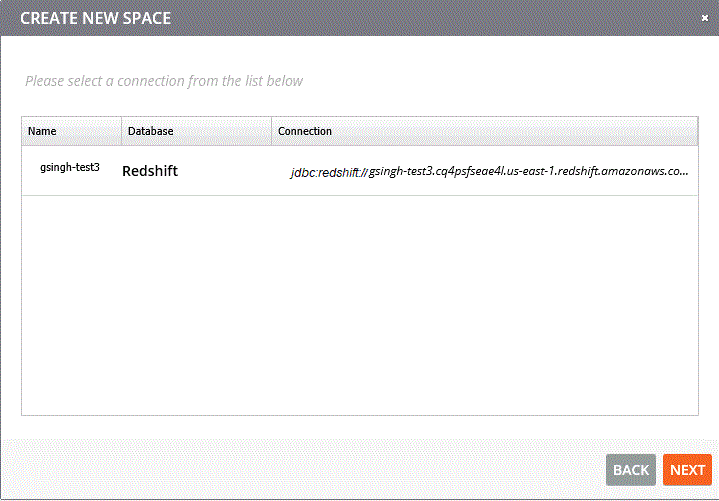 |
| 17. | In the next dialog box, provide a name for your new Birst space and use the comments box to enter a description, purpose, or special instructions, then click Done. The space will be added to the list of spaces on your home page. |
After the space has been created, the Navigation page in the Admin module opens. You can now upload data to your new space.
See Uploading Flat Files for information on how to upload text files using the Upload Files page. For files larger than 20MB or to connect to RDBMS sources, use Infor Connect.
You can use an Application Connector to extract data from cloud-based source. See Connect to Applications Using Application Connectors.
See Also
Creating a New Space
Performing Usage Tracking
Copying a Space
Modifying a Space
Deleting a Space
Infor
Space Types