Creating a load
To create a load from the RF device:
- Display the .
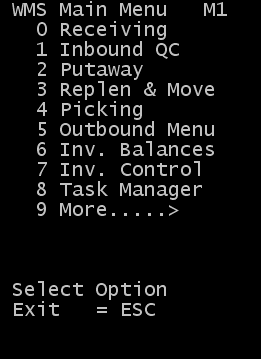
- From the RF device main menu, select . The menu is displayed.
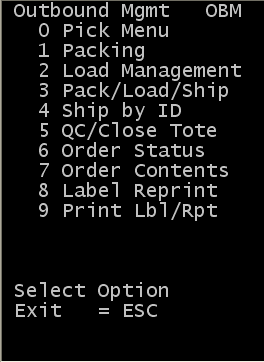
- Select . The menu is displayed.
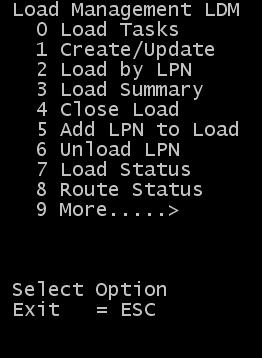
- Click . The Add/Update Load (ML1) screen is displayed.
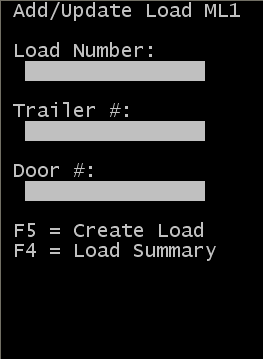
- Press to create the load. The Add/Update Load (ML2) screen is displayed.

Specify this information:
- Load#
- This is the system-assigned load ID.
- Status
- Specify New for the load status.
- Departure Time
- Specify the date and time for the load to depart. This format for the time is hh:mm:ss. The system provides the current date and time for a new load.
- Ship To
- Specify the customer to whom to ship this order. Specify the customer code or press to select from a list of customers.
- ExtLd
- Specify the external or alternate load ID. This is usually system supplied when the load links to a shipment on another system.
- Trlr#
- Specify the trailer number. You must enter a value here to begin the loading process.
- Tr Type
- Specify the trailer type for the load. Enter a valid type or press to select from a list of available trailer types.
- Door
- Specify the door number location to load the trailer.
- Route
- Specify the route number assigned to the load if one exists.
- Carrier
- Specify the carrier for the load. Specify the carrier code or press to select from a list of carriers.