Receiving (Mode 2 – Case Level receipts with ASN set to not allow Auto Receipt)
- Follow steps 1-4 as outlined above for Single Scan Receiving.
-
Input the Receipt number
to receive. The
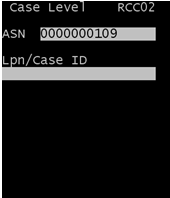
Case Level (RCC02) screen displays to allow you
to input the LPN or specific Case ID to receive. This screen displays because
the Receipt has been defined as Case Level or SSCC.

-
Scan or input one of the
following and press
Enter.
- LPN to receive
- Single Case ID to receive
Note: If the LPN is scanned, the following error message displays:Allow Auto Receipt is set to NO for this ASN. The LPN cannot be scanned. Please scan a CASEID to receive product.
-
Scan or input one of the
Case IDs and press
Enter.

-
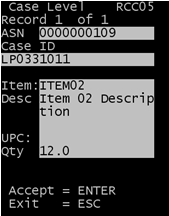
To continue receiving
this Case ID, press
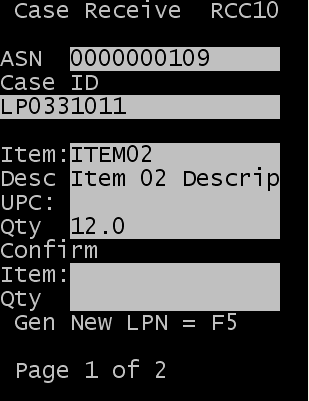
Enter. The Case Receive
(RCC10) displays to confirm the Item and Quantity on the Case ID.

-
Input Item and Quantity.
For an application-generated LPN, press
F5. The
application-generated label is directed to the printer identified when you
logged in.
For the item you received, note the following:
- If the item is configured for lottable validation, the fields to specify lottable information open after the RJCT field.
- If the item is configured to capture inbound catchweight/catch data, specify this information before the receipt is complete.
- If the contents of the Case ID on the ASN are different from actual Case ID being received, specify the RJCT (Reject Qty). Another screen displays to input the rejected quantity and a new LPN for the product being received.
- To complete receipt, press Enter.