Step 1: Performing shipping pallet moves
-
Specify this information:
- Area1
- Specify the area or location for the tasks. If this field is blank, the application references tasks for all areas in which you have permission.
- Task
- To select Picking tasks, specify P. PK – Pick displays in the field. If nothing is selected, non-pick tasks are sent.
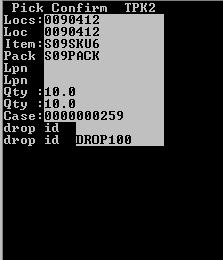
The application sends you the first pick task. The Pick (TPK) screen is displayed.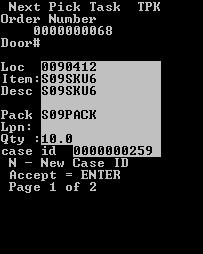
-
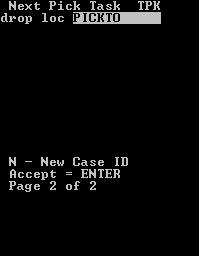
Do one of the following:
- To accept the next task, press . A new Pick (TPK) screen is displayed.
- To exit the screen, press and enter a reason code.
If special instructions are included, a separate screen is displayed with special instructions.