Step 2: RF-directed move
After completing the putaway task, the application generates a move task from the PND location to the putaway location.
- From the RF device Main menu, select Task Manager. The Task Manager (TMM) screen is displayed.
 - Select Standard. The Task Manager (T1) screen is displayed.
 - 
            Specify this
			 information: 
		  
            
- Area1
 - Specify the area or location for the tasks. If this field is blank, the application finds tasks for all areas in which you have permission.
 - Task
 - To select move tasks, specify M. MV – Move Tasks displays in the field. If nothing is selected, non-move tasks are sent.
 
 - 
            The application sends
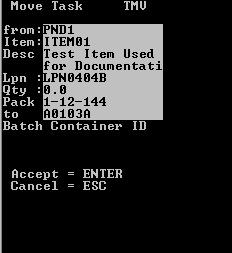
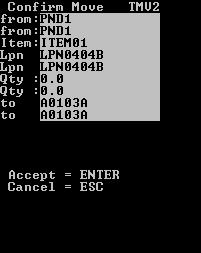
			 you the first move task. The 
			 Move Task (TMV) screen is displayed. 
		  
            
		           - To accept the current move task, press Enter.
 - 
            Specify this
			 information: 
		  
            
- FROM
 - Location from which the item is moved.
 - LPN
 - Current LPN of the item being moved, usually bar-coded on the case or pallet.
 - TO
 - Destination location for the item.
 - LPN
 - New LPN for the item.
 - QTY
 - Amount of item moved. Specify zero to move all.
 
		          See the Inventory Management User Guide for more information. - Press Enter. The RF device transmits the data to the application database.
 - 
            Do one of the following:


- To accept the next task, press Enter.
 - To exit the screen, press Esc.
 
 - 
            Repeat steps 5-9 until
			 all pick tasks have been completed. 
		  
            The items are moved from the PND location to the appropriate Putaway location.