Moving items to final destination through stocker putaway tasks
Once the pallet has been moved to the final PND location, the stocker tasks are made available through Task Manager. A different associate usually performs these tasks.
-
Specify this
information:
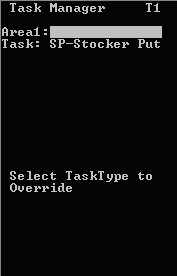
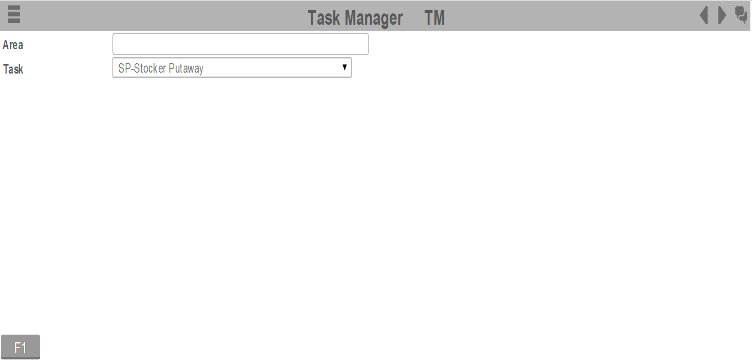
- Area1
- Specify the area or location for the tasks. If this field is blank, the application finds tasks for all areas in which you have permission.
- Task
- Select the task to be performed. To select Stock Putaway tasks, specify S. SP – Stocker Put displays in the field. If nothing is selected, non-cherry pick replenishment tasks are sent.
-
-
Press
. The first pallet
with Stocker Putaway tasks displays.
-
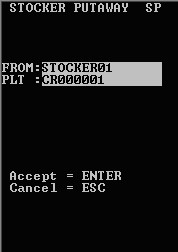
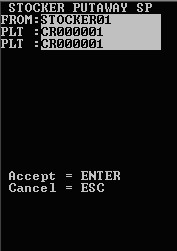
In the
PLT field, specify the
Pallet ID to confirm it.
-
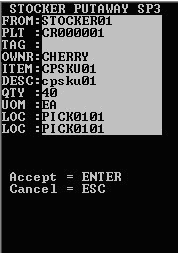
To accept, press
. The
STOCKER PUTAWAY (TSP) screen is displayed.

-
To view the first task
associated with the pallet ID that was entered, press
. The
STOCKER PUTAWAY (SP2) screen is displayed.
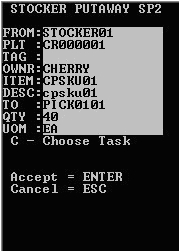 Note: To select a task to complete, press . See the description at the end of this section for more information.
 -
To accept the task,
press
. The
STOCKER PUTAWAY (SP3) screen is displayed.