Receiving (Mode 2 – Case Level receipts with ASN set to not allow Auto Receipt)
-
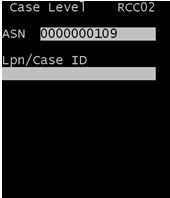
Input the Receipt number
to receive. The
Case Level (RCC02) screen displays to allow you
to input the LPN or specific Case ID to receive. This screen displays because
the Receipt has been defined as Case Level or SSCC.
-
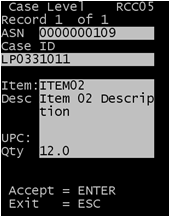
Scan or input one of the
Case IDs and press
.
-
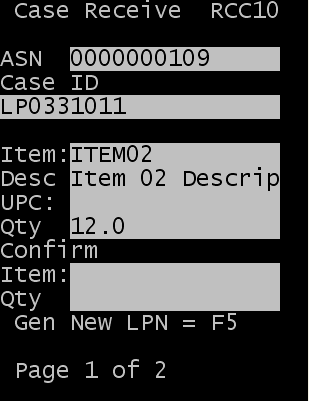
To continue receiving
this Case ID, press
. The Case Receive
(RCC10) displays to confirm the Item and Quantity on the Case ID.