Completing an RF-directed putaway for a single pallet task putaway

To perform an RF-directed (Task Manager) putaway for a single pallet task:

  1. From the RF device Main menu, select Task Manager. The Task Manager (TMM) screen is displayed.
  2. Select Standard. The Task Manager (TM) screen is displayed.
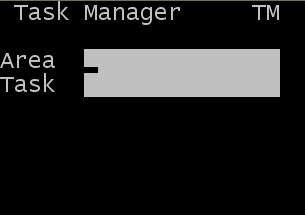
  3. Specify this information:
    Area
    Specify the area for the tasks. If this field is blank, the application finds tasks for all areas for which you have permission.
    Task
    Leave blank or select the task type to complete. To get a Putaway task, press P twice. Select putaway from the list. PA – Putaway displays in the field.
    Note:  If a specific task type is not selected, you are given a task based on your user permissions and the priority of the tasks you have permission to execute.
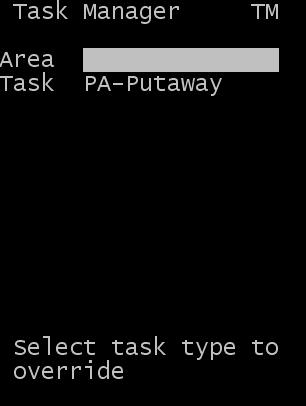
  4. Press Enter. The following screen displays to allow you to input the license plates to be put away.
  5. Select or scan the license plate to put away. From one to five license plates can be selected for putaway. The next section describes the process if multiple license plates are input on this screen.
    Note:  This screen can be easily modified to allow for the number of pallets that can be put away by one operator. For example, if a maximum of two pallets are to be moved at any time, edit the TPA1 screen to make fields Lpn3, Lpn4, and Lpn5 not visible. This limits the fields that display and reduces the number of keystrokes required to begin the putaway process. For more information on modifying the RF screens, see the Administrator’s Guide.

    Other field that can be activated for input on the screen:

    Loc
    Location from which the item is to be moved (standard RF screen defaults assume that the product should be put away from the STAGE location.)
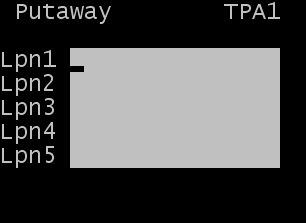
  6. After you enter all IDs to be put away, press Enter
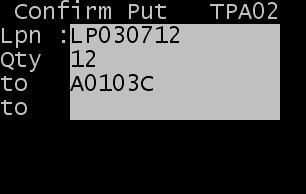
. The TPA2 screen is displayed with the suggested location for the license plate selected for putaway.
  7. To proceed with the putaway, press Enter. The Task Putaway confirmation screen (TPA02) displays.
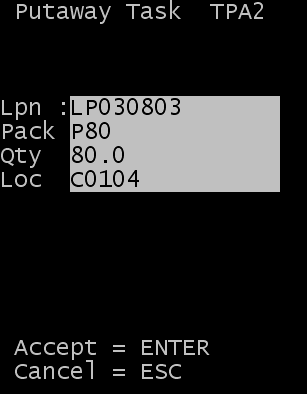
  8. To confirm the putaway transaction, scan or input the To location.
  9. Press Enter.
  10. If LOTVAL screen is displayed, then specify a valid lot attribute value for each lot. This screen is displayed when lot attribute validations are checked as visible or required on the RF Lot Attribute Validation page.

    If lot attribute validation is not required, then the Pick Order (TPK03) screen is displayed to continue the pick.

  11. After confirming the putaway, you can either press Enter for another task or Esc to quit the Task Manager process.