Performing RF-directed rainbow pallet putaways
-
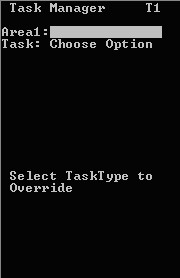
Specify this information:
- Area1
- Specify the area for the tasks. If this field is blank, the system finds tasks for all areas in which you have permission.
- Task
- Press twice to select putaway tasks. PA - Putaway displays in the field. If nothing is selected, you can receive other tasks types besides putaway tasks.
-
To get the first Putaway task, press
twice. If applicable, the
Putaway (TPA1) screen is displayed with all of the
putaways that exist in the area you designated in the Area1 field. You must
execute these tasks in the order they are given.
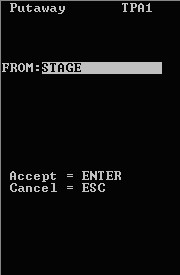
-
To accept the task, press
. The
Putaway (TPA3) screen is displayed.
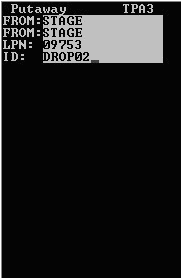
-
Specify the Drop ID, and then press
twice to accept it. If there is a Drop
ID to be put away, the
Putaway (TPA06) screen is displayed with the
From location and the LPN associated with the Drop ID.

-
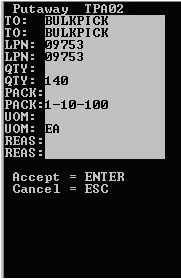
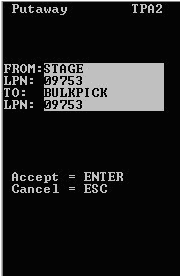
With the record showing, specify
P for putaway. The
Putaway (TPA2) screen is displayed.
-
To accept, press
. The
Putaway (TPA02) screen is displayed.