Using Visual Inventory functions
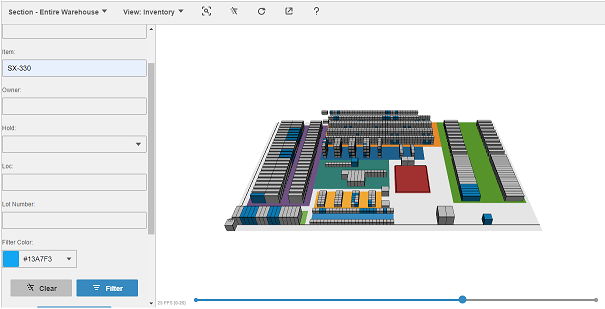
The image below illustrates an example of the Inventory display mode within Visual Inventory. The locations containing item SX-330 have been colored with the selected Filter Color value.
- Mouse
- The mouse wheel can be used to zoom in and out. The left mouse button can be used to rotate the model. The right mouse button provides a way to pan up/down/left/right.
- Main Toolbar
- From the Main Toolbar, you
can access:
- : If locations have been placed in different sections, this menu provides a way to switch between them. Only one section can be displayed at a time. This capability can be helpful for large facilities or when locations from multiple buildings are in the same Infor WMS facility.
- : This menu is used to switch between the three display modes; Task Age, Task Frequency, and Inventory.
- : The button (shown below) re-centers the 3D model.

- : The button (shown below) clears any coloring
that has been applied using one of the view modes.

- : The button (shown below) reloads location and
inventory data.

- : The button (shown below) opens a new browser window
containing only the Visual Inventory
page.

- : The button (shown below) opens the Infor Cloud Suite WMS help
window and navigates to the Visual Inventory section.

- Task Frequency
- The Task Frequency View
allows you to color locations based on task activity. You must either select
currently pending tasks or specify a date range of previously completed
tasks.

Click to color the locations based on your specified criteria.

- Task Age
- When you switch to the Task
Age view, you are prompted for a list of task types you want to view.
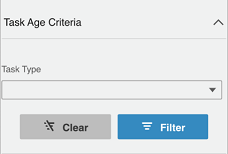
The locations are then colored based on the oldest age task found for a location.
- Inventory
- When you switch to the
inventory view, you are prompted to specify a combination of location and inventory
criteria. Click to color locations
containing material matching the criteria. You can switch the color and run multiple
inventory filters at the same time. Click to remove all coloring and clear the filter criteria.
Click to replace the 3D model with a data grid listing matching inventory records.
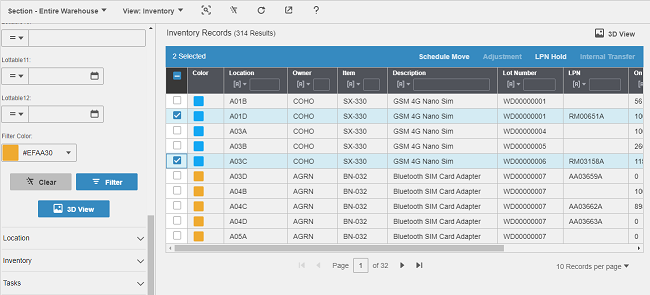
You can select records to schedule moves, place LPNs on hold, and perform adjustments or transfers. You can click to switch back to the 3D model display.
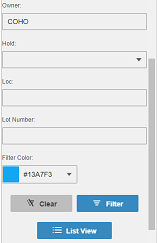
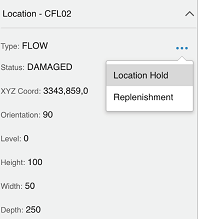
- Location Details
- When you select a location
in the 3D model, the Location section in the accordion on the left side of the screen
is populated. You can then set the location hold or initiate a
replenishment.
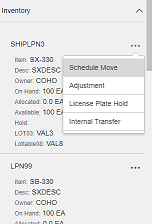
- Inventory Details
- The Inventory section of
the accordion displays each piece of inventory in the selected location. You can
schedule moves, place LPNs on hold, and perform adjustments or transfers.
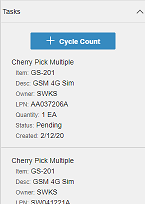
- Task Details
- The Task section displays all tasks for the selected location. You
can initiate a cycle count.