Deploying an entity
Use this procedure to deploy an entity. When the source file is compiled successfully, the files can be deployed. It is recommended to connect only one component to an Action number; otherwise the system displays a warning.
- In the MAK Navigator tab, select or get an entity.
-
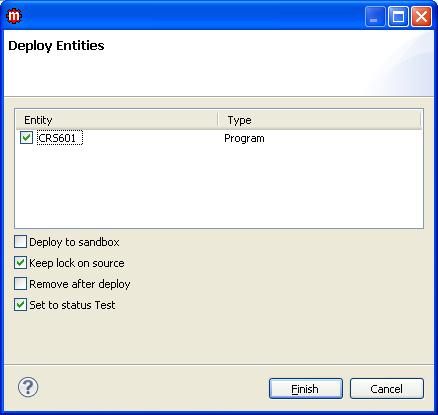
Right-click the entity and select Deploy. The Deploy Entities window is displayed.
 Note: If the entity is not connected to an Action number, a message is displayed prompting you to connect the entity with an Action number.
 - Select the entity that you want to deploy.
-
Select from the deploy options as needed:
Deploy to sandbox Select this option if you want to use the MAK Sandbox functionality. When deploying to the sandbox, the Remove after deploy setting is disabled and the component will remain in the MAK Navigator tab.
Selecting this option means that the files are deployed to a specific folder for each user located under the HFix folder. The folder is added to the classpath and the modified file can be tested by the user without affecting other users.
Keep lock on source Select this option to keep lock on the file even after deploying.
This option is selected by default.
Remove after deploy Select this option to remove the entity from the workspace after deploying. Set to status Test Select this option to automatically set the A/N status to Test. -
Click Finish. The
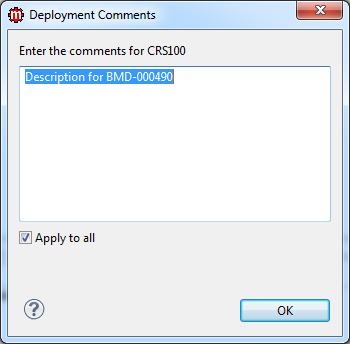
Deployment Comments window is displayed.

- Specify comments in the text box.
- Clear the Apply to all option if you want to specify various comments for every entity.
-
Click OK. The entity is now
deployed.
Note: If MAK is under Version Control, it performs an auto-commit to the SVN server when an entity is deployed and its corresponding project is connected to SVN. When you browse the SVN history of the deployed entity, the comment column will display the following: <AN>: <User Comment> (Automatic MAK commit)
- Optionally, view the MAK Console for file and location information.