Performing a check run

After you select the appropriate invoices for payment, you will need to generate the payments. This procedure details the steps required to perform a check run, the most common method of payment. You can also generate other types of payments. Creating cash payment tapes A description of the files produced for tape creation can be found on the Knowledge base; search for the Accounts Payable File Layouts (APFL.xls).

Perform a check run

  1. Access Payment Forms Creation (AP155) and define the parameters to be used when generating the checks.
  2. Select the Main tab to select payment and cash code options.
  3. Specify this information:
    Pay Group

    Select a pay group while generating checks. Pay groups are set up using Pay Group (AP01.1).

    Payment Code

    Select a payment code while generating checks. Payment codes are set up using Bank Transaction Definition (CB00.4).

    You must run AP155 for each cash code and payment code combination processed by Cash Requirements (AP150).

    Process Group

    Select a process group if you want to process payments concurrently. This lets you balance the load. You define process groups using Process Groups (AP02.3).

    Cash Code

    Select a cash code that you defined using Company Cash Code Relationships (CB00.3).

    You must run AP155 for each cash code and payment code combination processed by Cash Requirements (AP150).

    Cash Code Group

    Select a cash code group to run AP155 for the cash codes referenced on the cash code group. You set up cash code groups using Cash Code Group (CB11.1).

    Cash Code List

    Select a cash code list to run AP155 for cash codes referenced on the cash code list. You set up lists using List (MX10.1).

    List

  4. Select the Select Options tab to define check generating options.
    Payment Date

    Specify the payment date. This date is assigned to payments and prints on checks. Payment Closing (AP170) assigns the payment date to general ledger transactions created for payments.

    Starting Form

    You do not need to specify a starting form number if you assigned a starting form number on Cash Payment Formats (CB00.5) during Cash Management setup.

    Leader Forms

    Specify the number of leader forms you will use when printing. Leader forms are used to feed the continuous print paper into the printer, but are not printed on. Alignment forms are printed on as a test to ensure the print shows up in the correct place on the forms.

    Alignment Forms

    Specify the number of alignment forms you will use when printing. The application automatically voids payment numbers used as alignment forms

    Document Currency

    Select whether you are creating payment forms in the currency of the bank account (cash code) or the invoice currency.

    Print Comments

    Select whether to print comments on remittance advice forms.

    Include Fax and Email

    Select whether to include fax and e-mail when creating payment forms. Valid values are None, Email only, Fax only, and both Fax and Email.

    Note: Payment format only works if the cash payment format is set up as a separate remittance.
    Date Format

    Select the date format you want to use: a two-digit year with date separators or a four-digit year with no date separators.

    Print PO Number

    Select Yes to print the invoice purchase order number in place of the description on the check remittance.

  5. Select the Rerun Options tab to determine payment reprinting options.
    Reprint Option

    Use this field if you are reprinting payment forms. Select:

    • Void Range (to void and reprint a range of payment forms)

    • Remaining Forms (to void and reprint a range of payment forms and continue printing payment forms from the first voided payment through the end of the run)

    • Complete Rerun (to completely rerun the payment forms, usually before printing has begun; use this option if you selected a cash code group or cash code list)

    Void Forms

    If you selected Void Range or Remaining Forms in the Reprint Option field, specify the beginning and ending form number for the range of forms to void.

  6. Select the File Name tab to specify a print file name or remit file name.
    Print Filename

    Specify a check print file name to control the names of the files that are used for processing. If left blank the existing file names are used.

    Remit Filename

    Specify a remittance file name to control the names of the files used for processing. If left blank the existing file names are used.

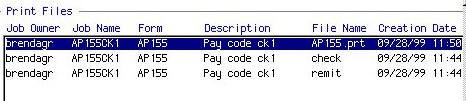
  7. Print the checks by selecting the check file in Print Manager and sending it to the printer. Details on troubleshooting problems during the printing are found elsewhere in this user guide. Reprinting checks

    Ensure you are satisfied with your cash payment run before you close the payment cycle. After you close the cash payment cycle, you cannot reprint payment forms.

    Illustration: Payment Forms Creation (AP155) generates three files: a *.prt file, a check file, and a remittance file

Related reports and inquiries

To Run
List potential duplicate invoices Potential Duplicate Payments (AP221)