Adding an SSO Identity to an Existing User

This procedure describes how to add an identity on a service or agent to a user or people resource who is already in the Resource Management repository.

You would perform this procedure in the following circumstances:

  • You are upgrading from an earlier version of Lawson when identities were not required. Your username data has been transferred to the repository but you now need to add identities for users. Depending on how many users you have, a procedure for mass-loading identities is preferable in this situation.

  • An existing user needs an identity on a service or agent.

The basics steps for this procedure are:

  • Using the Lawson Security Administrator, locate the user entry in the Lawson repository.

    This procedure provides simplified instructions for formulating a query. More detailed instructions for formulating queries are available.

  • From the Manage Identities dialog box, add identity information.

To locate the user entry in the Lawson Repository
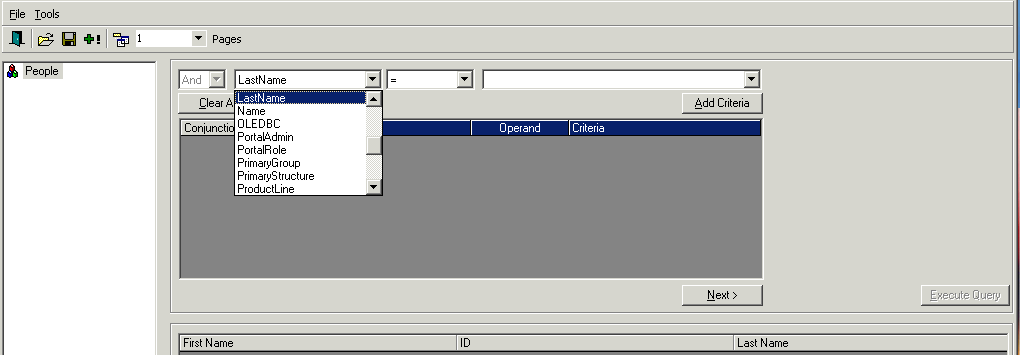
  1. From the Lawson Security Administrator main menu, click User Management and then click User Maintenance.

    The dialog box for formulating a query appears.

    Form clip: User Maintenance query dialog box
  2. Perform a query to locate the user entry.
    1. Click in the attribute selection box to choose an attribute that will help you find the user.

      The screen clip shows the LastName attribute being used for the query.

    2. Select an operand and type data for the attribute.
    3. Click Add Criteria.
    4. If you need additional criteria to locate the user, you can add it. Click Next when you have enough criteria to locate the user.
    5. At the next dialog box, select the attributes that you want to appear in your query results. Last Name and First Name should be enough.
    6. Click Execute Query.

      The user entry appears.

  3. Right-click on the entry.

    The Manage Identities dialog box appears.

    Form clip: Manage Identities dialog box showing adding an identity for the "APPS803_VENDOR" agent
  4. Type the required information for the identity.

    The screen clip shows adding an identity for the Vendor self-service application agent.

  5. Click the Add button (plus sign on the toolbar) when you finish adding identity information.

    The message "Identity added," should appear.