Mass Assigning RMIds (Users) to Identities (Manage Identities)

This procedure explains how to link multiple users to a single identity.

You might perform this procedure if:

  • You are upgrading from a previous release of Lawson on which your existing users did not have identities.

  • You use Self-Service applications and you want to save time when performing user setup by mass assigning identities that are the same for all users, such as the OS identity.

This procedure applies only to users who do not need unique operating system identities. For example, users who run batch jobs must have their own operating system identities, so do not use this procedure for those users.

To mass assign RMIds to identities

  1. From the main menu of the Lawson Security Administrator, select the User Management menu and then select Manage Identities.
  2. From the list of services and agents in the left pane, select the service or agent that contains the identity to which you want to assign RMIds.

    For example, if you are linking self-service application users to a single operating system user, you would select the operating system service. This service is named the same as the Lawson environment. (In the example shown in the next step, the service is named "lawenv.")

  3. Perform a query to locate the RMIds that have already been assigned to the service or agent.

    You can use any criteria that will result in the RMId you want to use to link the other users. If you don't have a huge number of RMIds on the service, you can use a simple query , for example, login=*, which will result in RMIds.

    Form clip: Manage Identities dialog box

    (Instructions for how to construct a query are in a different section of this document.)

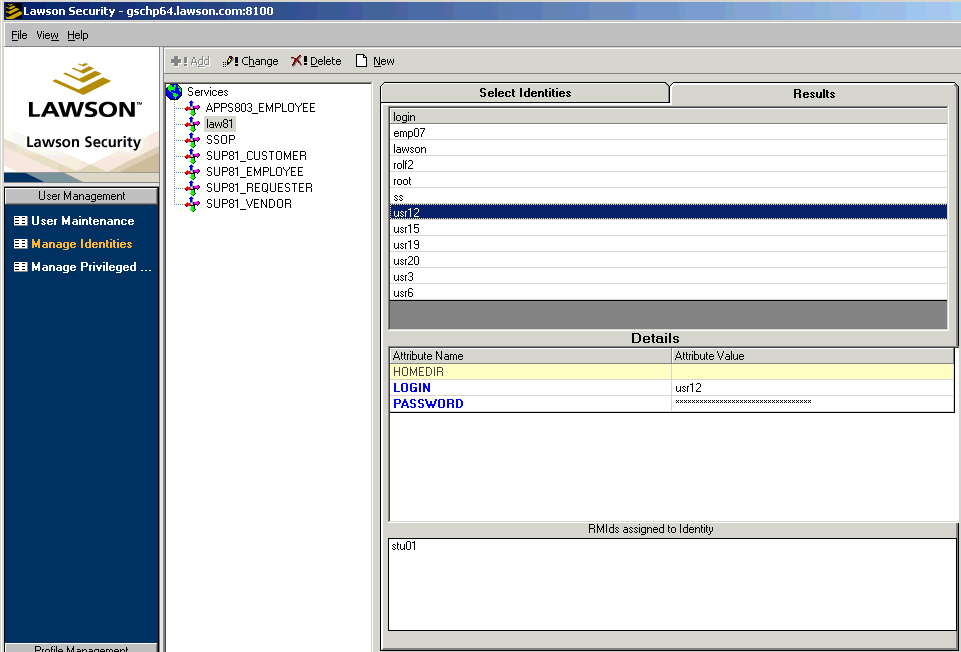
    When a service or agent is selected, a list of the identities on the service appears.

  4. Right-click the identity to which you want to assign RMIds.

    The Assign/Unassign button activates.

    Form clip: Assign / Unassign button
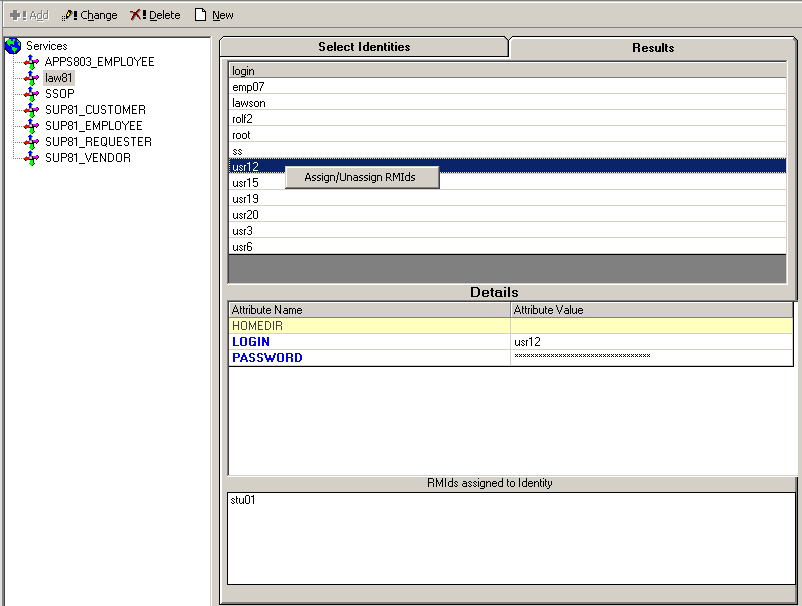
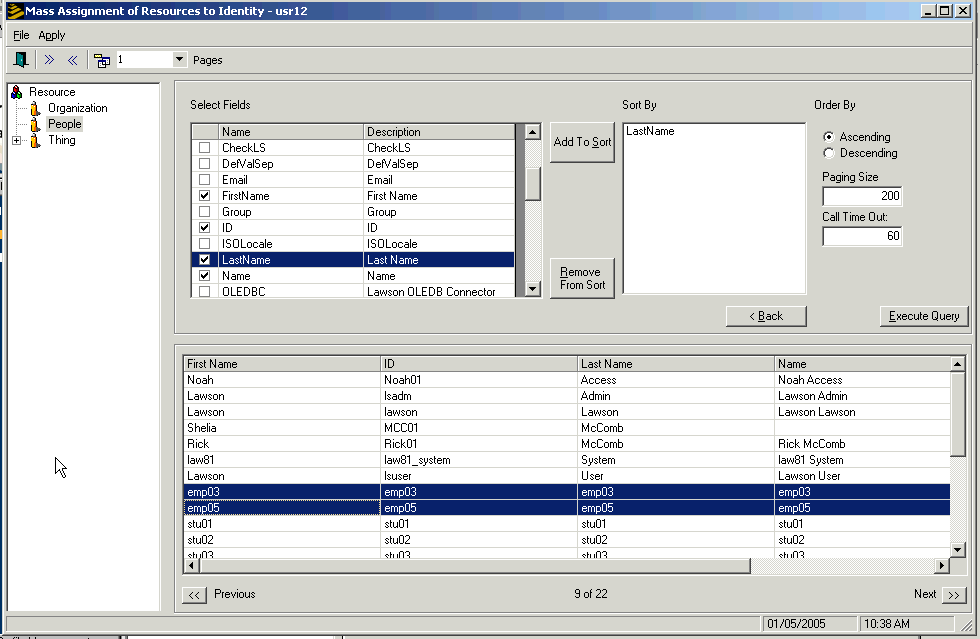
  5. Click the Assign/Unassign button.

    You will be at the Mass Assignment of Resources to Identity dialog box.

    Form clip: Mass Assignment of Resources to Identity dialog box
  6. On the Mass Assignment of Resources to Identity dialog box, select People as the type of resource.
  7. Perform a query to locate the RMIds (users) to whom the identity should be linked.

    You can use any criteria that will include the RMIds you want to link in the results. For example, a simple query such as, ID=*, will locate all RMIds.

    (Instructions for how to construct a query are in a different section of this document.)

  8. From the list of query results, select the RMIds / users for which you want to assign the identity.

    Use Ctrl + click to select multiple RMIds.

  9. From the Apply menu, click Apply Selected, because you are currently attempting to link the RMIds to an identity. (If you were attempting to remove RMIds from an identity, you would choose Remove Selected.)

    The RMIds from your query results will now be linked to the identity.

  10. When you are finished, close the Mass Assignment of Resources to Identity screen.
  11. If you want to test that this was the case, look at the identity on the Manage Identities screen. The RMIDs you just linked should show up in the "RMIDs Assigned to Identity" portion of the screen.