To link an attribute to an object definition

  1. From the Schema Editor main menu, select RM Objects, right-click on the object you want to link an attribute to (for example, People), and then select Add Attribute.

    The Add Attribute Wizard dialog box appears. The Add Attribute wizard lists attributes that exist but have not already been assigned to the resource you are working with.

    Form clip: Add Attribute Wizard dialog box
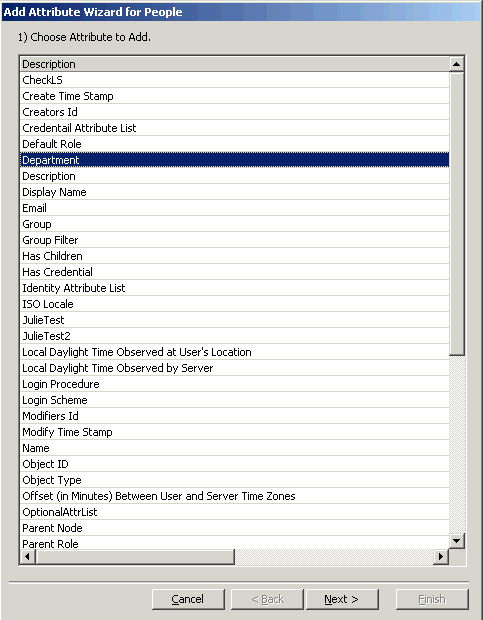
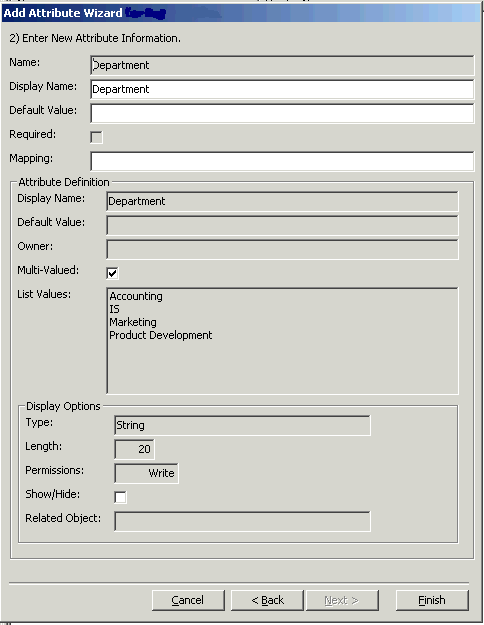
  2. Select the attribute you want to link to the resource (for example, "Department") and then click Next.
    Form clip: Linking an attribute to a resource
  3. At the next dialog box, you can make changes to the following properties:
    • Default value: You can add or change an existing default for the attribute

    • Multi-valued: You can make the attribute accept multiple values or remove this capability

    • Show / Hide: If the Show / Hide attribute is selected, it means the attribute is hidden and does not appear on the dialog box when a user adds or changes the resource. You can change this property now.

  4. You can map this attribute to an existing schema object or leave it blank to let Schema Editor create a new schema attribute. If you want to use an existing schema object, type the name of the object.
  5. Click Finish to complete linking the attribute.

    You are now ready to generate an LDIF file and load the changed schema to your LDAP server.

    For more information, see "Running the ldifgen Utility".