Form
A form itself is an object and has properties that can be changed. These are properties that relate to the form as a whole.
This table describes the properties for the form object.
| Property | Description |
|---|---|
| Name | For a form object, the name property cannot be changed. It is always "form1." |
| Width | Change the overall width of the form. |
| Height | Change the overall height of the form. |
| Grid Height | Change the number of rows that are available on the form by changing the underlying grid. |
| Grid Width | Change the number of columns that are available on the form by changing the underlying grid. |
| Title |
Click the hyperlink to change the title of the form. For example, you could change "Employee" (HR11.1) to "Acme Company Personnel Data." |
| Type | Type of form. Options are online, batch, or flowchart. Typically, you would only change the form type if you had made customizations to support the change. |
| Custom | Click the hyperlink to open a dialog box of customizable options for the form. See "Form Obejct Custom Options". |
Form Object Custom Options
When you click the "Custom" button for the form object, a complex dialog box of customizable options appears. The sections that follow describe the options on the dialog box tabs in detail.
General tab
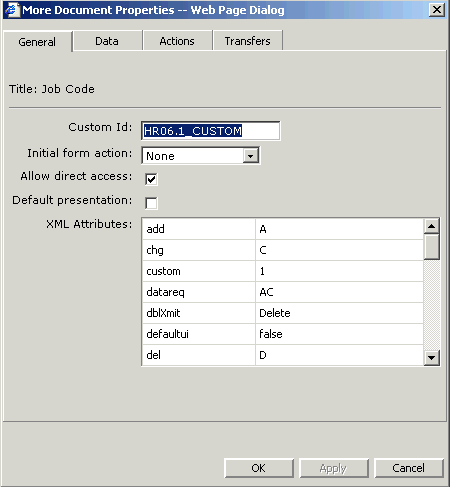
You use the general tab to:
-
View XML attributes of the form. These attributes are not editable.
-
Make changes to features that affect overall functioning of the form
| Property | Description |
| Custom_ID | You can change the ID of the form. If you choose a name that already exists or is reserved, you will be prompted. |
| Initial Form Action | The action that a form does upon initialization. |
| Allow Direct Access | For forms that can only be accessed by another form, you can allow a form to be called directly through Lawson Portal search or some other way. |
| Default Presentation | Make this customized form the new default for users. Typically, you do this only after you have completed and tested your customizations. |
Data tab
The data tab is for updating properties related to what data is displayed on a form and how transactions are processed.
| Property | Description |
| Use Change EVT | For fields that must be inquired upon before an update transaction can be performed, Transaction can pre-fill the fields with inquires so that a custom form can perform an update transaction. Use Change EVT to perform the inquires. |
| Send All Fields, Send Selected |
Use this feature to change the data that is sent with a transaction. For example, suppose you are working with a form that has 20 data fields but only ten of the fields are used at your site. In general, processing for queries and database updates is improved if fewer fields are processed in a transaction. If you select Send All, all fields are sent. If you choose Send Selected, you must select the specific fields you want to be processed. (Some key fields cannot be deselected.) |
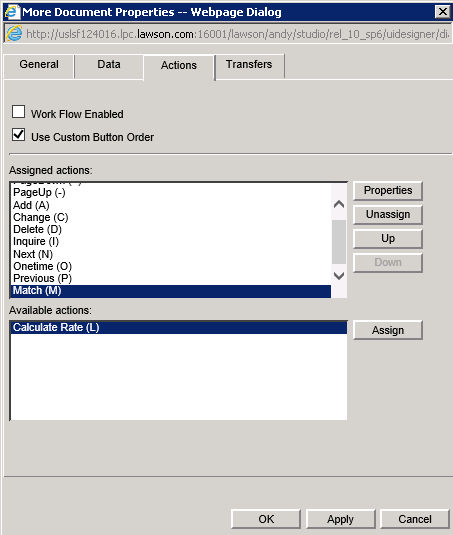
Actions tab
The Actions tab is for assigning an action that the form takes. This table shows the options for the Actions tab:
| Field | Description |
|---|---|
| Work Flow Enabled | Users of Lawson workflow products, such as Process Server, can associate a trigger with a form. When you choose to add a workflow trigger, you start a wizard for linking the workflow to the form. The trigger would have to be created before you could associate it with the form. (If you need information about how to create a trigger, see the Lawson documentation for the workflow product you use.) |
| Use Custom Button Order | When the check box is selected, Lawson Portal displays the action buttons in the same order as shown in Assigned actions list. When the check box is cleared, the default order of the action buttons defined in portalconfig.xml is used. |
| Assigned / Available actions | You can make actions such as Add, Change, Delete, Previous, and Next available to a form. Available actions are shown at the bottom of the dialog box. Click Assign to add an action. |
If you do not want users at your site to perform some actions, you can also use the Unassign button to remove access to them.
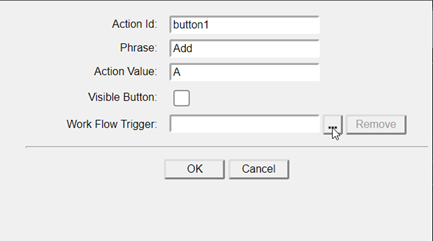
Setting a Work Flow Trigger
Clicking on Properties for the selected action opens the Action Properties window. Here you can customize the Action, in particular we can set a Work Flow Trigger by clicking on the ellipsis (…).
The Trigger Service Selection screen is displayed where you may choose the appropriate service. Leaving the Service field blank then clicking Find populates all available services.
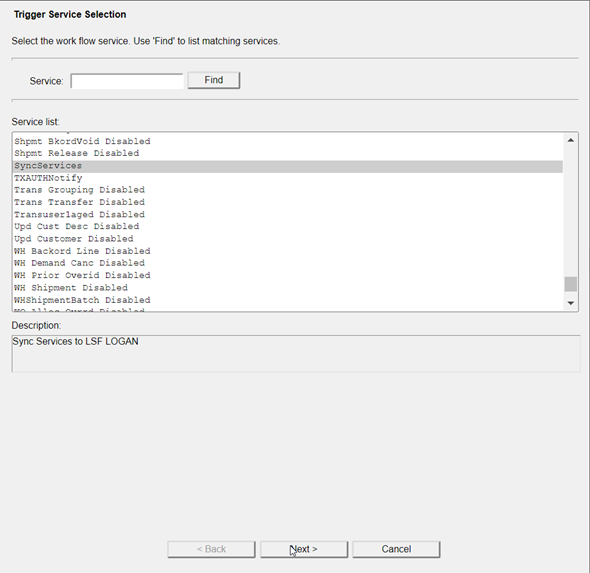
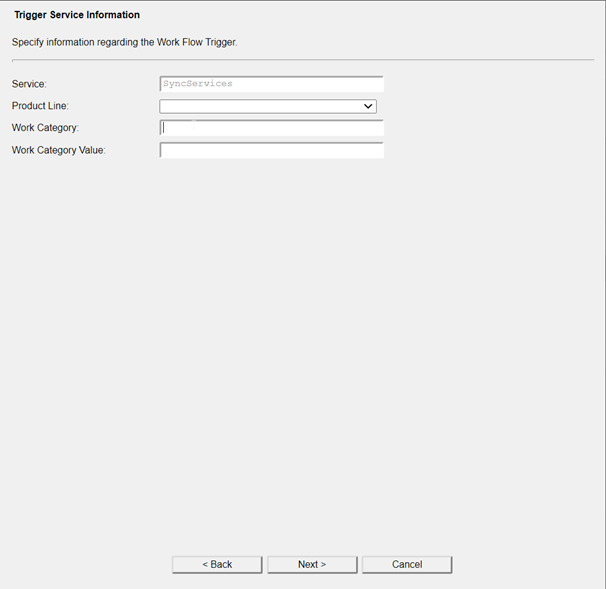
After you select a service, the Trigger Service Information screen will appear where you can set the Product Line, Work Category, and Work Category Value.
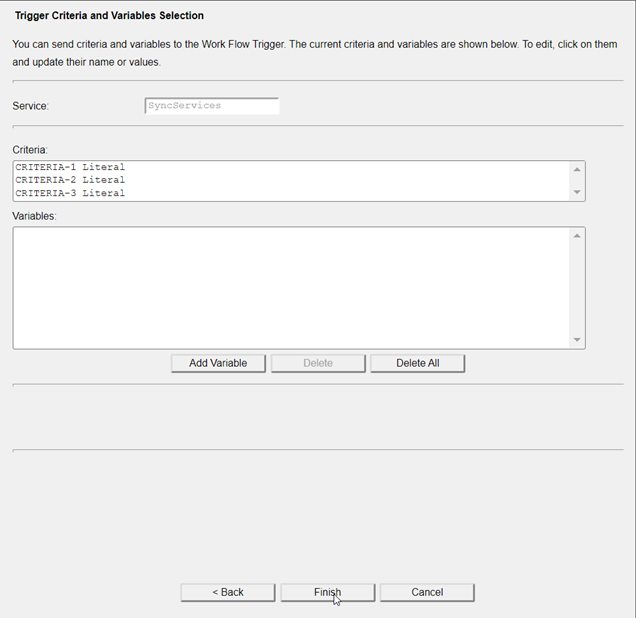
Lastly, the Trigger Criteria and Variables Selection screen will appear, where you may send criteria and variables to the Work Flow Trigger.
Transfers tab
The Transfers tab provides access to a list of forms, if any, that the form you are working with can transfer to. You can add transfers to a list that do not appear on the Lawson version of the form. You can also remove forms that the Lawson version of the form allows users to transfer to.
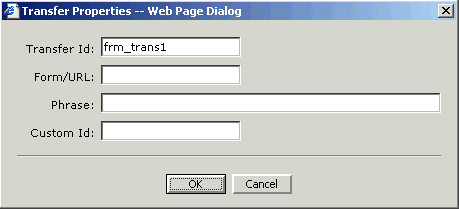
When you choose to add a form to transfer to, the Transfers Properties dialog box opens.
Select options for:
-
Transfer ID: This is the internal ID of the transfer. Typically, it's not necessary to change this property.
-
Form / URL: Type the location that this form should transfer to. This is most typically a Lawson form name, for example, HR13.1, but it could also be a URL.
-
Phrase: Type a description of the transfer. Phrase can be used to describe either Form / URL or a Custom form.
-
Custom ID: You can use this option to transfer to a custom form that you have created. For example, if you have a created HR13.1_custom, a customized version of HR13.1 that you want users to be transfer to, type that name here.
If you are required to change properties for a form that you have already added to the list of transferable forms, click Properties.