Transferring balloon numbers from Creo to Infor PLM
- In the integration preferences, select Transfer Ballooning Information check box.
- In the Integration preference, specify the name of the balloon mapping parameter in Component parameter for Balloon Mapping field. This preference stores the balloon numbers for an assembly.
- In the Integration preference, specify the Infor PLM Item object attribute in field. The preference stores the balloon values in Infor PLM. By default this field is set to 'FIND_NO'. This is 'Find No.' attribute of Infor PLM Item object.
- Open a new assembly file in ProE/ Creo application.
- In the ProE/ Creo application, select Create Balloon
Attribute option from the PLM menu.

The components in the assembly must have a balloon mapping parameter generated which stores the balloon numbers.
The parameter name is same as specified in Step 2.
The starting value of the balloon mapping parameters is10 and increments of 10, that is 10, 20, 30, and so on.
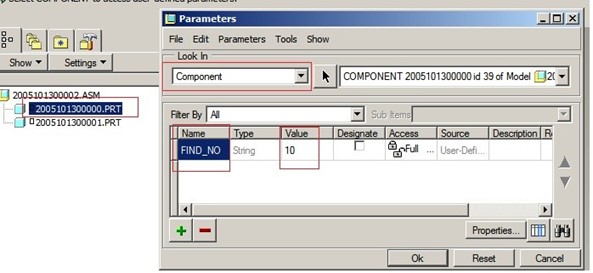
- To view/ change the generated values in ProE/Creo application, select and click Parameters. The Parameters dialog box opens.
Select the component of the assembly to view/ change the balloon mapping parameter value. In Look In, select Component and select the component in the assembly model tree as shown below.
- Create a drawing file for the assembly.
- Create a table with a single row and a single column. Select Table and click Insert Table.
- Select Table and click Repeat Region. The TBL REGIONS menu opens.
- In TBL REGIONS menu, click .
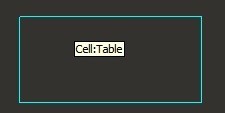
- Select the single cell, click inside the cell and select in TBL REGIONS menu. The color of the cell changes to aqua as shown
below.
- Double-click inside the cell. The menu opens.
- Select asm, mbr, cparam and User Defined.
- Specify the balloon mapping parameter name as shown below. The balloon mapping parameter
name specified in Step 2.

- Click .
- Select Table and click . The TBL REGIONS menu opens.
- Double-click Switch Syms. The balloon mapping parameter values created is displayed in the table.
- To display the balloon mapping parameter values, select , select Update and click .
- To change value of a mapping parameter value, double-click in the cell and specify desired value.
- Select Table and click . The BOM Balloons menu opens.
- Select .
- Select the table that stores the balloon mapping parameter values.
- Select Set Param and select the text in the table cell. The message is displayed in ProE/Creo status window as shown below.
- In menu, select Create Balloon.
- In menu, select and click . The BOM BALLOONS are displayed on the drawings.
- Save the drawing and in Infor PLM Discrete menu, click Save To PLM. The Find numbers are transferred to Infor PLM Discrete.