| | To edit formsAfter you have a basic form setup and operational, you can
change the form layout to achieve the final result. Form edit tasks are
performed in the context of the basic form edit procedure. Many of the typical form editing operations are outlined here,
grouped by general area: Note For detailed information on the Dynamic Form Editor, refer
to the Dynamic Form Editor's online help. To edit the form content Form layout changes affect the labels and fields that are
presented on the form. To specify fields for overview and detail
sessions You can specify, per individual field, whether the field
must be displayed in the overview session, the details session, or in both
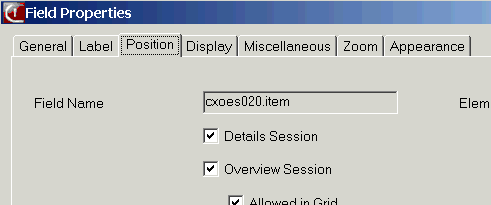
sessions: - Right-click a form field, and on the shortcut menu click Properties. The Field Properties dialog
starts.
On the Position tab, select whether the
field is displayed in the Details session or in the Overview session or in both
sessions. - To move to the other fields, click the navigation buttons in
the dialog.
You can view the effect of your changes from within the form
editor: On the File menu, click Show Overview Session. The overview session starts. If you wish to view the details
session, click Show Details Session. To add a field You can add a field to a form based on these
conditions: - The field is defined in the main table of the
session.
- The field is defined in a reference table of the main
table.
- The field is defined in the program (UI) script.
To add a field to the form: - Select the field that is before the field you wish to add.
On the Insert menu, click Field. A new field,
with a label icon, is added.
- Edit the field properties. Define the field name and
attributes in the General tab. If the new field is a table
field, you can select it from a list:
- Click the zoom button next to the Field Name field. The Table Fields (ttadv4529m000) session starts.
- Select a table field. If the field is not in the main
table, use the Find button to select a different table.
- Define additional properties for the field. If a field is a
reference only field, you can clear the Label Code field in
the Label tab to remove the label.
- Depending on the importance of the field, you can select if
you want the field to be displayed in the overview session, the details session
or both.
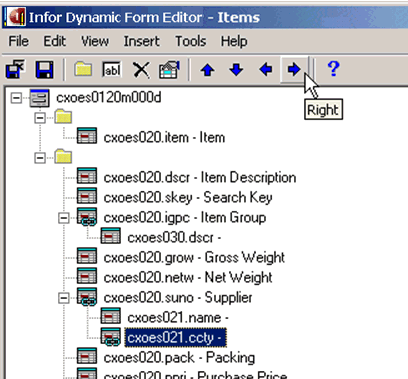
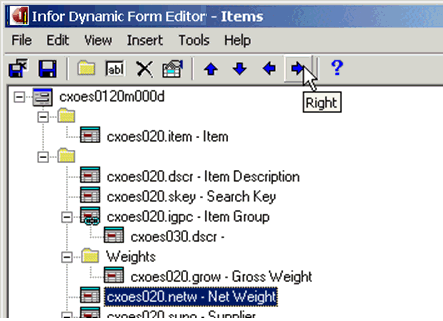
- The new field is displayed in the Dynamic Form Editor. An
indented field indicates that the field is a “child” field. Child fields
display next and to the right of parent fields, at the same indentation level
as fields that have the same parent. To change the indentation of a field, use
the Right and Left buttons in the editor's
toolbar.
- Save the form.
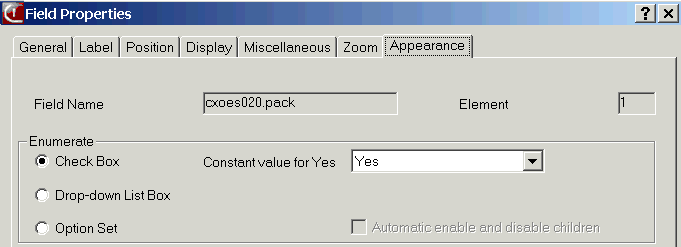
Checkbox Appearance An enumerated domain that has two values can be viewed as a
checkbox. The default appearance is a drop-down list box. To change the appearance of an enumerated
domain: - In the field properties for the field with the enumerated
domain, select the Appearance tab.
- Select Check Box.
When you show the details session, the result shows the field
with the enumerated domain as a checkbox. Alternatively, you can change the appearance of the domain for
any form for an enumerated domain. To do so, insert the domain in the Domains to be Displayed as Checkbox (ttgfd4520m000) session. To edit the form structure The structure of the form affects the grouping of fields and tab
labels. To add a field Group A field group has a title. The fields in the field group are
shown within an indented list. To create a field group: - On the Insert menu, click Group.
- A new group, with a folder icon, is added. The group is added
immediately below the selected field. If you need to, use the Up and Down arrow buttons to position the
field group.
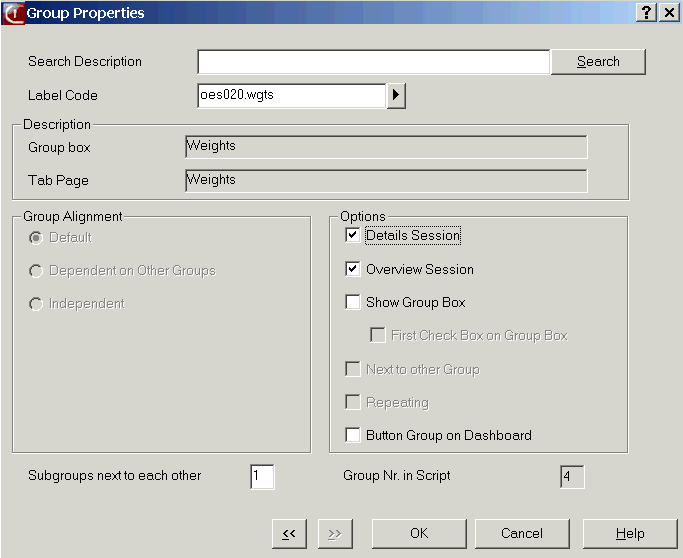
- Click Properties to start the Group Properties dialog. Enter a label for the new group, and specify the
other group properties. For details about the fields in the dialog, refer to
the Dynamic Form Editor's
online help.
- Click OK. The field group label will change
in the form editor.
- Use the arrow buttons to move the fields into the group.
To align groups and fields Field group alignment and field alignment are important in
determining the layout of the form. Because the form generation is dynamic,
this alignment is the main way to control the placement of labels and fields on
the form. Groups and field placement depends on the indentation level of
the field groups, subgroups and fields. The indentation level of a group
determines if the group is a tab, or a field group (sub-group) within a tab.
Sub-groups can be aligned next to each other. The indentation level of the field determines if the field is
placed on a new line (on the left side of the form), or as a field to the right
of a previous field. The alignment of fields in columns depends on the group
alignment selection of the field group that the fields belong to. To adjust the indentation level of field groups and fields,
use the left and right arrow buttons. Example- Field Alignment for
Items The Items form has many fields. In the Weights field group,
you want the net weight to be placed to the right of the gross weight field.
You change the indentation level for the net weight field to be one level to
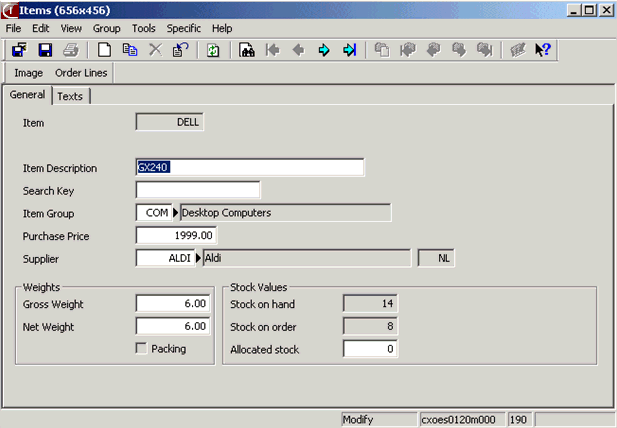
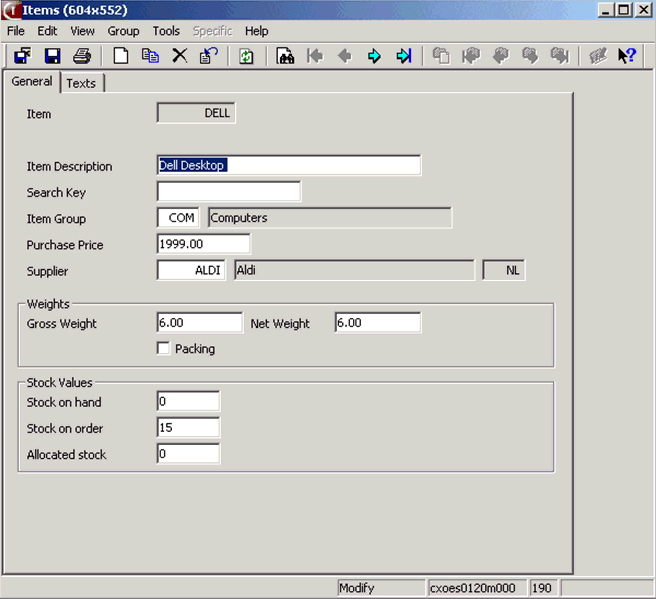
the right. Example- Group Alignment The General group/tab in the Items form contains two
sub-groups: the Weights group and the Stock Values group. To place these
sub-groups next to each other: - Edit the properties of the General group: specify 2 in the Subgroups next to each other field.
- In the properties of the Weights group, select Next to other Group.
- In the properties of the Stock Values group, select Next to other Group.
The tab sequence for fields in subgroups allows you to tab
through the fields in the first subgroup before tabbing to fields in the second
sub-group. To edit the form sequence The sequence of the form allows you to present the data relative
to its importance to the organization. You can sequence field groups or fields.
To change the sequence of a field group or field, select the item and use the Up and Down buttons in the editor's toolbar
to move the item. Alternatively, you can drag and drop the item. Example- Field Sequence for
Items You move the purchase price field above the supplier
information, and the packing field to the Weights field group. The result shows the desired sequence of the
fields. For more information on group and field alignment, refer to
"Alignment" in the Dynamic Form Editor's online help. | |
