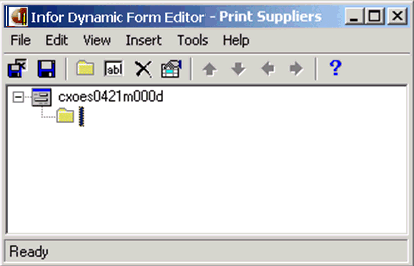
To create a form for a print sessionWhen you create a print session, you must also create the form for the session. The form is used to specify selection ranges and processing options:
For detailed information on the Dynamic Form Editor, see the Dynamic Form Editor's online help. Before you create the form, it is helpful to review the program script. This is particularly true if you created the program script when you created the print session. The program script contains the default selection ranges. You may have to extend the generated program script to query references to parent tables. See this example program script: |**********************************************************
|* cxoes0421 0 VRC B61U a dv00
|*
|* Development User
|* 2005-02-07
|**********************************************************
|* Main table cxoes021 Suppliers, Form Type 4
|**********************************************************
|****************************** declaration section *******
declaration:
table tcxoes021 | Suppliers
table tcxoes031 | Countries
extern domain cxsuno suno.f fixed
extern domain cxsuno suno.t fixed
|****************************** program section ************
|****************************** group section **************
group.1:
init.group:
get.screen.defaults()
|****************************** choice section *************
choice.cont.process:
on.choice:
execute(print.data)
choice.print.data:
on.choice:
if rprt_open() then
read.main.table()
rprt_close()
else
choice.again()
endif
|****************************** field section ***************
field.suno.f:
when.field.changes:
suno.t = suno.f
|****************************** function section ************
functions:
function read.main.table()
{
select cxoes021.*, cxoes031.*
from cxoes021, cxoes031
where cxoes021._index1 inrange {:suno.f}
and {:suno.t}
and cxoes021.ccty refers to cxoes031
order by cxoes021._index1
selectdo
rprt_send()
endselect
}
Create the form for the print session. You can create a form in a variety of ways, this procedure shows you how a typical form is setup for a print session. Step 1. Insert a Group To insert a group in the form:
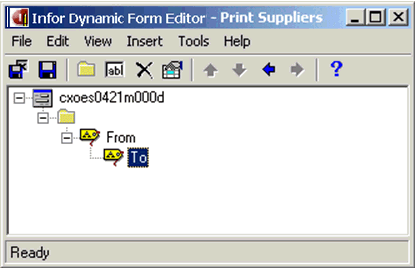
 Insert Group Step 2. Insert Labels Insert a label only field, with the label corresponding to “From”. Note that the position indicator is “above”. This table shows an example of the Field Properties:
Insert a second label only field with a label code corresponding to “To”. The “To” label field is a child of the from label field. This table shows an example of the Field Properties:
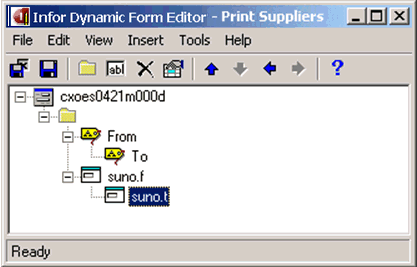
 Insert Label Fields Step 3. Insert Selection Fields The selection fields you insert on the form must correspond to the variables that are used in the main SQL statement in the program script. Insert the "From" field corresponding to the first selection
field. This field is denoted as a table field name appended with a “ This table shows an example of the Field Properties:
Insert the "To" field corresponding to the first selection
field. This field is denoted as a table field name appended with a “ This table shows an example of the Field Properties:
 Insert Selection Range Fields Step 4. Edit Standard Commands Click Standard Commands on the Tools menu. The Standard Commands (ttadv3110s000) session starts. Edit the Standard Commands for the form so that these commands are available:
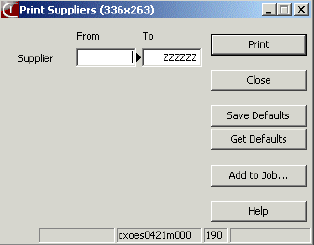
Step 5. Save the form Save the form. You can view the effect of your changes from within the form editor: On the File menu, click Show Details Session. The session starts.  Form Result Save and Exit the form.
| |||||||||||||||||||||||||||||||||||||||||||||||||||||||||||||||||||||||||||||