Simple single-level approval process
This topic provides a step-by-step example for creating a process for routing a purchase order approval. To keep the example simple, t demonstrates a single-level approval workflow that requires only one round of approval to complete the process.

This table explains the purpose of each node or step in the process.
| Activity node | Description |
|---|---|
| Start and End | All processes have Start and End nodes. These nodes are automatically displayed on the Designer canvas when you start a new process. The Start is the first node, while the End is the last node. All other nodes appear between Start and End. |
| User Action | This node is the part of the process where the user is presented with a task in the Inbasket. In the example, the possible actions are Approve or Reject. |
| The process includes two Email nodes, one for notifying if the user approves the purchase order and one for notifying if the user rejects the purchase order. |
Design the process on paper
Before launching Infor Process Designer, define exactly how the process should function. This planning step is critical because it helps streamline process creation and simplifies troubleshooting if the process does not function as designed.
Analyze what you want the process to do
For our example process, Bob Johnson, who is the Procurement Manager for Example Company needs approval for a purchase requisition that has been sent by a member of the IT department. Jane Doe, the Chief Information Officer for Example Company, signs off on all requisitions from IT.
When the process runs, Jane will then receive an action item in her Inbasket to approve or reject the purchase request. Bob receives an email with Jane's decision and the process ends.
Block out the small steps that make up the action
For our example, the small steps are shown below.
-
The process starts when a purchase order is submitted.
-
Jane receives a work action in her Inbasket which gives her the option to accept or reject the purchase request.
-
Bob receives an automated email informing him of Jane's action.
-
The process ends.
Map the small steps to activity nodes
For our example, these activity nodes are needed:
-
User Action: This is where we configure a work item to be sent to Jane's Inbasket.
-
Email for Approve action: If Jane approves the purchase, this automated message is sent to Bob.
-
Email for Reject action: If Jane rejects the purchase, this automated message is sent to Bob.
Now we are ready to begin creating the process using Infor Process Designer.
Start a new process
-
From the Designer canvas, click File / New to start a new process.
A blank canvas displays. By blank canvas, we mean only the Start and End activity nodes appear on the canvas.
All processes must begin with Start and have End as the last node. The nodes are automatically displayed and cannot be deleted.
Add and connect the node
-
From the User Interaction group of activity nodes, select User Action ad drag it onto your canvas.
-
Use the Connect tool to connect the User Action node to the Start node.
Assign a name to the node
-
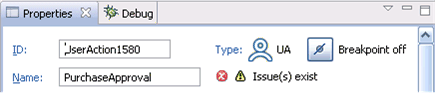
By default, all activity nodes have properties for ID and Name which are displayed on the top portion of the Properties dialog box. These properties can be changed.
For our example, we will change the Name from its default of UserAction1580 to a more meaningful name of PurchaseApproval.
Create actions for the node
-
With the User Action node selected on the Designer canvas, click on the Properties pane, which, by default, is anchored on the bottom left of the Designer.
-
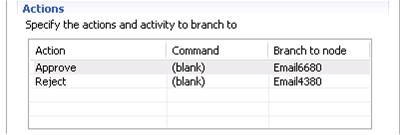
Create the actions for the node. For our example, we want to create Approve and Reject. These will be the only actions that the user (Jane Doe) can take when a purchase order request appears in her Inbasket.
-
Click the Action tab.
-
In the Actions portion of the tab, click Add (+) to open the Action Builder.
-
Specify the name of the action you want to create. For our example process, we will perform this step twice, once for the Approve action and once for the Reject action.
-
Assign the work item to a user
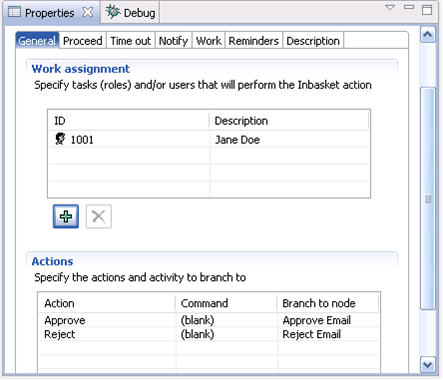
Use the General tab to assign the user who will perform the approve or reject action. In our example, we are assigning the work to a specific person, Jane Doe, the CIO.
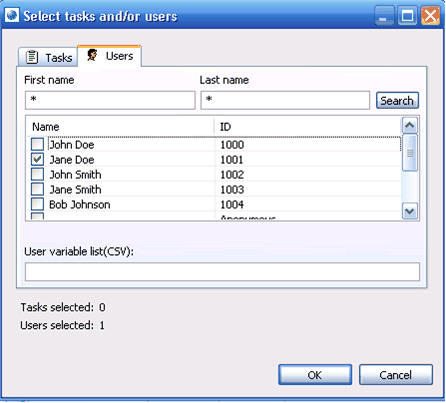
To locate a user to which you can assign the approve or reject action to, go to the General tab in the Work assignment section. For our example, we will assign to a specific user, Jane Doe, the CIO for Example Company. To make this assignment:
-
Click the Add (+) button
-
Click the Users tab and then Browse to locate and select Jane Doe.
Configure the Proceed tab
The tab is used to determine when the User Action has been successfully executed so that the process can begin executing to the next activity node.
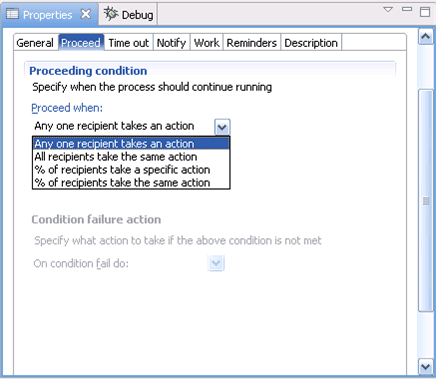
To simplify our example, we have selected the option when Any one recipient takes an action. Jane is the only user who will be receiving the action in our case. When she responds, the appropriate Email node will execute.
In general, you can select when you are sending to multiple users but you only need one of them to approve. The Proceed tab can handle more complex scenarios, one of which we will describe in a later section.
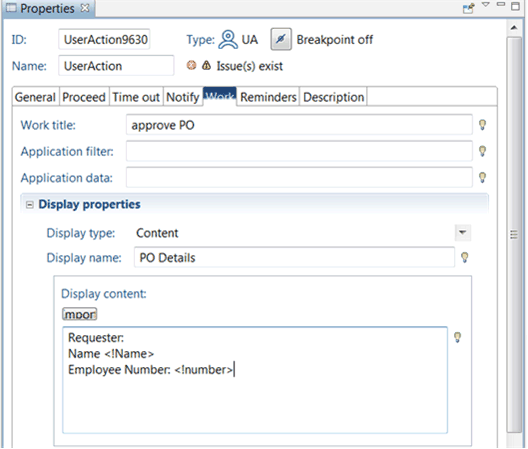
Create the work item display for in the user's Inbasket
Use the Work tab to show what information will display in the Inbasket for our work item.
For our example, we will configure these items:
-
Work title: This is the name of the of the item as it shows in the Inbasket. It is similar to a subject line in an email box in that it is what Jane sees before she clicks the item to open it. You can use a Work title that makes it clear what the user needs to do. For our example, we are using approve PO.
-
Display type: The type of material that is displayed in the Inbasket. A URL or a Lawson form can be displayed. For our example, we selected Content. This is the simplest type of display because what you specify on this tab is what the user sees in the Inbasket.
-
Display name: This is the name that appears on the inside of the work item after the user opens it.
-
Display content: This is the information that, in our example, the user needs to make a decision about the purchase order.
The Name and Employee Number of the requester, the person who wants to buy the item that Jane will sign off on, is displayed.
Our example puts brackets around <Name> and <Employee>. This information is a variable and is supplied by the trigger method, for example, an Infor Process Automation service or another activity node. For this example in which we are focusing on using the Designer, triggering the process to execute is not considered.
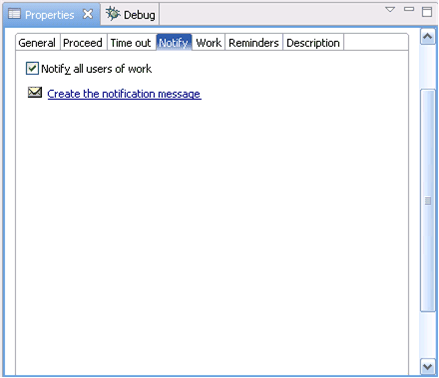
Configure the Notify tab
The Notify tab is used for sending a message to a user to tell them that a work action has been sent to their Inbasket.
On the Notify tab:
-
Ensure that the flag is selected.
-
Click the Create the notification message link.
On the Notify Message dialog box, populate the From:, Subject:, and Contents: fields.
Click the Browse button if you want to locate and open a file that contains information to be copied and pasted.
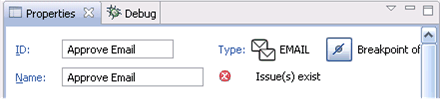
Add two Email nodes to the Designer canvas
Now we are ready to add and configure the nodes that will send out email messages to the process initiator (Bob) telling him what action (Approve or Reject) Jane has taken.
-
From the Notification group of activity nodes, click Email and drag it to the Designer canvas.
-
Repeat this step so that there are two Email nodes on the canvas.
-
Change the Name and ID fields for the nodes. Name one Approve Email and the other Reject Email. This will help you to identify them when you are configuring.
Connect the nodes to the actions
-
With a connector selected, connect the User Action node to one of the Email nodes.
When you perform this step, a dialog box prompting you to select an action to be associated with the message is displayed. In our example, this is called a Branch condition because there are two possible actions that could be taken by the user.

When you have
Perform this step for both the Approve and Reject messages.
Configure addresses for the email message
-
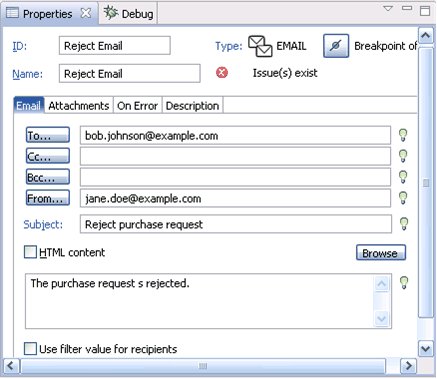
For our example, the approve or reject email messages are coming from a specific person, Jane Doe, and are being sent to Bob Johnson.
Locate the recipient of the message (Bob Johnson). Click To: / Email tab and then click Browse. Select Bob Johnson from the list.
-
With your cursor in the From: field, repeat the above steps to select the sender (Jane Doe).
Configure the content of the messages for the Email nodes
-
For both the Approve and Reject actions, specify the text to be displayed. Populate both the Subject line and the body of the message.
Test, upload, and trigger a process
We have now completed creating the process. Before the process starts, these steps need to be taken:
- Testing the process on a test server
- Uploading to a production server
- Configuring the conditions that trigger the process to run
Because we are focusing on learning how to use the Designer, we will skip discussions of testing, uploading and triggering. Instead, we can learn how to use the Designer by enhancing our simple process with some more advanced functionality.