Configuring a file receiver
When you configure a file receiver, you configure how Infor Process Automation handles the file data that comes in from the channel.
- Specify this information:
- Channel Name
-
This is a display field that shows the channel for which you are configuring a receiver.
Verify that the channel is correct.
- Receiver
-
Specify a name for the receiver. The name can include numbers and special characters. We recommend that you use a name that reflects the purpose of the receiver.
- Description
-
Optionally, provide a description for the receiver such as details on what the receiver is used for or what it is about.
- File Name
-
Specify the file or files that the File Channel Receiver will process. The files must in the format of a regular expression. This enables the receiver to process more than one if that is necessary for your application.
Ensure that the regular expression is specified correctly to prevent unintended results.
For more information, see Wild cards.
- Ignore Delete Errors
-
Select this option to ignore any file deletion errors during the file scanning process.
The file channel deletes the file from the location being scanned after it processes the file. If the file channel does not have delete access to the server location being scanned, the file channel creates an error and stops. Some users may not give delete access to a third party program. For example, they might choose to handle file deletions themselves after file has been processed or downloaded. In that case, select this option to ignore the error and continue on with the channel processing.
- Process
-
Select the Infor Process Automation process that will activate for workunits that are created from files associated with this receiver.
- Data
-
Select the type of data that will be provided to the workunit when a file is received:
-
File Name: A single workunit is created and triggered. Only the file name is included in the WorkunitInputData associated with the workunit.
-
File Data: A single workunit is created and triggered. The data contained in the file is included in the WorkunitInputData associated with the workunit.
-
File Line: A workunit is created and triggered for each line in the file. The line content is included in the WorkunitInputData associated with the workunit.
-
- Startup Type
-
Select one of these options to determine when the receiver starts up:
-
Automatic: The file transfer starts up automatically when the system starts.
-
Manual: The file receiver does not start automatically when the system starts. The administrator must start it manually.
-
Disable: The file receiver does not start automatically, nor can it be started manually.
-
- Last Message Received Time
-
This display field shows a time stamp of the most recent time a file was processed by the receiver.
- Status
-
This display field shows the current status of the receiver.
- Last Error Time
-
This display field shows the time when the most recently received error occurred.
- Last Error Type
-
This display field shows the type of error of the most recent error that was received. The system will show "Channel" or "Receiver."
- Last Error
-
This display field shows the text of the most recent error that was received.
- Test Connection
-
After saving your configuration, click this button to test the new or updated connection. Alternatively, select Actions > Test Connection.
If the properties are set up correctly, a success message is displayed. If not, an error message is displayed.
Note:The success message looks like this:
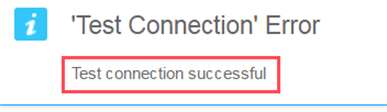
Disregard the "Test Connection Error" text.