Creating the list and detail panel: Version 1, using default behavior of controls
This section describes the simplest version of the mashup we plan to create. It uses default behavior of controls.
Create a new project
-
From the Designer File menu, click New / New Project.
You are prompted to supply a name for the project.
-
Type a name that briefly identifies what you want the mashup as a whole to do.
This file will be an organizer for all other files (.xaml files, images and so on) associated with the mashup. It will be saved with the extension .manifest
-
When you are finished typing the project name, click Save.
The Designer canvas opens.
-
In the Properties tab in the bottom-left of the designer, populate the following fields as needed:
- Name: Assign a name to the project. This is an important field. It contains the name
that is used to associate all XAML files with the project and it follows the project
throughout its lifecycle.
Be sure to assign a name that is meaningful to you and others who need to use the mashup. Use alphanumeric characters only, no white spaces and no special characters. Do not include versioning information here.
- Author: Type your name, initials or other identifier
- Description: Type a textual description of the project to provide quick, explanatory information.
- Version: Type a version level for the project. Use two to four numbers only, for example, 1.0, 1.0.0, or 1.0.0.0
- Profile: Select the Lawson Smart Reports Designer profile that is associated
through LifeCycle Manager
Click to select an existing profile or Create to create a new one. If you select Create, you will be prompted to assign a name to the profile.
By default, profiles are stored on your local machine in YourDocumentLocation\XAMLprofile.xml.
- Name: Assign a name to the project. This is an important field. It contains the name
that is used to associate all XAML files with the project and it follows the project
throughout its lifecycle.
- Click from the toolbar when you are finished selecting options. By default the .manifest project file will be stored in C:\My Documents\XAML. You can select a different location when you save the project.
Create a new XAML application
Now we are ready to create the new application or .xaml files. .Xaml files contain the instructions (code) that tells your mashup how to behave. You might have several .xaml files in a project.
-
From the Designer File menu, select New / New XAML
You could also select New / New Xaml from Template but for this example, we are creating the .xaml application without a template.
-
At the prompt, type a name for the .xaml file. By default, it will be saved to CYourDocumentLocation\XAML.
-
Because we have a project open, we will be prompted to add the new .xaml file to the project. For our example, we will respond Yes here.
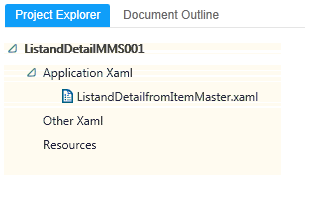
The new .xaml file will be added to the list of files in Project Explorer (top-left pane of the designer canvas.)
A .xaml must be associated with a project in order to be deployed, but this can be done at any time. You could respond No to this prompt.
We are now on the Designer canvas. Some boilerplate .xaml code has been added.
We are ready to add and configure controls for the mashup.
Designing the mashup
The sub-sections that follow describe how to add and configure controls for the mashup. But, first, we need to understand the concept of the grid.
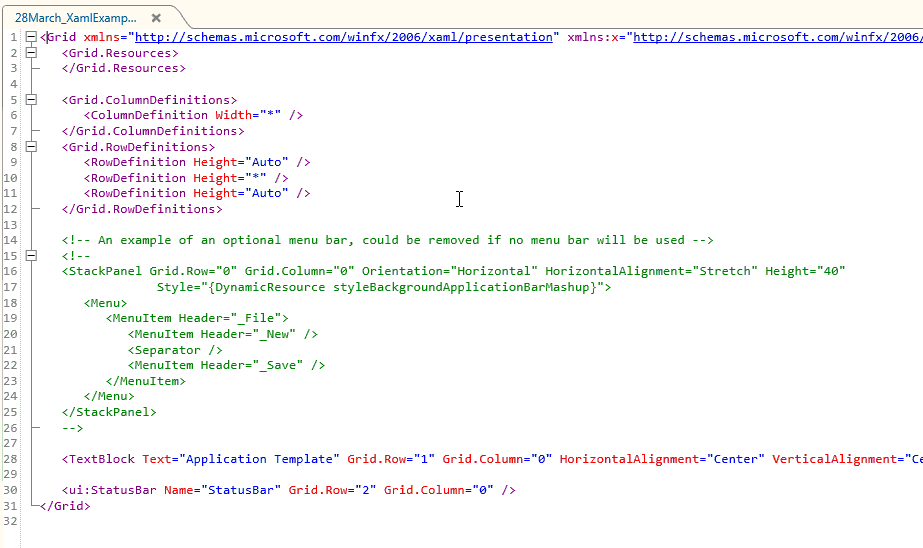
The grid is a table or a chart -- you could even think of it as an electronic sheet of graph paper if that helps you visualize -- in which you tell your application where to place each control that you want to use in your mashup.
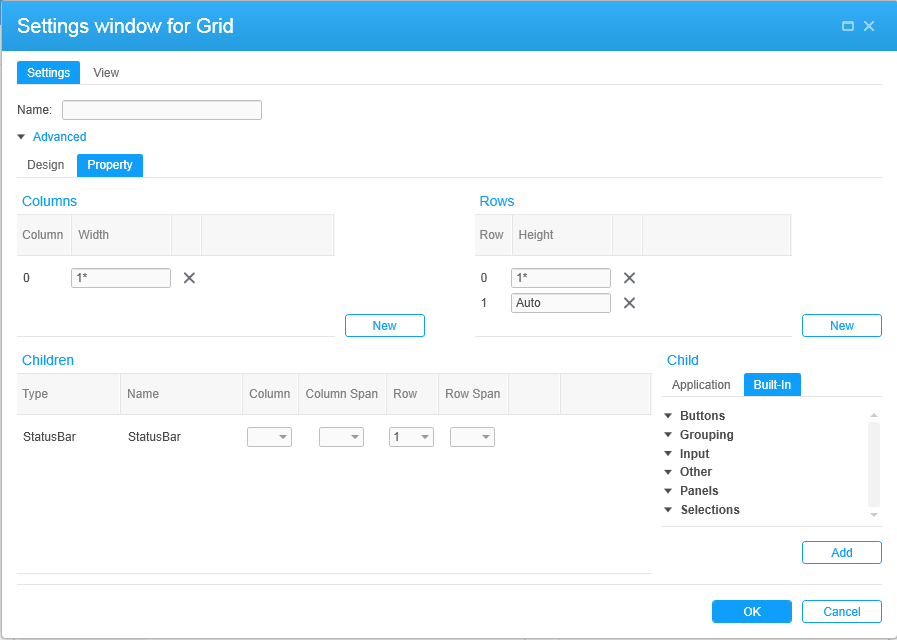
When we click Tools (the gear icon) from the toolbar, a grid appears in a new window above the .xaml code. When you access the grid for the first time in a new application, a few commonly used controls will be on the Designer canvas initially. In our case, we already have StatusBar.
In addition to the default controls, the Designer also automatically adds a column and two rows to the canvas.
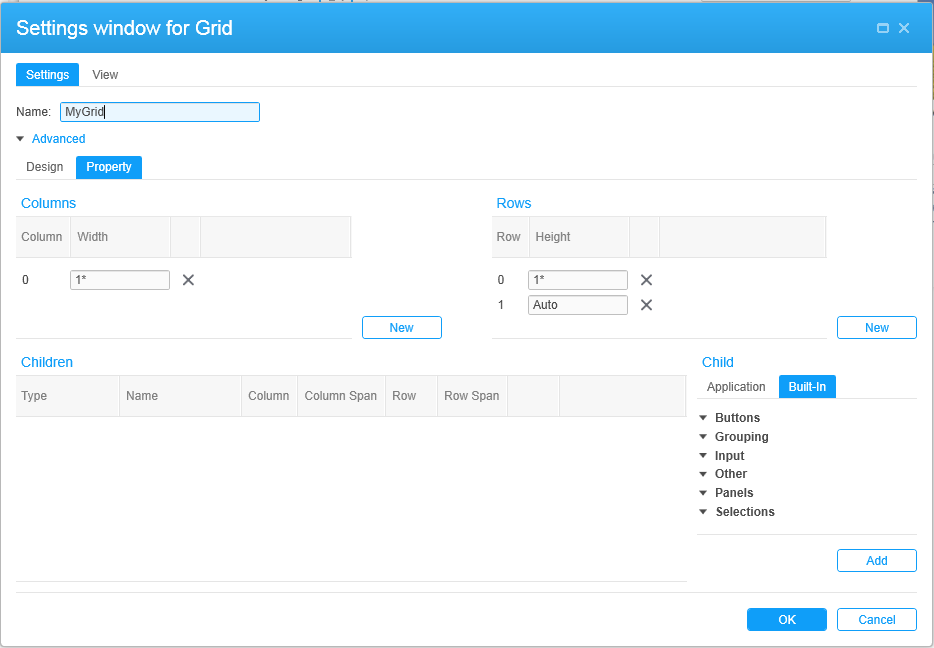
Even when it is not required, it is always a good idea to name the components of a mashup that have a Name field. Because we are creating a new application, we start on a new grid. We will assign the name "MyGrid." (Name fields are alphanumeric but cannot include spaces or special characters.)
We will start by deleting any controls placed on the grid by default that we do not want to use. In our case, we will delete the StatusBar. To delete the StatusBar, click in the StatusBar control row. When the control is highlighted and the context menu appears to the right of the control, click the X to delete the control.

The sections that follow describe adding and configuring other controls needed for our mashup application.
Adding and configuring a ListPanel
To add a ListPanel control to your application, click the Application tab, click M3 Transactions, and then double-click ListPanel.
You will automatically be on the screen for configuring the ListPanel. There are a number of options that can be manually configured but for our simple initial application, we will configure only a few. Even so, the resulting mashup will be complex and powerful while being quick and easy to create.
For our application, we will:
-
Populate the Name field to differentiate this ListPanel from any other ListPanels this application might use. (We will use the name "MyListPanel".)
-
Move to the capture portion of the screen (bottom right), type the name of the program our new ListPanel is based on (MMS001) and then click the Start Capture button.
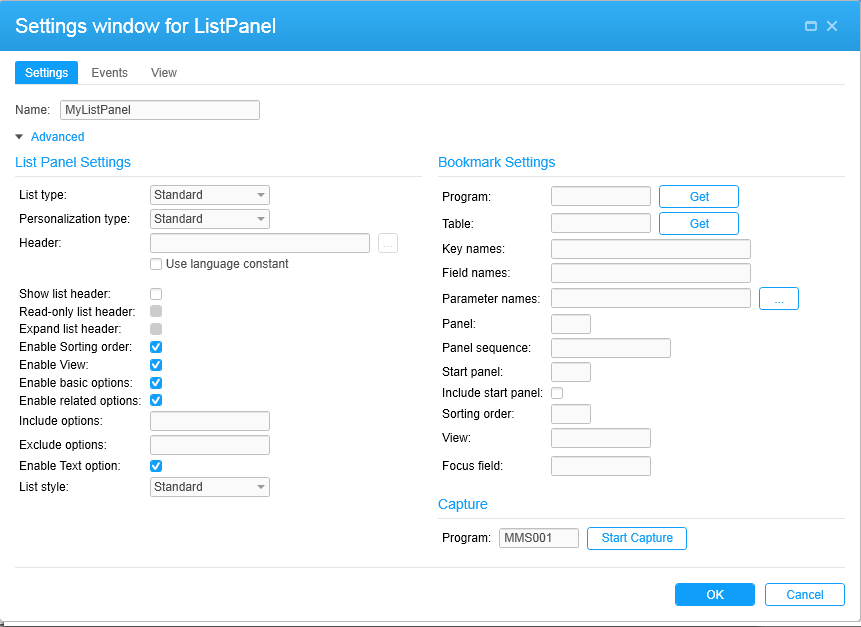
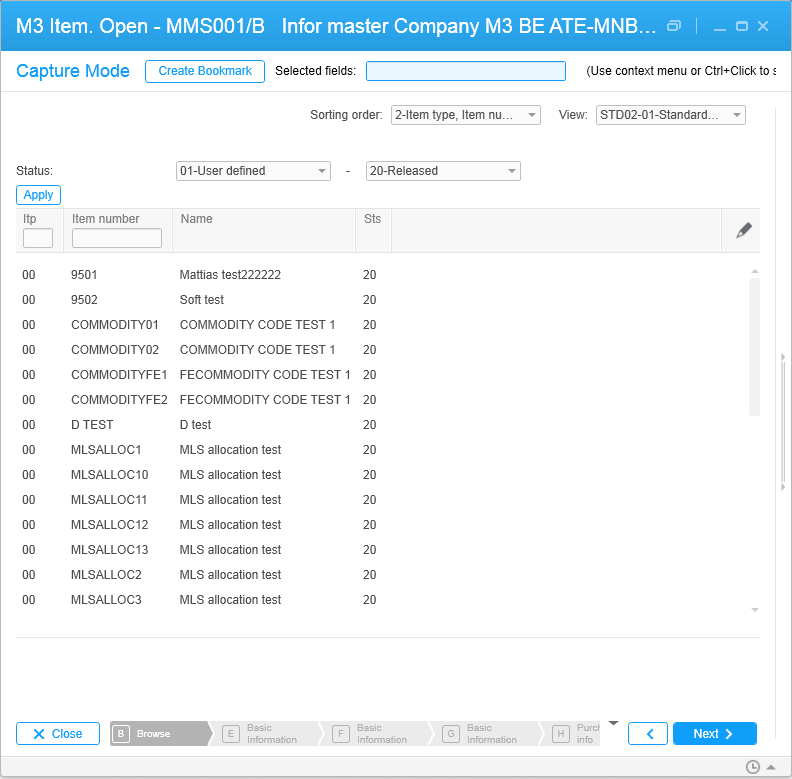
It can take several seconds to process. You will be on a new window where you must navigate to an MMS001 detail screen. Click on a field and then, from the toolbar at the top of the screen, click Create Bookmark.
-
Close the MMS001 window when you see the "Created Bookmark" message. You will be returned to the Designer with required fields populated in your settings window.
-
Accept defaults for the rest of the options on the settings window. Click OK to return to the Designer canvas.
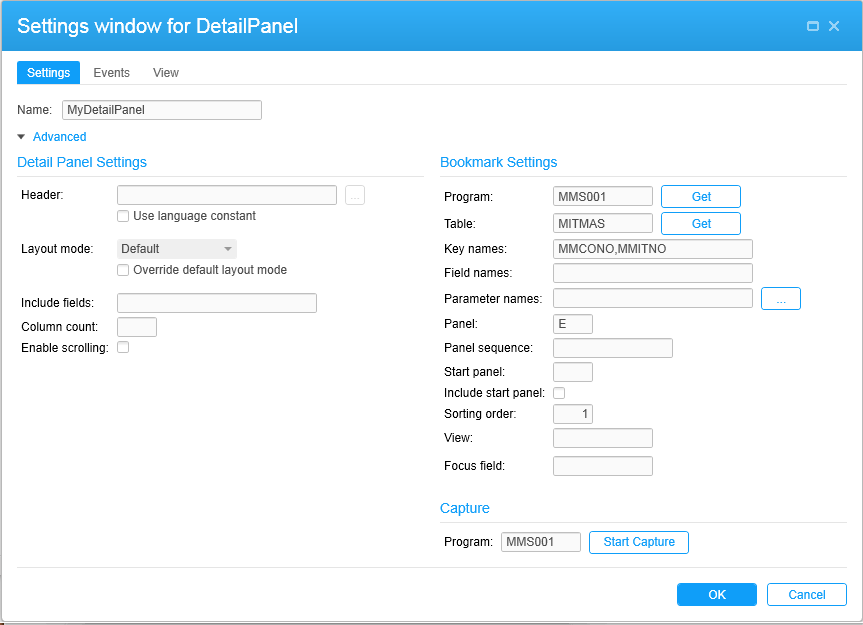
Adding and configuring a DetailPanel
For the DetailPanel, we will perform almost the same steps that we did for the ListPanel.
-
Populate the Name field to differentiate this DetailPanel from any other DetailPanels this application might use. (We will use the name "MyDetailPanel".)
-
Click the "Enable scrolling" flag (right side of the DetailPanel settings window). This is necessary because a DetailPanel might contain so much information that it cannot fit in the mashup application window without scrolling.
-
Type "MMS001" in the bookmark capture program name field and then click Capture.
-
Move to the capture portion of the screen (bottom right), type the name of the program our new DetailPanel is based on (MMS001) and then click the Start Capture button.
It can take several seconds to process. You will be on a new window where you must navigate to an MMS001 detail screen. Click on a field and then, from the toolbar at the top of the screen, click Create Bookmark.
You will be returned to the panel control dialog box with required fields populated.
-
Move to the capture portion of the screen (bottom right), type the name of the program our new ListPanel is based on (MMS001) and then click the Start Capture button.
It can take several seconds to process. You will be on a new window where you must navigate to an MMS001 detail screen. Click on a field and then, from the toolbar at the top of the screen, click Create Bookmark.
-
Close the MMS001 window when you see the "Created Bookmark" message. You will be returned to the Designer with required fields populated in your settings window.
-
Accept defaults for the rest of the options on the settings window. Click OK to return to the Designer canvas.
Note that:
-
Using bookmark data is required for a DetailPanel. (It is optional for a ListPanel but, in our application, we chose to use it.)
-
In our example, we are accessing bookmark data from the MMS001 program for both the ListPanel and the DetailPanel. However, that is not a requirement. We could have, for example, obtained bookmark data for the ListPanel from one program and bookmark data for the DetailPanel from another program.
-
Only panels that have been enabled for bookmarking can be used in mashups that require bookmark data. Information about how to determine if a panel has been enabled for bookmarks is another section.
Add a separator control to your screen
This step is not necessary but for purposes of this example, we will add a Separator to the mashup. For now, we will just add it. In a later step, we will tell the mashup where it and other controls should be physically placed on the mashup.
From the Designer canvas, click the Built-in tab and then open the Other controls. Add the Separator control by double-clicking (or by clicking once and then clicking the Add button). We will accept all defaults for the Separator control by clicking OK.
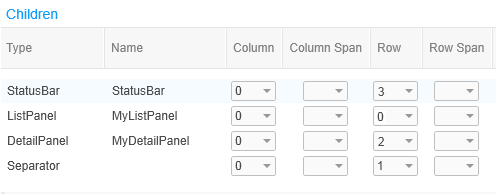
The Separator is now added to "Children" portion of the Designer canvas. We now have four controls on our screen even though only three have been allowed for by the grid defaults. We need to add a row for this control which we will do in a later step.
Adding an event
Now we need to tell the ListPanel when to display the DetailPanel.
We do this from the ListPanel settings window. From the Designer canvas, double-click the ListPanel control to open the settings window. Now click the events tab and then click New.
In the Source Event field, select "Startup." This tells the mashup that when a user selects a record in the ListPanel, the DetailPanel for that record opens.
You can leave other settings per defaults. Click OK to return to the Designer canvas.
Placing the controls in the appropriate locations on the grid
We will now do the following things:
-
Add a row to the grid to accommodate the Separator control.
Do this by clicking the New button that appears nearest the Row portion of the designer screen.
-
Place the objects in the rows in which we want them to appear.
We want the controls to appear in this order shown below, where "0" is assigned to the first control in the list, "1" is assigned to the second control, and so on.
-
MyListPanel = 0
-
MySeparator = 1
-
MyDetailPanel = 2
-
MyStatusBar = 3
When we are finished configuring, the Children portion of the designer should look like this:
-

Previewing the mashup
At any time, you can click the Preview tab to view your application. If you notice things you want to change, you can click the Edit icon (pencil) to return to the designer. If you are a XAML developer, you can also click the Code tab to directly manipulate the XAML code.
Creating the .lawsonapp
The final step is making the application (.lawsonapp) that makes your new mashup available for deployment to other users by your system administrator. These steps are in another section.