Adding new destination table
Add a new destination table as follows:
- Click Add. The Add a Destination Table screen is displayed in the right panel.
- Provide the technical name for the new table to be created, for example, BANK_DETAILS.
- In the Friendly Table Name field, add an easy to understand and properly formatted name for this table. This field will be displayed in Infor Risk & Compliance and will be how users view this table.
- Objects may be classified as Master data or Transactions data objects. This is a mandatory field and new destination objects must be sorted into one of these categories
-
Click
Save to save the new
table and to continue editing the rest of the table attributes.
You will see a message at the bottom right of the screen confirming that the new destination table has been added. Once you save the new destination table, you will see a list of pre-defined columns for the table as well as some automatically referenced tables.
- Select the module associations that the table will be associated with. A module is a logical grouping of Insight objects such as Accounts Payable, Accounts Receivable.
-
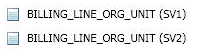
Source variant-To add a source variant, click
Settings. The Manage
Source Variants window is displayed. Click
New or right-click to add
a new source variant. In the Variant description, specify the name of the
destination table and the source variant number. For example, if for the table
BILLING_LINE_ORG_UNIT you want to add source
variants, then you should enter BILLING_LINE_ORG_UNIT_1 and BILLING_LINE_ORG_UNIT_2. When you do this, then on the Mappings tab, the table will be displayed as in the example below, indicating that data for it is fetched from 2 sets of source tables:
- From the drop-down list, select the column name by which this object can be searched on the Global Search page of the Infor Risk & Compliance application. The selected column name will appear as a link on the Global Search page.
- Provide a description for the column selected in the Global Search Name field. This description also appears on the Global Search page of the Infor Risk & Compliance application.
- Select a Category.
- If you select the option as Transaction, you must select a Parent table name and the Date Scope Column from the drop-down list. If in the Parent Table field you select self, then a Date Scope field appears. Select a date range for scoping data. All the child tables that point to the selected parent will use the selected date field for scoping data
- Select the table settings that you require. These settings control how Infor Risk & Compliance will work with the table in terms of extraction, analysis and rule building capabilities. Select the check box next to the required setting to select that setting.
-
Save the table by clicking
Save on the tool bar.
Once the table is saved, you can view the columns for the new table.
Note: When you delete a table that is referenced by other tables, all references will also be deleted.