Moving Application server and Database from SQL Server 2016 SP2 to SQL Server 2019
Perform these steps to move your existing application server and database from SQL Server 2016 SP2 to SQL Server 2019.
Note: Copy the CoreDB.Report and ReportTempDB databases of the source
server and paste to some other drive.
-
Detach the CoreDB, Report, and ReportserverTempDB from the source
database server and attach to the destination database server. Perform these
steps:
-
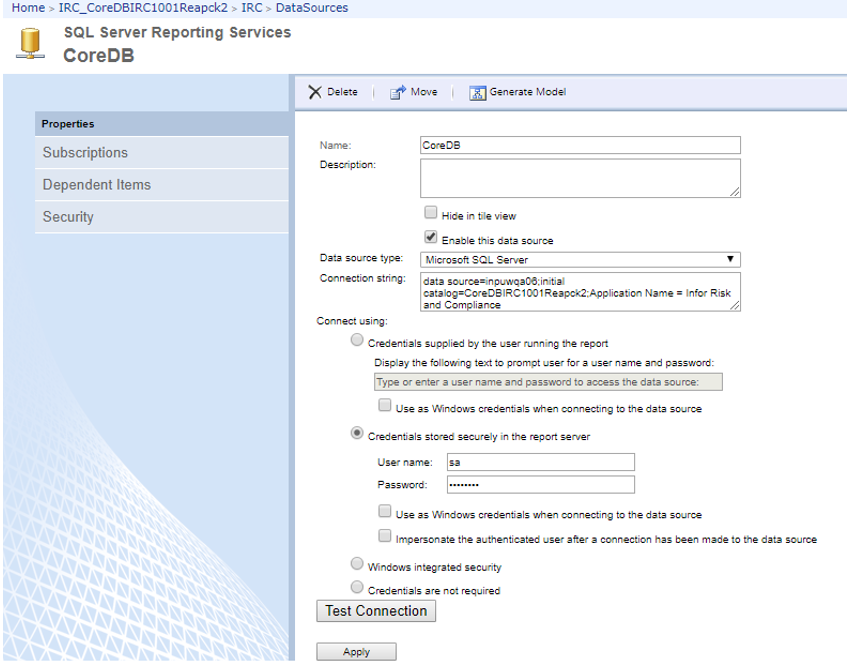
Verify connection string for IRC data source. For example, Ensure
that the database connection details are populated. In case , the database
connection details are not populated, fill in the connection string and
credentials by referring to the old Report Server CoreDB data source. Update
data source in connection string with new server name so that the data source
points to the new Database Server.
-
Run these SQL queries on the destination IRC database server.
- UPDATE AuthenticationSchemes SET AuthenticationServer = '##ServerPublicCN##' WHERE ID = 1
- UPDATE BizRightsSettings SET SettingValue = 'https://##ServerPublicCN##:##ServerPublicCNPort##' WHERE SettingName = 'BizRightsServerURL'
- UPDATE BizRightsSettings SET SettingValue = '##ServerPublicCN##' WHERE SettingName = 'BizRightsServerName'
- UPDATE TMBizRightsAdapters SET URL = 'https://##ServerPublicCN##:##ServerPublicCNPort##/TMAdapter' WHERE ID = 1
- UPDATE PI_CONFIG SET STRING_VALUE = 'https://##ServerPublicCN##:##ServerPublicCNPort##' WHERE DESCRIPTION = 'WebServerURL'
- UPDATE PI_CONFIG SET STRING_VALUE = '##ServerPublicCN##' WHERE DESCRIPTION = 'WebServer'
- UPDATE PI_CONFIG SET STRING_VALUE = '\\##ServerPrivateCN##\UploadStaging\XI_ALL_ORCL_LOAD.xml' WHERE DESCRIPTION = 'UR_ORCLXformMetaData'
- UPDATE PI_CONFIG SET STRING_VALUE = '\\##ServerPrivateCN##\UploadStaging' WHERE DESCRIPTION = 'UR_StagingFolderShare'
- UPDATE PI_CONFIG SET STRING_VALUE = '\\##ServerPrivateCN##\UploadStaging\XI_ALL_SAP_SAP_LOAD.xml' WHERE DESCRIPTION = 'UR_SAPXformMetaData'
- UPDATE PI_CONFIG SET STRING_VALUE = '\\##ServerPrivateCN##\Logs' WHERE DESCRIPTION = 'BizRights-XILogs'
- UPDATE PI_CONFIG SET STRING_VALUE = '\\##ServerPrivateCN##\UploadStaging\CDM_LOAD_GENERIC.xml' WHERE DESCRIPTION = 'UR_GenericXformMetaData'
- UPDATE PI_CONFIG SET STRING_VALUE = '\\##ServerPrivateCN##\UploadStaging\XI_ALL_PSFT_LOAD.xml' WHERE DESCRIPTION = 'UR_PSOFTXformMetaData'
- UPDATE PI_CONFIG SET STRING_VALUE = '\\##ServerPrivateCN##\UploadStaging\XI_ALL_OFAC_LOAD.xml' WHERE DESCRIPTION = 'UR_OFACXformMetaData'
- UPDATE PI_CONFIG SET STRING_VALUE = '\\##ServerPrivateCN##\UploadStaging\XI_ALL_ProcessInsightforION_ION_LOAD.xml' WHERE DESCRIPTION = 'UR_IONXformMetaData'
- UPDATE
TMBizRightsAdapters SET GUID = '##ADAPTERGUIDID##' WHERE ID = 1
Note: The GUID ID can be obtained from Installed Path > BizRights > Adapters > TMonitor > Settings > TMAdapterConfig.xml file in the destination database server. See this node

Note: The #ServerPrivateCN# must be replaced with the destination application server name.