Layout concepts
You can resize and reposition dashboard content much as you like, but there are some constraints. For example, a minimum size can be specified for reports. This might prevent you placing a report widget in certain positions.
Hotspots
When empty, dashboards have hotspots at their corners and edges. Widgets have hotspots at their edges and centers.
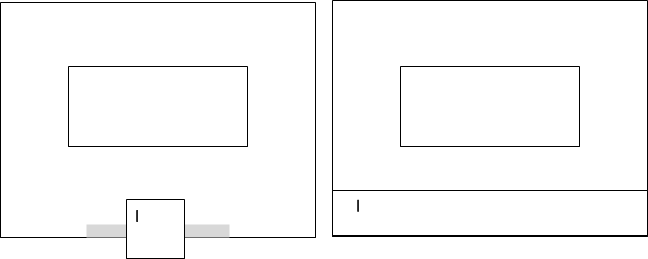
A hotspot is displayed when you drag a widget onto a dashboard and the mouse pointer is over the hotspot.
As you add widgets to a dashboard, further hotspots become available.
If you pause over the hotspot, a preview is displayed beneath the widget. The preview indicates the position the widget will occupy if you drop it. The preview displays a rectangular hotspot when the mouse pointer is halfway along an edge of an existing widget or the edge of the dashboard.
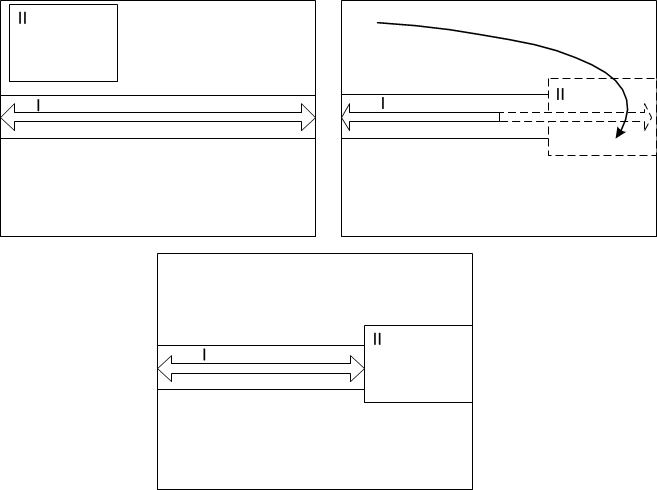
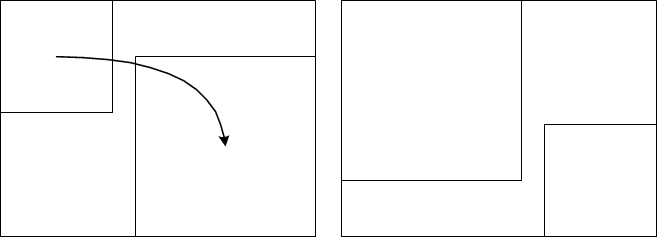
Initially, the hotspots at the edges of a dashboard occupy a position mid-way along the length of the edge. In this example, when dropped, Widget I expands horizontally along the length of the edge. It also expands vertically to occupy half the available space.
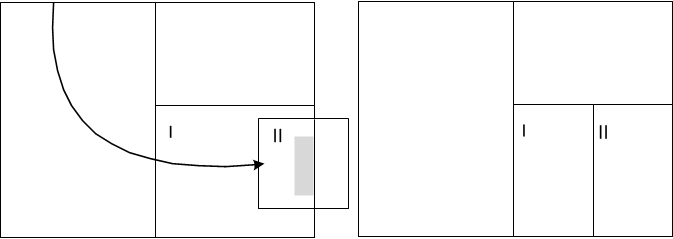
But in this second example, the left and bottom edges of the dashboard are already partially occupied by Widgets I and II, leaving an empty space between the bottom of Widget I and the top edge of Widget II.
When Widget III is dragged over the space at the left hand edge, a hotspot is displayed. When dropped, Widget III contracts vertically to occupy the empty space, and expands horizontally to occupy half the available space.
Tile
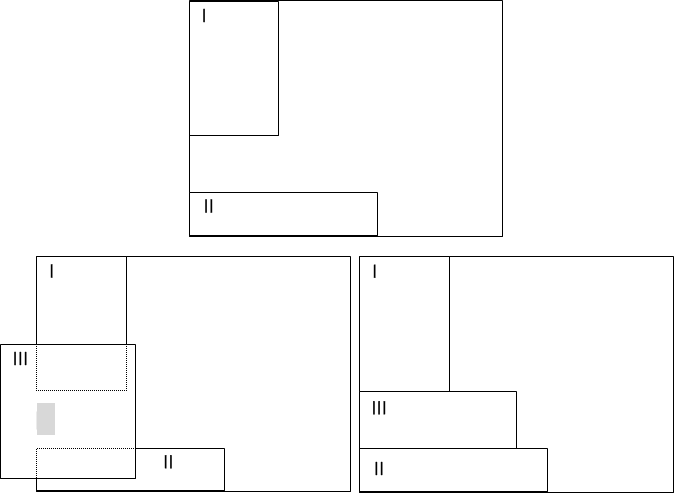
Here, Widget II is dropped when the mouse pointer is above a hotspot of Widget I. Widget II captures half the space occupied by Widget I:
Swap
To swap the positions of two widgets, drag one widget over the other and drop when the central hotspots are aligned:
Push and squeeze
To push one widget with another, use one of these the options while dragging the widget: press the key, or press both mouse buttons. If a widget is pushed against an edge of the dashboard or against widgets that cannot be further compressed, it is compressed. It does not return to its original size if the pushing widget is withdrawn.
If you withdraw the pushing widget before you drop it, the squeezed widgets revert to their original dimensions.
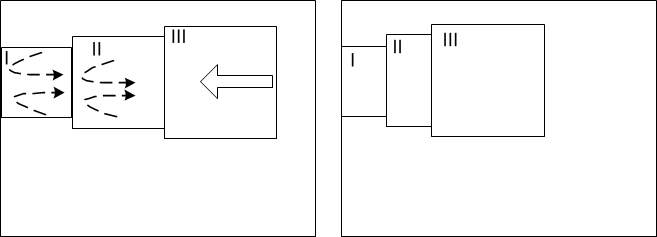
Push between
To push a widget between adjacent widgets, drag it over the adjacent widgets, press Shift, and then drop the widget:

Fill
In the properties of a widget you can specify that the widget automatically expands horizontally or vertically to fill the available space:
- Click in the widget's toolbar.
- Click the Layout tab.
- Select Fill Horizontally or Fill Vertically.
This is important in creating dashboards which auto-size. You can place widgets at either end of a widget that has horizontal or vertical fill:
- Drag a widget over the end of a widget with horizontal or vertical fill.
- Drop the widget when a hotspot is displayed at the edge of the widget underneath.
The filled widget shrinks to accommodate the new widget but retains its fill setting. It will expand again if Widget II is removed: