Configuring Visual Workflow
The appearance of the steps (i.e., nodes) in the tab can be configured by role.
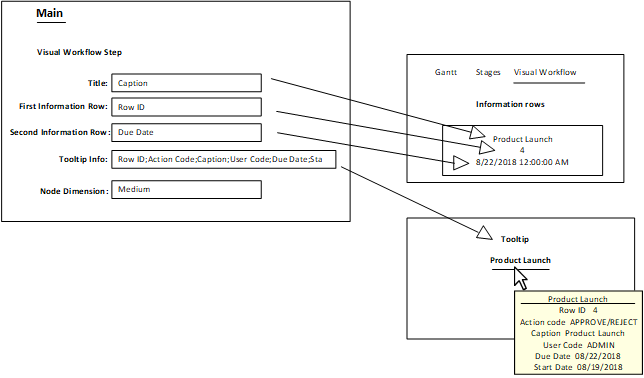
- Specify this information:
- Title
- Specify the content that is used to derive the title for each node. For example, specify Caption to display the description of each action step in the node title.
- First Information Row
- Select a column name, such as Line ID, from this list. The data from this column is displayed in the first row of the Visual Workflow node.
- Second Information Row
- Select a column name, such as Due Date, from this list. The data from this column is displayed in the second row of the Visual Workflow node.
- Tooltip Info
- Specify the column names that are used to derive the tooltip information for each node. A semi-colon is inserted in between each column name.
- Node Dimension
- Specify the size of the node. The choices are: Small, Medium, and Large. If the titles are too long to display on one line, the text is wrapped to fit within the node.

- Click .