Creating a location calendar
Location shop calendars can be shared among users. These shop calendars can be used to calculate the tasks for users who belong to the same region.
These calendars do not have a base calendar.
When you define a location calendar, the properties from the
@DFLTSHOP calendar are copied to the location
calendar. Create rules can be used to copy properties from calendars other than
the
@DFLTSHOP calendar.
-
In the
Main tab, specify this
criteria.
- Description
- Specify a description.
- Calendar Type
- Select Location Calendar.
- User/Location
- Specify a valid location, such as
US-NORTHEAST. For a given location, there can be only one shop calendar that is associated with that location. - Class
-
The choices are defined in the
C_CALENDARCLASSenumerated list.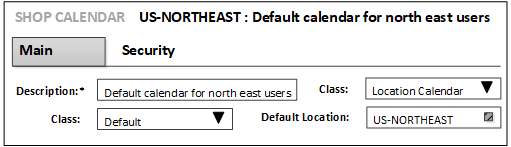
-
Change the criteria in the Standard Work Time grid to suit your business
requirements.
Initially, these values come from the
@DFLTSHOPcalendar.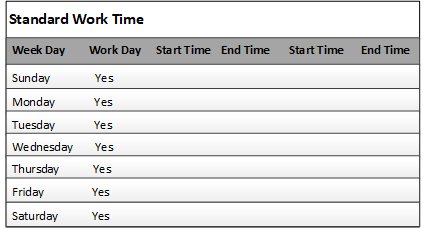
Specify the non-workdays and add the start times and end times for each workday.
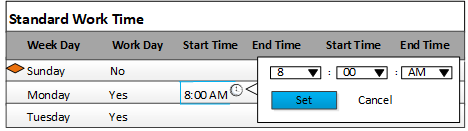
Location calendars require a seven day week. Do not delete any days from this grid.
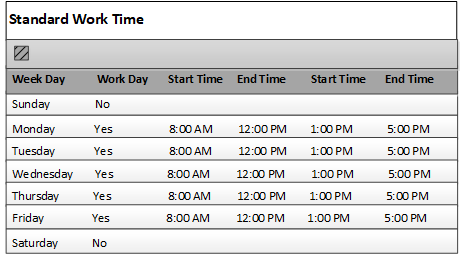
In this example, the non-workdays are Saturday and Sunday. For Monday through Friday, the working hours are 8:00 AM to 12:00 PM and 1:00 PM to 5:00 PM.
In the Standard Work Time grid, you can specify one start and end time for a workday or more than one start and end time. For example, users in one location only work from 8:00 AM to 12:00 PM on Tuesday; but they work a full day the rest of the week with an hour lunch break.
-
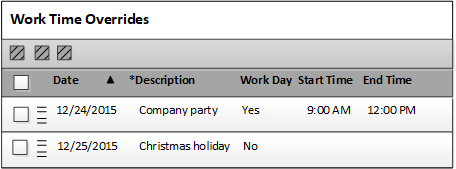
Specify the work overrides in the
Work Time Overrides grid.
-
Specify a description. If you select
Yes for the
Work Day, specify the
start and end times.
-
Specify a description. If you select
Yes for the
Work Day, specify the
start and end times.