Creating a new project using Microsoft Project Client
Open the Microsoft Project Client.
From the menu select
SyteLine >
SyteLine Project
Information.
If the
SyteLine menu is
not available, see the installation and setup section of this guide.
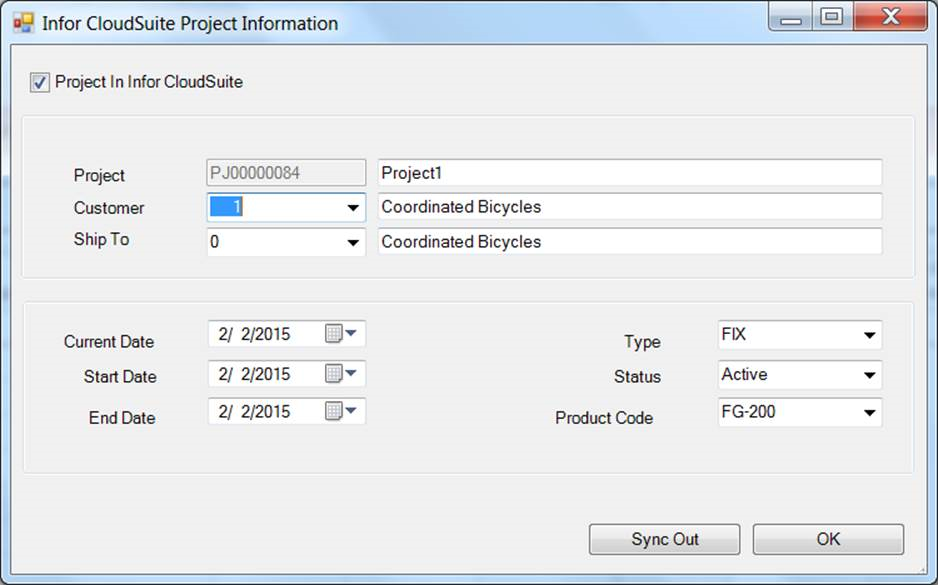
Select the ‘Project In
SyteLine’ check
box.
Specify a project name.
Select a customer and ship to.
Select a type.
Select the status.
Select a product code.
Change the current date, start date, and end date if needed.
Click
Sync Out, and then click
Yes for the warning
message. A new project has been created in
SyteLine and
returns the next project number on the project column.
To verify that the new project is in
SyteLine, open
the
Projects form in
SyteLine and
filter for the project number returned to the above column.