Creating additional client configurations
You must add a client configuration for each site database that you want to access through this application/web server.
For each site, create one configuration name that exactly matches the site ID, including case, and that uses the site’s application database. This is required unless you specify a different default Configuration Name on the Sites or Sites/Entities form. (You can create additional configurations for the site, with different names.)
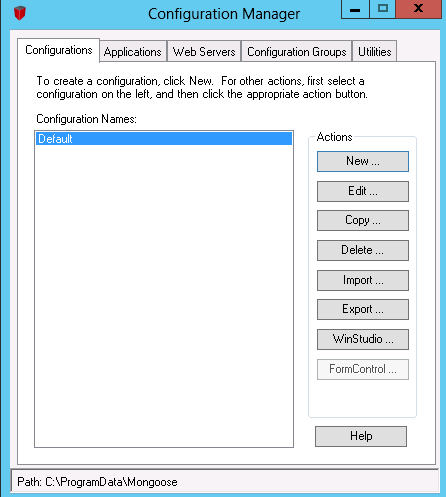
- On the application server, find and open the Configuration Manager, under Apps (Run as Administrator).
The Configuration Manager displays the initial configuration that was created during installation and setup of the application/web server.
-
In the
Runtime (Client) tab,
specify the application and forms database connection information for the new
configuration.
Note: For an all-in-one database, the specifications for the application, forms, and objects databases will be the same.
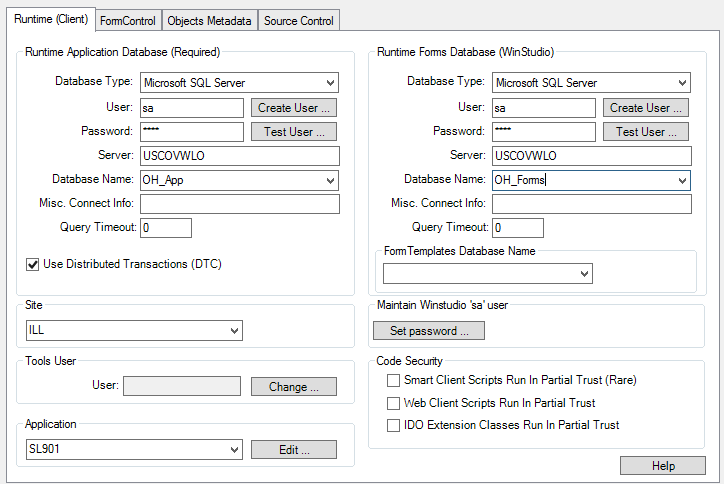
Use the information from your SiteEntity and Configurations planning spreadsheets to help you fill in access information (SQL server name, login, password, and database name) for the application, forms, and objects databases.
-
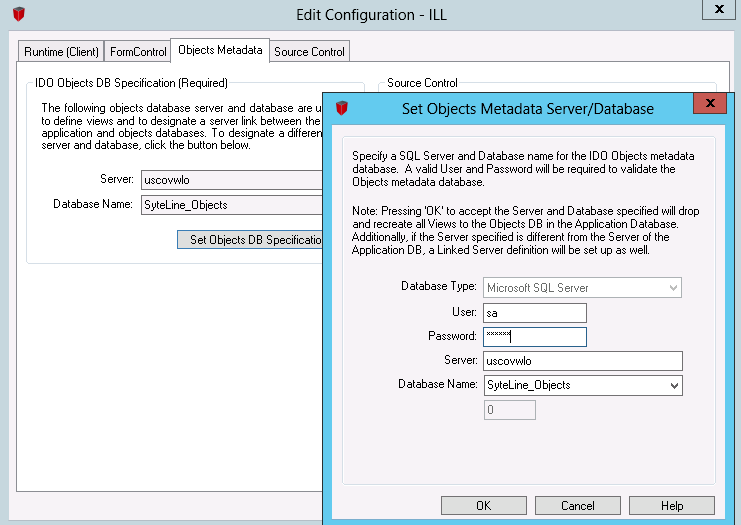
In the
Objects Metadata tab, click
Set Objects DB
Specification and then specify the Objects database name.
You can associate only one Objects database with an application database.
By default, if you have multiple sites in one application database, all configurations for sites in that database should point to the same Objects database.