Publishing in Modeler

Users can publish directly from the Prepare and Relate screens.

Note: Spaces must have at least one source to publish. You must add a source before publishing or verify your sources are not being ignored.

By default, all sources are assigned to a default publishing group and the hierarchy levels and measure grains are all published at the same time. Publishing groups allow you to group sources together that should be loaded separately from other data.

Caution: 
When publishing data, publishing groups run at the same time are executed in alphabetical order.
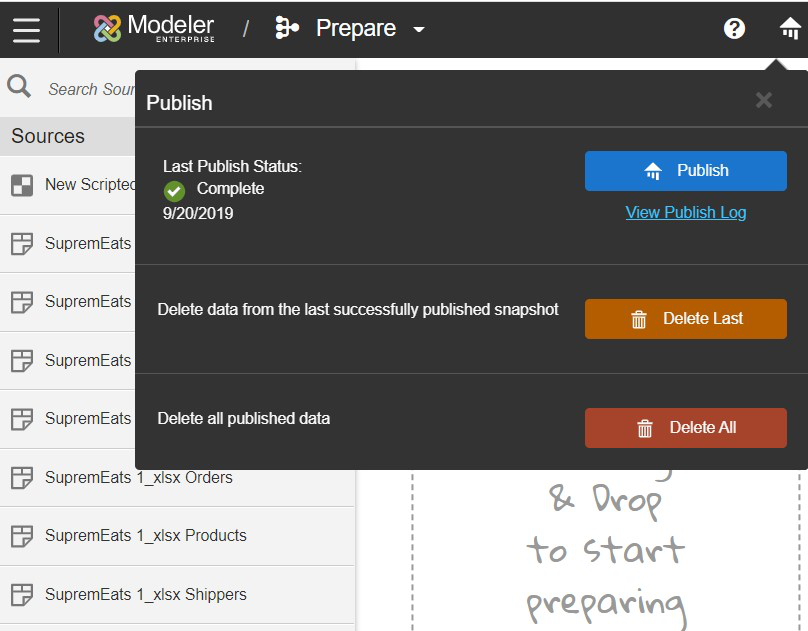
  1. Click Publish. The Publishing Control Center window displays.
    From this menu, you can see the last published date, publish your space, access publishing logs, delete the last published snapshot, or delete all published data. If there was an error in the last publication run, it is displayed here.


  2. To publish your data:
    1. Click Publish.
    2. From Publish Settings window, select the snapshot date.
      Note:  When you process data in Modeler Prepare or Relare, Birst uses the snapshot date set in the Publish Settings window to populate the variable values. Birst uses the snapshot date regardless of what the Processing Time Zone of the space is set to.
    3. Select the applicable publishing groups. You can expand the group row to list what is included in that publishing group.
    4. Click Publish.
  3. Alternatively, you can click one of these options:
    Update Model Only
    Updates the model but does not publish any data. This option may not be available.
    Last Publish Status
    The date and status of the last publishing job and any relevant error messages.
    View Publish Log
    Opens Monitoring in a new tab where you can view publish and audit logs.
    Delete Last
    Deletes the data from the last successfully published snapshot.
    Delete All
    Deletes all published data in space.