Creating and managing a subject area

You can create a subject area, manage its folders and columns, and then assign space groups.
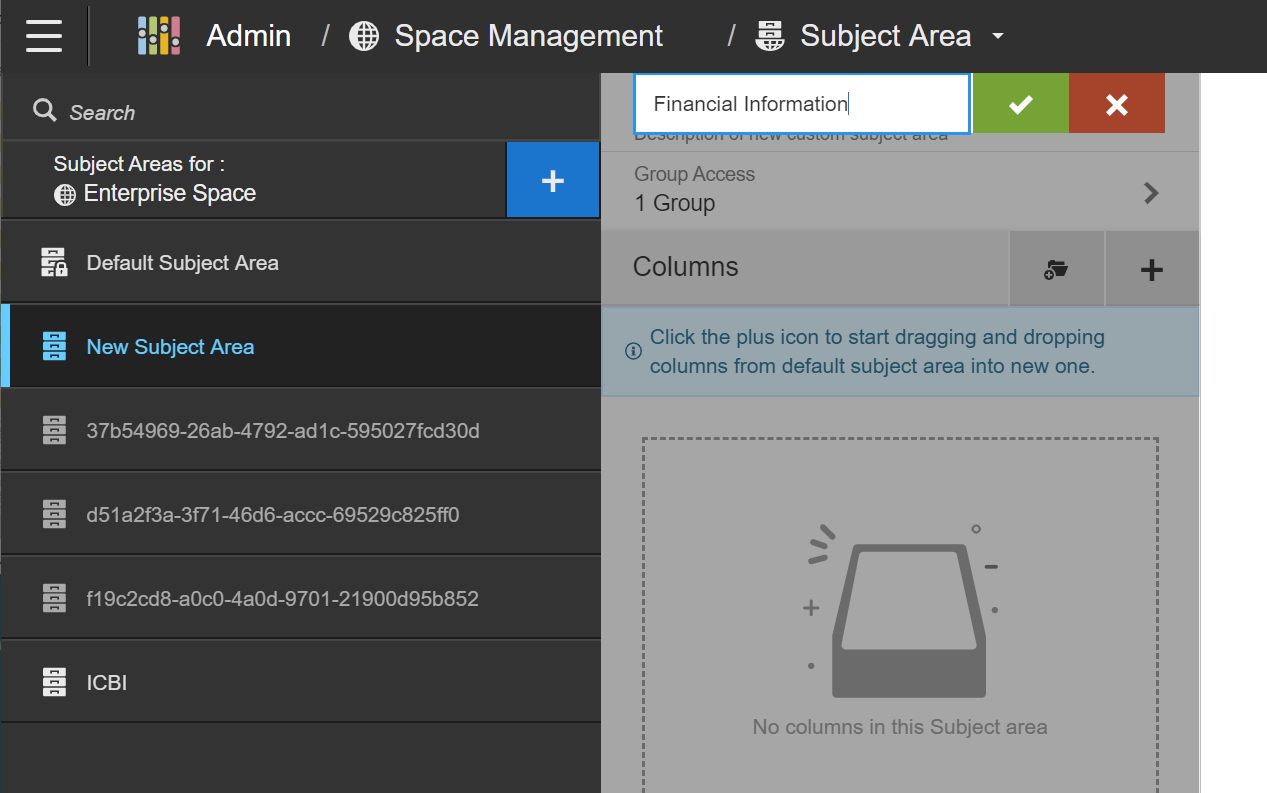
  1. From Space Management, select Subject Area.
  2. To create a new subject area, click + New Subject Area. Specify the subject area name, then click the Confirm icon to save.
  3. To edit and manage an existing subject area, you can:
    • Select a subject area from the Subject Area panel.
    • Use the Search field to search for existing subject areas in the space by name. When you specify characters in the Search field, Birst auto-populates a list of possible search results.
      Note: You may need to specify at least three characters for search results to auto-populate.
  4. Click + to add columns to the subject area. The Add Columns panel is displayed.
  5. Select a column to add to the subject area. You can click a subject area from the list to view and select columns from that specific subject area. Alternatively, you can use the Search columns field to search for columns. When you specify characters in the Search columns field, Birst auto-populates a list of possible search results.
    Note: You may need to specify at least three characters for search results to auto-populate.
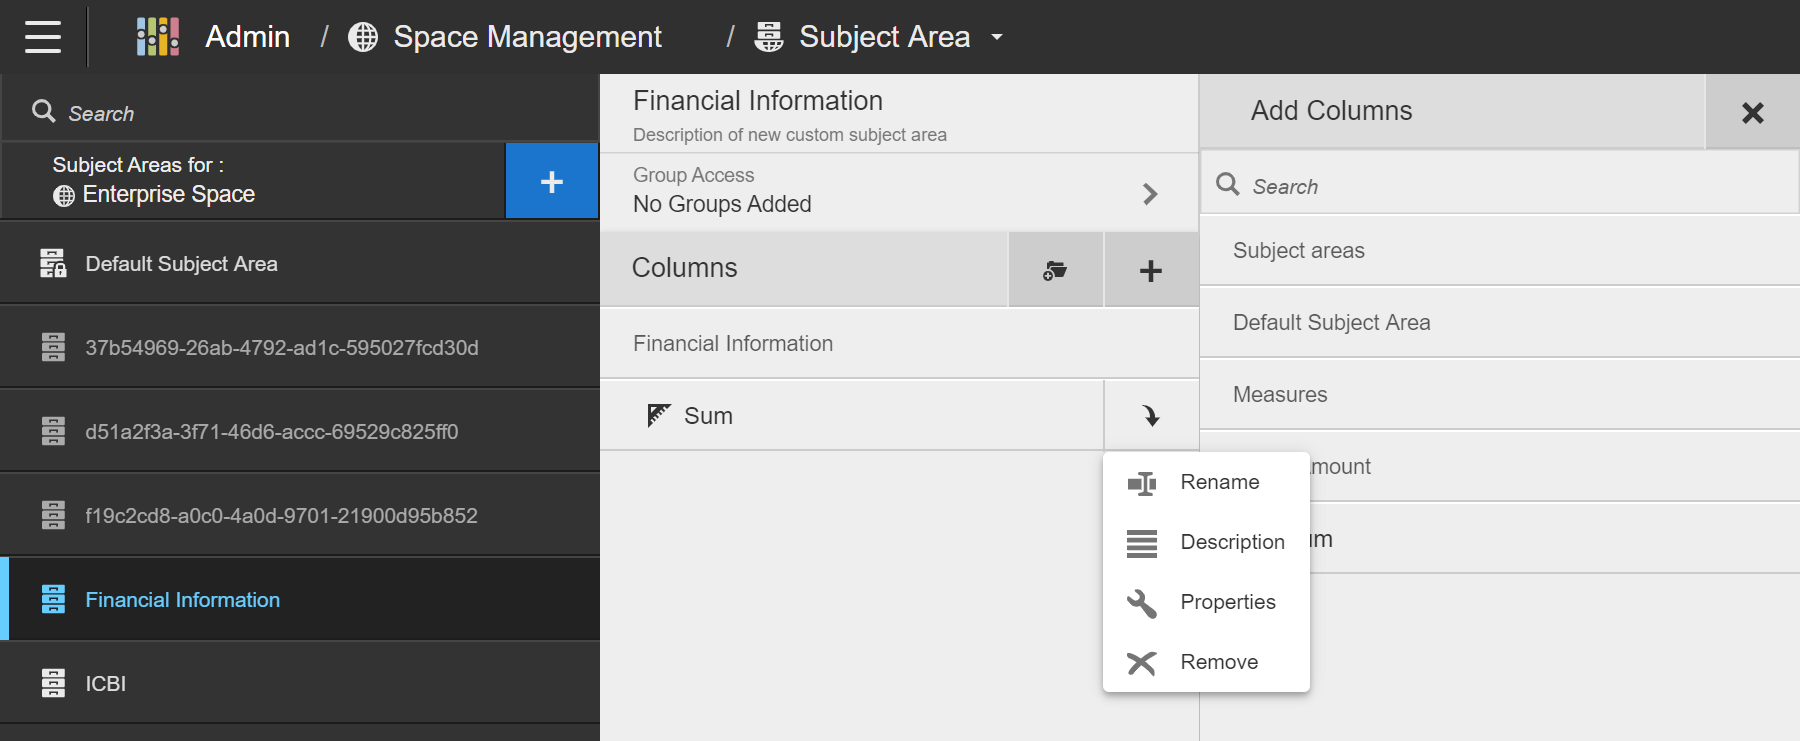
  6. To manage columns in the subject area, click the Actions icon. From the Actions menu, you can Rename the column, edit the Description, modify Properties, or Remove the column from the subject area.


  7. To create a new folder and organize your subject area, click + Create New Folder and specify the folder name. Items in a custom subject area can be reordered by dragging and dropping them.
    Note: The default subject area cannot be modified.
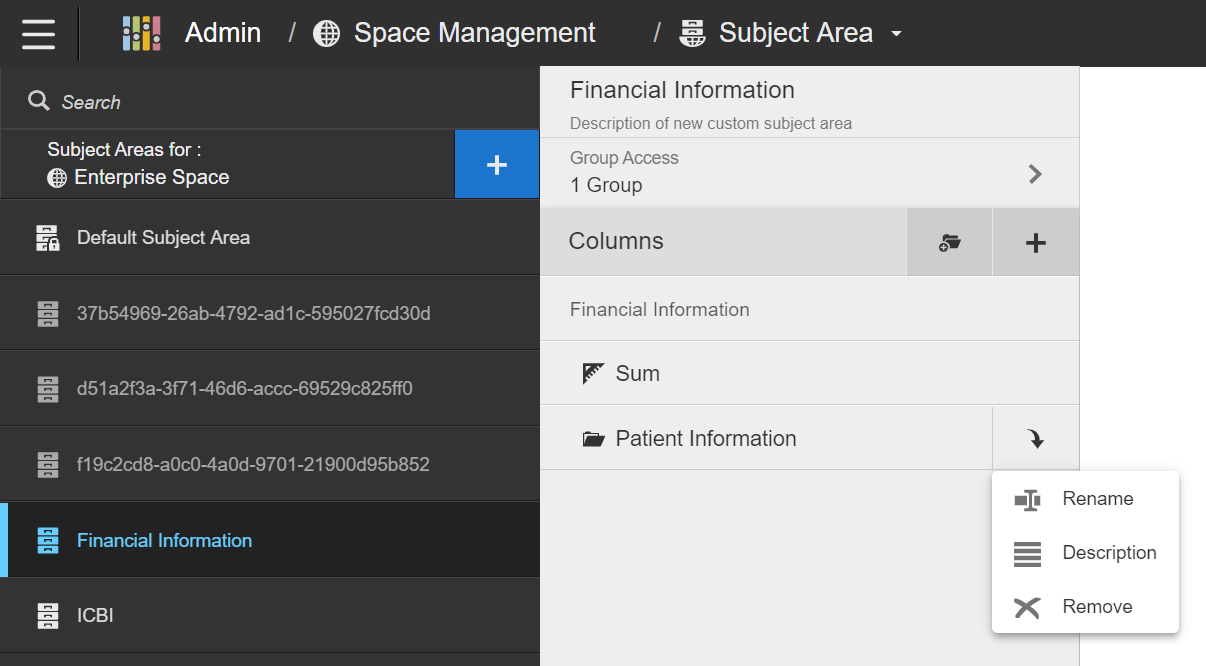
  8. To manage folders, click the Actions icon. You can Rename the folder, edit its Description, modify any Properties, or Remove the folder.


    Note: Birst does not support multiple objects with the same name in different character cases. For example, users cannot have "Test Folder" and "TEST Folder" object names. The report name must be unique within a folder regardless of character case.
  9. To add group access for a subject area, click the Arrow > icon in the Group Access section. You can click +Add Group and select your group or use the Search field to search for the group to add.
    Group Access determines the groups that have access to a subject area. New subject areas have All Users in Space assigned by default so that all users in that space have access to that subject area.
  10. To remove a group from a subject area:
    1. Select the group and click the Trash icon.
    2. Click Confirm to remove the group. Alternatively, click Cancel.


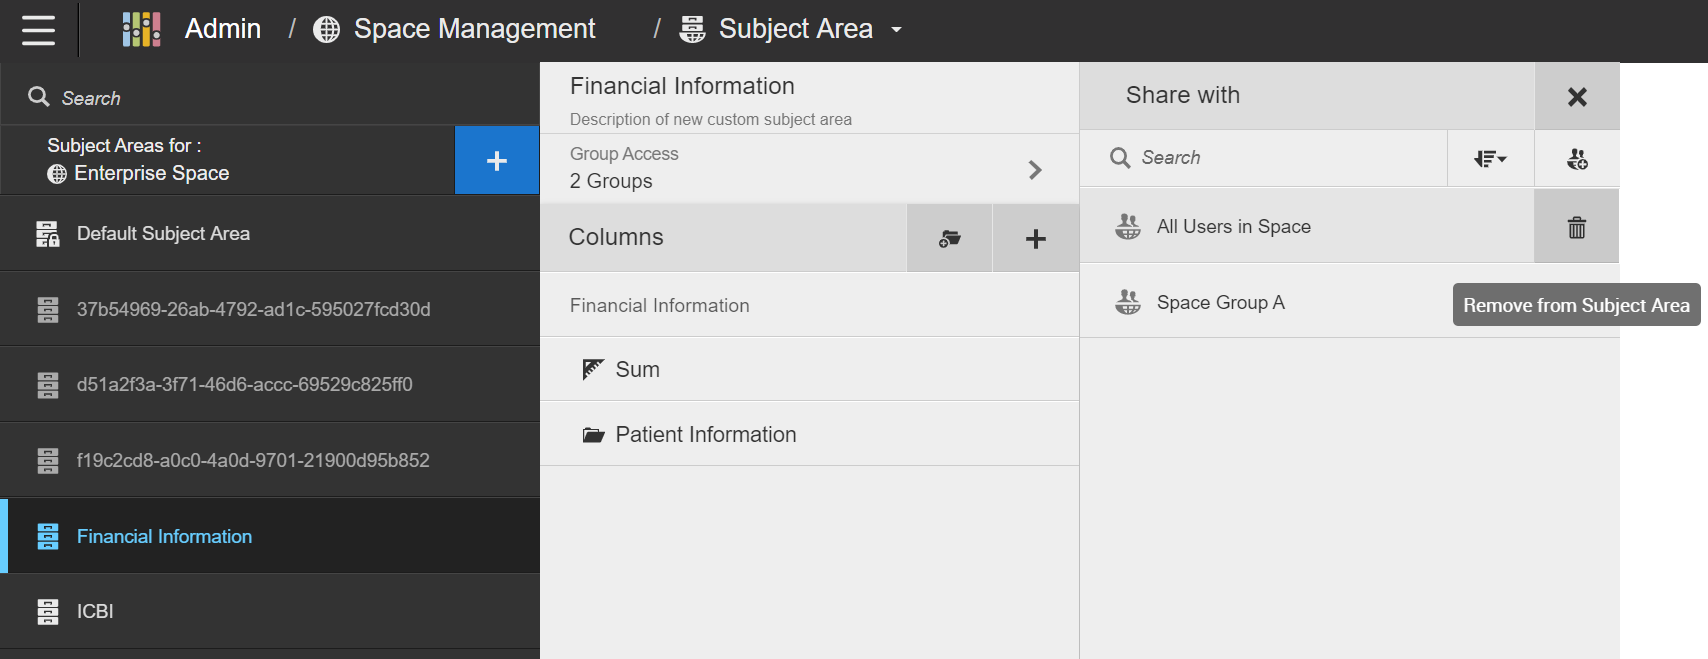
    Note: Subject areas must have at least one group assigned to them.