Security Filters
Security Filters are accessed through the Space Management Module. Admins are given a holistic view of all security filters for a given space rather than navigating to individual spaces. This feature allows admins to create security filters, either with an existing variable or custom BQL. The build of the security filter is simple, selecting an attribute or measure using a subject area rather than navigating to specific attribute per a source. Pre-existing (Flash) security filters can also be managed from this interface.
Prior to creating a security filter, you must create the Visibility Control table. Optionally, you can create a variable to use for a variable type security filter. For information, see Manage Variables.
To create a security filter:
-
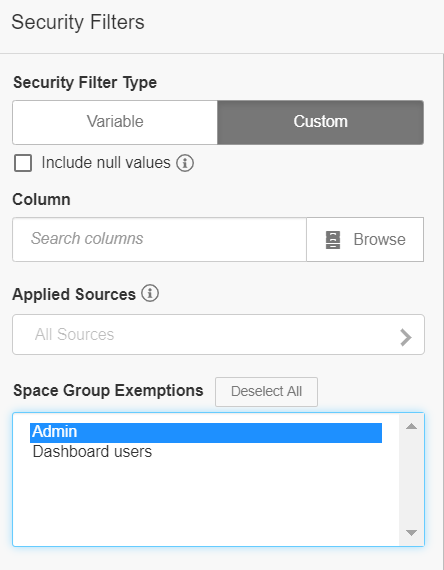
Select the Security Filter Type you want
to create.
- Variable
- Select a variable from the Variable Name list field. The Variable Name list shows previously created variables. After selecting the variable, you can see the BQL associated with that variable.
- Custom
- Allows the user to create their own query that returns a list of values or list of constants on which to filter. Use the Custom value pane to specify your query. For example:
SELECT [Mapping.Retail_Store_Code] FROM [ALL] WHERE
                           [Mapping.Username]=GetVariable('USER')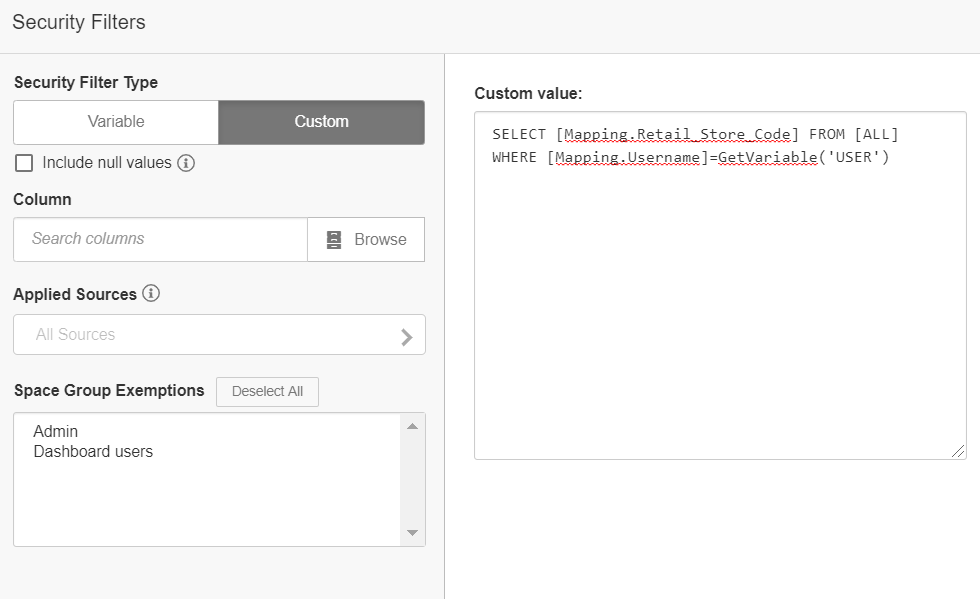
-
Select the space groups to be exempt from this security filter so that they are not
affected by the security filter. You can select more than one group. Use to clear out your previous
selection.
Note: If the space does not have any space groups, account groups display instead of space groups.