Creating trellis charts in Visualizer

You can create trellis charts in Visualizer using Trellis in the Chart Builder. Use trellis charts to identify patterns and trends across a series of charts.

Since a trellis includes smaller charts, it works best to start with simple charts that are easy to understand and easy to compare.

To create trellis charts in Visualizer:
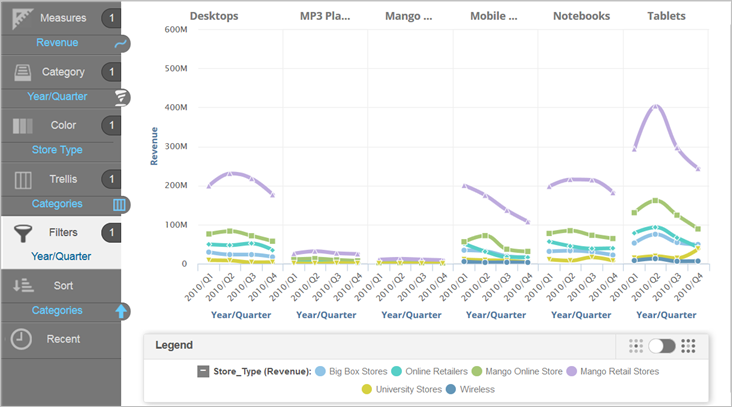
  1. In Visualizer, add one or more measures and attributes to plot a chart. You want to see a miniature version of the chart for each one of a particular attribute. For example, start with Revenue by Year/Quarter and Store Type, filtered by the four quarters of 2010.
  2. Add an attribute by either:
    • Dragging the attribute and dropping it on one of the suggestions.
    • Dragging the attribute and dropping it on Trellis in the Chart Builder.

    For example, add the product Categories attribute and transform the Spline into a Trellis.

    Note: To remove the trellis charts, drag the attribute from Trellis in the Chart Builder and drop it on the Trash in the Subject Area.
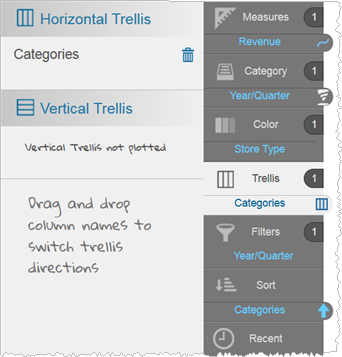
  3. Click Trellis in the Chart Builder to see the different options for trellis charts. For example, the Categories attribute is arranged as a horizontal trellis (the charts are stacked horizontal to each other).
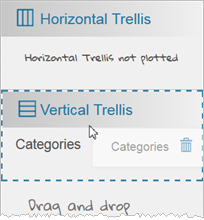
  4. You can change the charts in the trellis to a vertical arrangement. For example, drag and drop Categories from the Horizontal Trellis area to the Vertical Trellis area.
  5. For this example, the vertical trellis visualization is not as useful as the horizontal trellis. Drag the attribute back to the Horizontal Trellis area to restore the more effective chart.
  6. Click Save.