Connect to a Database Using Birst Connect 2.0
Your database connection will require the database type, database name and login credentials. The steps listed here are applicable to Live Access connections too.
In addition, you will need to download and run the BirstCloud Agent when making connections to some external data sources.
For more information about the Birst Cloud Agent and how to install, see Birst Cloud Agent.
Each database connection has its own connectivity requirements, depending on the vendor. Some databases such as Oracle will require their supporting database driver for connectivity. You will need to obtain the desired database driver from the vendor and place it in the Birst Cloud Connect drivers directory before you connect to those databases.

Tip: When you start a new space, make sure you have the connectivity information you need for your database. See Connect Reference for details about different connections.
To add a database connection, you can either click the SQL Databases icon in the middle panel or click the Add (+) icon and select SQL Databases from the drop-down selection box.
- Selecting the SQL Databases icon to add a database connection:
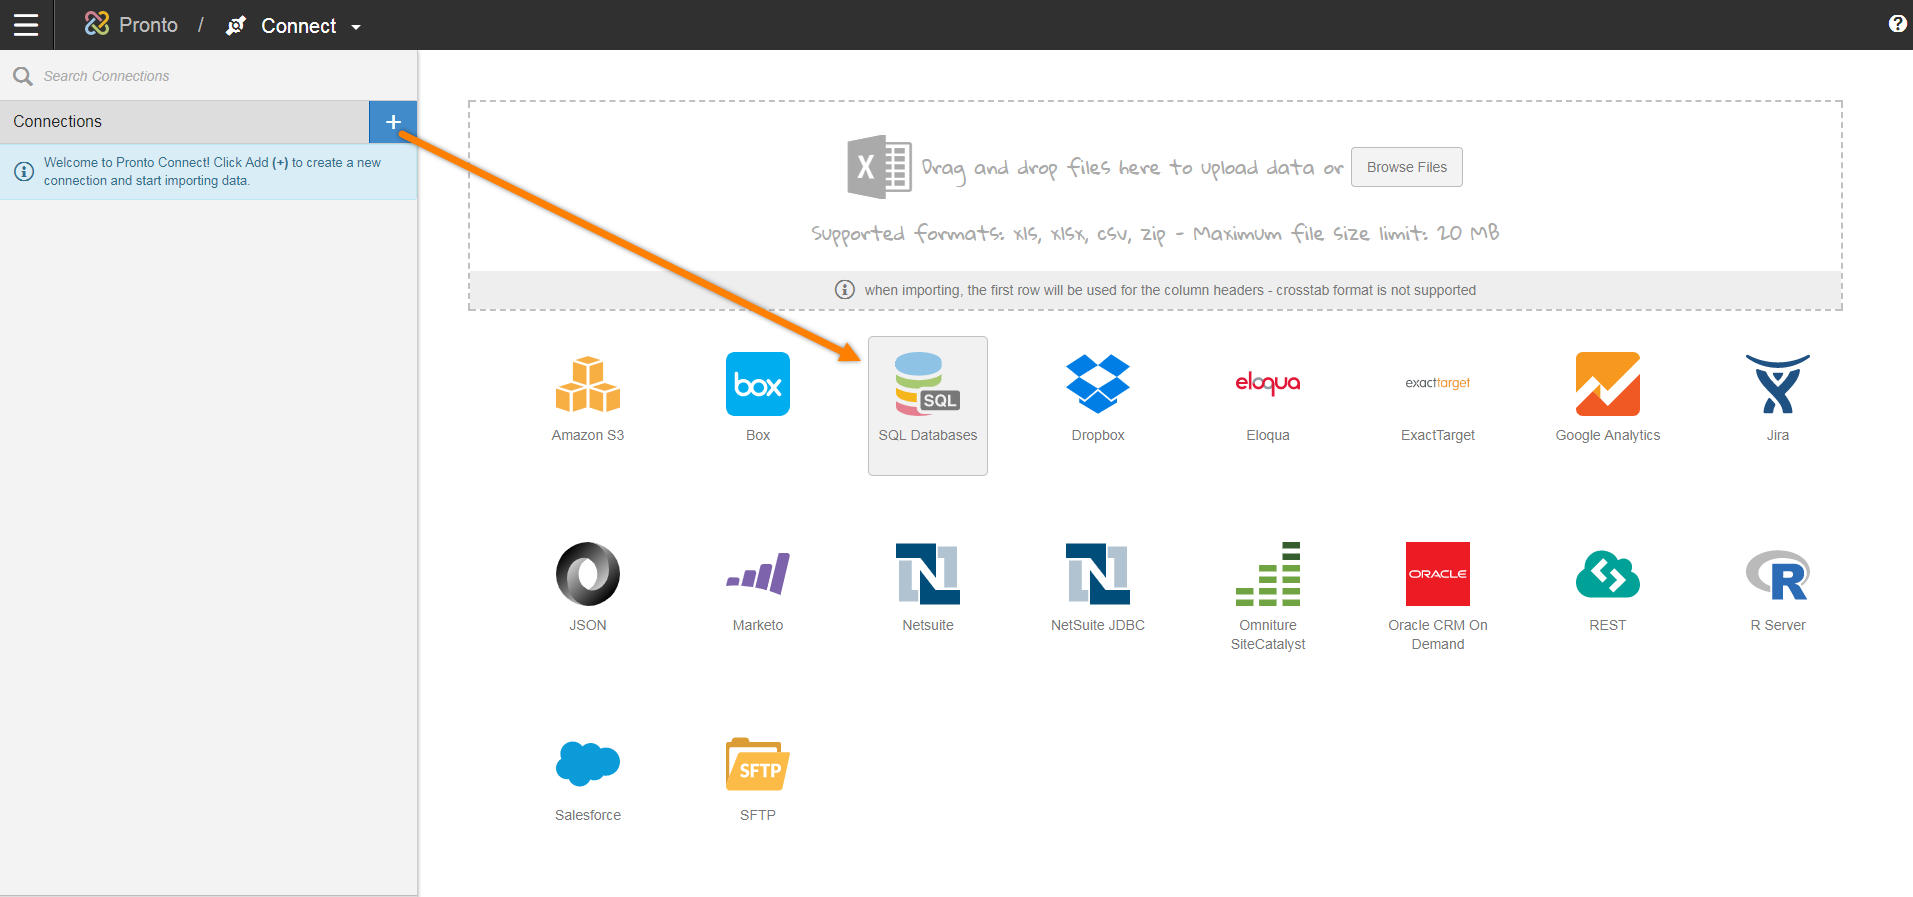
- Clicking Add (+) and then selecting the SQL Databases option.

You will have the option to Import to Birst or create a Live Access connection to your database.
The following steps are for a MSSQL database connection. The steps will vary slightly for different database types.
- Select your Connection Type.
- Click Import to Birst to import data objects into Birst.
- Click Live Access to create a logical data map to the data objects in the database.
- Enter a connection name. This should be a logical connection name in Birst such as MSSQL1. Important: If you are using Birst Connect 2.0 to import data into an existing ADR model that has been converted to use the new metadata infrastructure, please see Using the No Prefix Option before extracting your data.
- Select an Agent to run connect for your database or disable the Agent to run an agentless connection. Note: Agentless connections can only be used with cloud-based databases. Local databases require a local agent to run on a machine that can reach the database in order for Birst to connect to it.

- If you are using an agent and you have not yet installed the Birst Cloud Connect Agent, proceed to the Install the Birst Cloud Connect Agent instructions. Tip: The Birst Cloud Connect Agent must be running before you can select the agent and validate your database connection.
- Select the database type from the drop-down box.
- Provide the server name, which can be the server IP address, or the logical name provided for the server.
- Provide the Database Name.
- Enter valid credentials for the database connection (Username/Password).
- Optionally, provide the port number.
- Click Save to validate the connection credentials and access the database.
-
Select the desired database schema and click Apply.

-
Select a data source to preview or to import. Note: Live Access connections do not import data sources. You can edit the mapping to the data source in a similar fashion as editing objects.

- Edit the tables and filter rows for desired content as discussed in the Edit Connection Objects section.
Using the No Prefix Option
With the 5.29 release, you now have the ability to set table prefix name for BC 2.0 extract connections allowing for an easier migration path for existing ADR data models from Birst Connect 1.0 to Birst Connect 2.0.
If you are using Birst Connect 2.0 to import data into a converted ADR space (converted to new metadata infrastructure), you will likely want to employ the No Prefix option located in the more options section of the UI. By default, Birst Connect 2.0 applies your connection name as a prefix to any sources you are importing to your data model. That means, that existing sources will no longer get populated with data extracted from your source systems because BC 2.0 is now importing data to a source called something like this: "ConnectionName_SourceName" rather than populating the existing source.
Note: We recommend you initially perform the steps documented below on a copy of your space first to ensure the migration was successful.
Here is an example where we called the Birst Connect 2.0 connection Northwind to import data from the source database table into the converted ADR space:

Birst Connect 2.0 can ignore the connection name as the prefix to the connection so that the source data will instead import to the original modeled source that will save you from having to re-create the ADR model in the Admin module.
From Birst Connect 2.0 > Create Connection’s panel, you can now customize the source prefix by accessing the More Options panel. Toggle the Do not use prefix option to remove the connection name as the prefix.

Note: Birst will automatically look for other existing connections to see if others share the same prefix to warn you of the possibility of overwriting the sources with the same name.

In the case where we do want to import data into existing sources, we do want to proceed and overwrite the existing the source defined with Birst Connect 1.0 to Birst Connect 2.0.
Create Query Objects
In addition to importing tables from databases, you have the option to add a "query based object" from your database. This option lets you employ simple SQL expressions such as joining tables or creating simplified views of existing tables.

You need to provide a unique Query Object name and valid SQL syntax that is compliant with the connected database. Click Save to create the query object.
Note: If you change a column alias for a given query object after importing data, subsequent imports of data will create the new alias resulting in both the old as well as new columns being available for data prep.
In the following example, two views were created using the add query based object feature. In one case, a query based object was created from a subset or slimmed down version of an existing database object and the other query based object was created by joining two related objects by their foreign key relationship.


Here is the valid SQL syntax used to create the simple join with the Products and Categories table in MSSQL for the above example.
Select Products.CategoryID, Products.ProductName, Categories.CategoryName from Products, Categories
Where
Products.CategoryID = Categories.CategoryID
Similar to the database connections, Edit the tables and filter rows for desired content as previously discussed in theEdit Connection Objects help topic.
Once edited import the data base connected sources as follows:

Live Access and Query Objects
You can also create query objects via Live Access. Birst Connect 2.0 supports data prep preview and reporting for Query Objects that contain Birst Variables.
