On the Prepare page, you can make additional modifications and transformations to the data. Transformations are familiar and straight-forward, such as splitting or merging columns, filling in empty cells, etc. Complete descriptions of the modifications are at Deep Dive: Transformations.
Modeler has the concept of a “prepared source”, that is a view of the data, based on the raw source, that Birst updates on a regular basis, so that your reports and dashboards are always up-to-date.
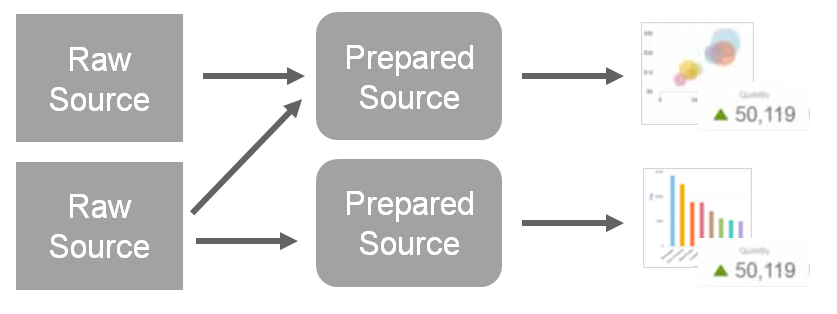
You can create multiple prepared sources from the “raw” or base sources that you extracted in the Connect page. If you to need merge tables from multiple raw sources, you can. Prepared sources are an efficient way to manage your report data, especially when you have different uses for the same tables.
- Creating a Prepared Source
- Modify Source and Column Properties
- Transformation Example
- Data Profile Display for Prepared Sources
Creating a Prepared Source
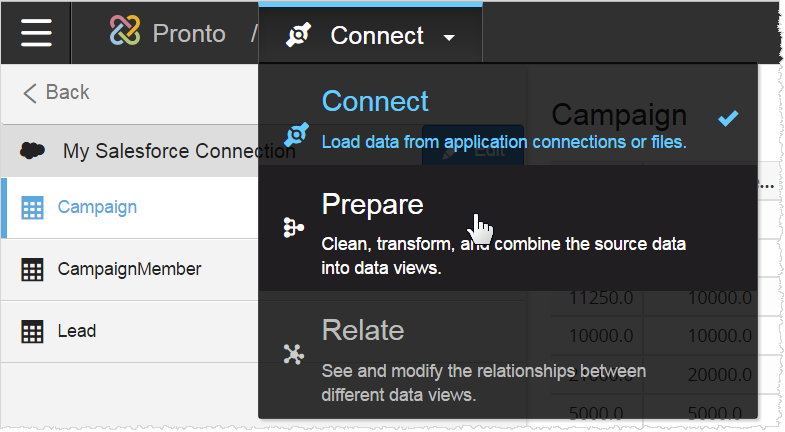
- Select Prepare from the Modeler menu.
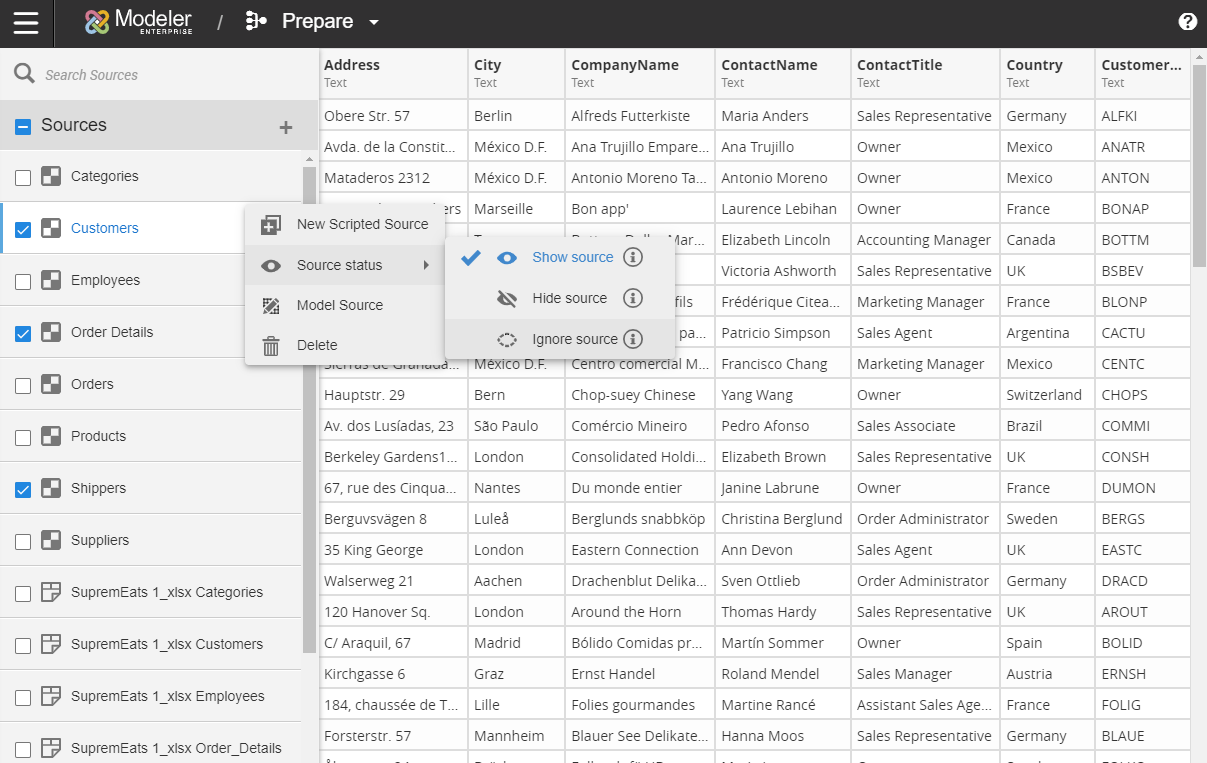
- The Prepare page lists all your tables and has a work area for preparing sources.

- Users can multi-select sources to show, hide, or ignore sources.
- Every prepared source is based on a raw source. Select the raw source by clicking its Create button.
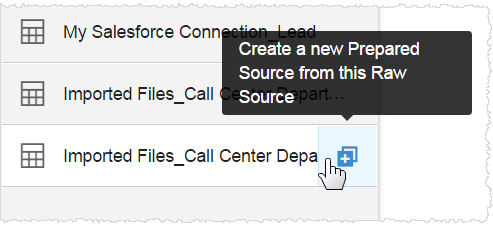
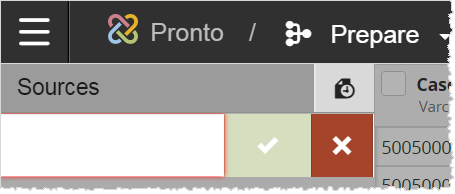
- Name the prepared source.
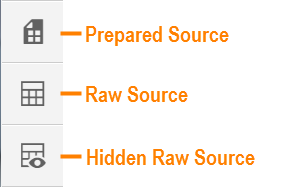
- The new source is listed with the raw sources. Note the difference in the icons for raw and prepared sources. When you hide a source, meaning that you don't want to see its columns in Visualizer or Dashboards 2.0, the icon includes a little eyeball.
- Modeler displays a preview (up to 100 rows) of the columns from the base source in the work area. These are the columns you chose in the Connect page. Underneath the preview is the transformation pipeline. This is a visual history of how you create the prepared source. The first event in the history is the name of the raw source. For a deeper look at the pipeline, see Deep Dive: Prepare Pipeline.

- To quickly navigate to the Relate page, click Model Source. For more information on Relate, see Relate Data.

Modify Source and Column Properties
Users can modify a column's properties or the source's properties from the Pipeline section of Prepare.
Column Properties
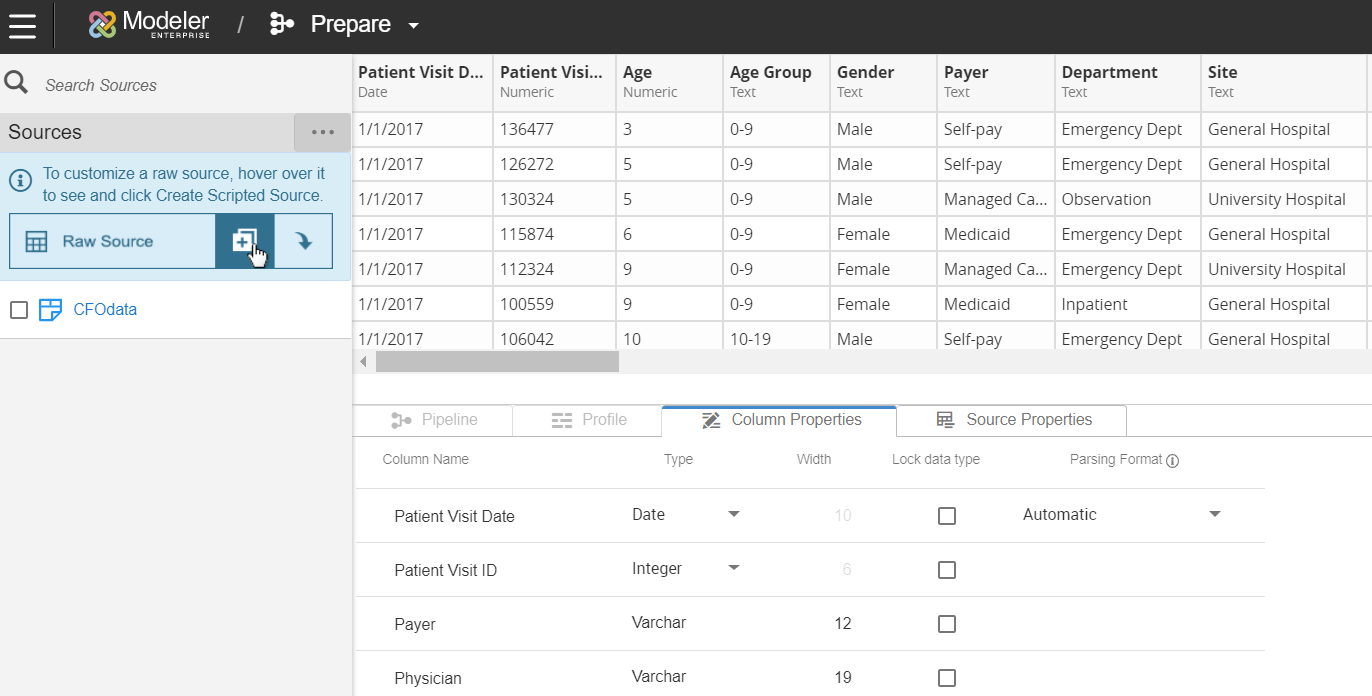
From Column Properties, users can define the following properties:
- Column Name: To change the name, click on the name in the Name field and type a new name. Column names in raw data sources can only be modified prior to processing. After the data has been processed, column names cannot be changed unless the data warehouse is deleted.
- Type: To change the column's data type to another relevant data type, click on the data type and select the new type from the dropdown. Important: Upcasting your data is not reversible. For example, if you change an Integer to Number, you would not be able to change the Number back to Integer. See Birst Data Types for more information.
- Width: For Varchar columns, you can specify the maximum character width in the Width field.
- Lock Data Type: Locks the data type so that the data type can't be changed.
- Parsing Format: Used by Modeler to better understand your Date and Datetime data. Tip: The Format column property does not have any effect on the display format used for reports in Visualizer. It only effects how datetime fields are recognized when raw data files are processed.
Source Properties
From Source Properties, users can define the source's following properties:
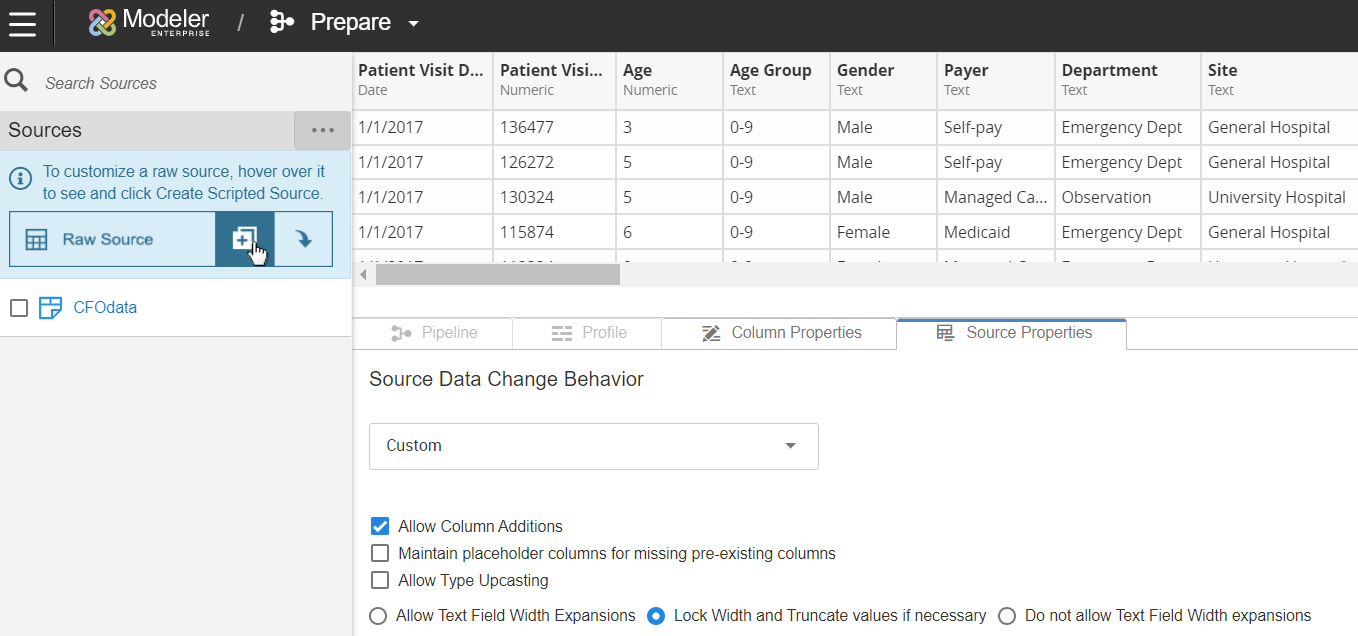
- Source Data Change Behavior: this settings affect whether and how Birst reacts to changes in the source date during subsequent processing. Select one of the following options from the dropdown menu.
- Select Do Not Detect Source Data Changes on Upload so any data source metadata changes (datatypes, widths etc.) are not detected. This option is only recommended when it is known that the data source structure does not change. It is expected that the data source column data type and length must be configured to correctly reflect the column data type and length as in source system. Additionally, other source data change options such as locking are not compatible with this property selected.
- Select Automatic so Birst automatically makes changes when there have been changes in the source data since the last time you uploaded the data. Birst adds and removes columns and makes other changes as necessary when changes exist in subsequent loads of the source data. This setting is the default.
- Select Locked if you do not want to make any changes to the source data properties after the first upload. If Locked is selected and the source data changes in a subsequent upload (such as new columns, missing columns, data types), there will be an error when the data is processed.
- Select Custom if you would like to choose how to handle specific types of changes in the source data. When you select Custom, the fields below become active so you can choose which types of changes to allow
- If you have selected Custom, choose the following settings:
Allow Column Additions: When Source Data Change Behavior is set to Custom, by default it allows column additions. If a new column appears in the source, uploading the file with the new addition will succeed. If you do not want Birst to automatically add new columns, deselect this option. By default, the newly added column will be targeted to the most common target, that is, the hierarchy that is most commonly used for that source. To change targeting behavior for new columns click Advanced Options in the Properties tab and select an option for Newly Detected Source Columns.
- Maintain Placeholder Columns for Missing Pre-existing Columns: Check this box if you would like to keep placeholders for columns that used to be present in the source but are missing from a subsequent upload.
- Allow Type Upcasting: Check this box if you want Birst to automatically convert columns to a different data type (e.g., Integer, Varchar, DateTime, Float) based on the kind of data in the column in subsequent uploads of the source data. If this box is not checked, you will receive an error if a column contains data that does not match its data type when you process the data. Tip: The data type can be locked for individual columns by checking the Lock Type box in the Column Properties.
- Choose from the three options on how to handle varchar columns:
- Allow Text Field Width Expansions: Check this box if you want Birst to automatically expand the width of text fields if the data in a text field exceeds the assigned width in subsequent uploads of the data source. For example, if a Description field is set to a maximum width of 100 characters (in the Width property of the Columns tab) and when the data source is loaded again a value in the Description field contains 200 characters, check this box if you want Birst to automatically expand the width of this column to accommodate the 200 characters.
- Lock Width and Truncate if Necessary: Check this box if you want Birst to lock the width of text fields and truncate values that exceed the assigned width in subsequent uploads of the data source. For example, if a Description column is set to a maximum width of 100 characters (in the Width property of the Columns tab) and when the data source is loaded again a value in the Description column contains 200 characters, the value will be truncated to 100 characters and extra characters will be discarded.
- Do not Allow Text Field Width Expansions: Check this box if you do not want Birst to allow text fields to be expanded beyond the maximum width set in the Width property of the Columns tab. For example, if a Description column is set to a maximum width of 100 characters and when the data source is loaded again a value in the Description column contains 200 characters, an error will occur when the data is processed.
Transformation Example
There are many transformations you can perform on the data to make it better suit your reports. Some transformations apply to the table as a whole, and some to individual columns.
For example, you may want to remove a time stamp from a Date column.
Removing a time stamp from a Date Column:
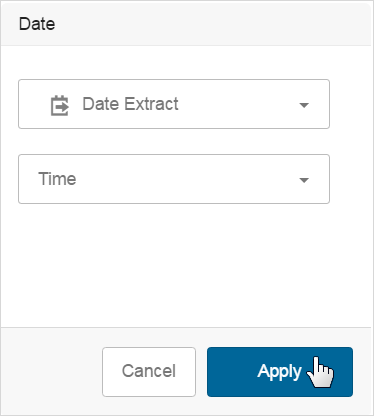
- First select the Date column, then select the Date transform and Time element.
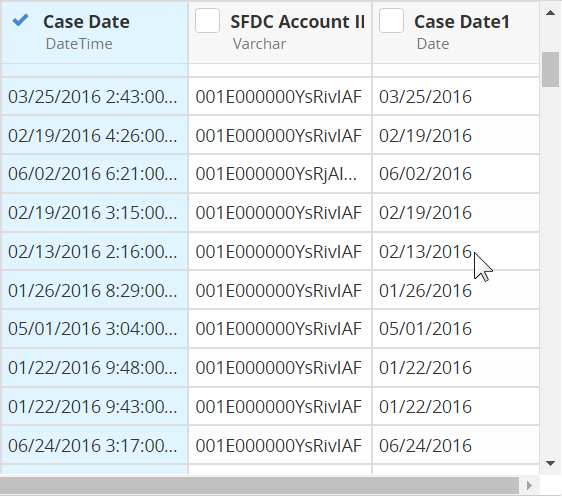
- Modeler adds a column to the end of the series, and here you see the Date without the Time. Tip: notice that the data type changed from DateTime to Date.
- The changes are visible in the transformation pipeline there is a new node for this Data change. If you don’t like the results of a transform, you can select its node and edit it again.

- Modeler creates a new column instead of editing the existing one. This allows you to make additional transformations on the original column. To remove, select it the column and click the Ignore transform.

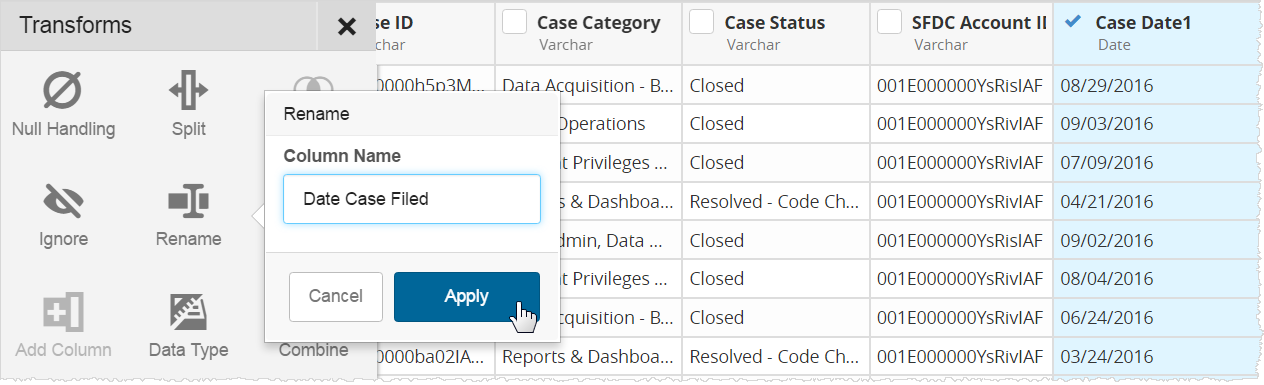
- Change the name of the column.
- Save the prepared source by clicking Publish.

- Modeler’s indicator shows it’s working and lets you know when it is done.

- Click the X button in the Transforms menu to go back to the list of tables and make more prepared sources.

- If you ever need to go back and change it, you can. Modeler saves the whole history of changes. Just select its transform button from the list.

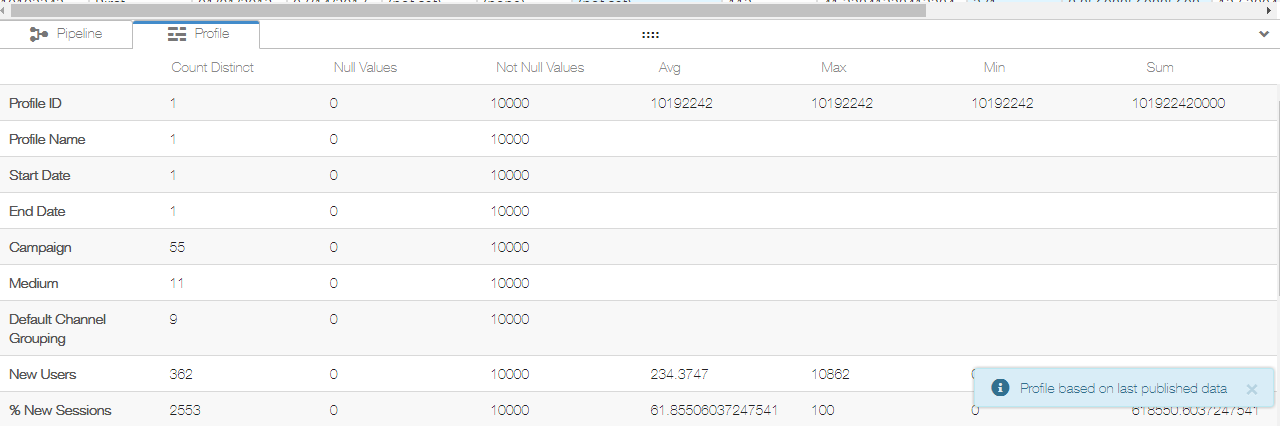
Data Profile display of Prepared Sources
After successful publishing, prepared sources data profiles can now display to aid in the iterative data prep process. Data profiles are available only for prepared sources.
Next Steps: