Creating a Hierarchy Alias
Birst Administrators who have the required ACL permissions can define a Hierarchy Alias and create logical representations of a hierarchy without replicating data within Birst.
You must be a member of a group that has the AdvancedAdmin permission in order to access the Advanced button on the Hierarchies page of the Define Sources tab. See Group ACLs.
Example Scenario
A purchaser is issued a reward from one store location and redeems the reward at another store location.
A store source feeds into the Store dimension, and has the level key named Store_ID.
Another source called Redemption has a column named Store_ID (where the reward was issued) and another column named Redeem_Store_ID (where the reward was redeemed/used).
The source Redemption has a fact named Award_Amount.
In the past, to support this scenario without using the Hierarchy Alias feature, an Administrator needed to create a new scripted source where the Redeem_Store_ID column could live. The scripted source is essentially a copy of the Store dimension. The new scripted source and the original Store dimension source can now connect to the fact table, Award_Amount. This approach is cumbersome for Administrators and requires redundant metadata.
Now, administrators can create a Hierachy Alias based on the Store_ID hierarchy level called Redeemed. This creates a logical representation of the Store dimension from the perspective of stores where the redemption took place.
To create a Hierarchy Alias
| 1. | Go to Admin - Define Sources - Hierarchies. |
| 2. | Select a Hierarchy level from the Hierarchies tree. The Advanced button on the bottom right of the page becomes active. |
| 3. | Click Advanced. The Advanced Properties dialog opens. |
| 4. | Click Create
a New Alias. The Alias Properties dialog opens.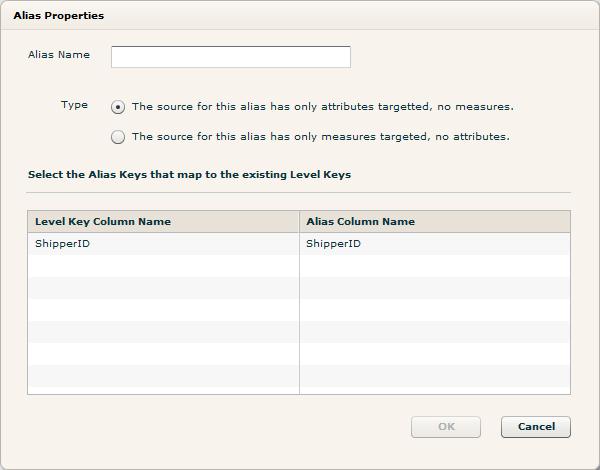 |
| 5. | Type a name for the alias and select the alias type. |
| 6. | Click the value under Alias Column Name to open a list with all the available columns for that specific source. Select the column to use. |
| 7. | Click OK in the Alias Properties dialog box. The new alias you created will be listed in the Hierarchy Alias table in the Advanced Properties dialog box. Click OK again. |
| 8. | Click Save at the top of the Hierarchies page. |
Once this space is processed, the subject area in Designer will reflect the newly created hierarchy alias. A new folder in the subject area will be created with the alias named using the prefix of the folder name. The folder will contain a copy of all attributes targeted to the original hierarchy and their names will be prefixed with the alias name.
See Also
Creating Hierarchies
Creating a Custom Time Hierarchy
Setting
a Hierarchy as a Type 2 Slowly Changing Dimension
Defining the Grain of
a Data Source